
If you’re a cryptocurrency enthusiast, you’re probably familiar with Metamask – one of the most popular wallets for managing your digital assets. Metamask allows you to interact with decentralized applications (dApps) and securely store your cryptocurrencies. In this guide, we’ll walk you through the steps of adding the Binance Smart Chain (BSC) Mainnet to your Metamask wallet, so you can easily access and manage your BSC tokens.
Step 1: Open your Metamask extension or mobile app, and make sure you’re logged in to your account. If you don’t have Metamask installed, you can download it from the official website and create a new wallet.
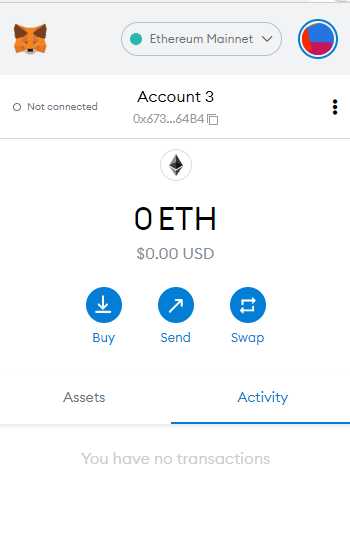
Step 2: Once you’re logged in to your Metamask account, click on the network selection button located at the top of the wallet interface. It looks like a circle with the current network’s name.
Step 3: In the network selection dialog, click on the “Custom RPC” option to add a custom network.
Step 4: Now, you’ll need to fill in the details for the BSC Mainnet. In the “Network Name” field, enter a name for the network (for example, “BSC Mainnet”). In the “New RPC URL” field, enter the BSC Mainnet RPC URL, which is https://bsc-dataseed.binance.org/. Leave the other fields as they are, and click on the “Save” button.
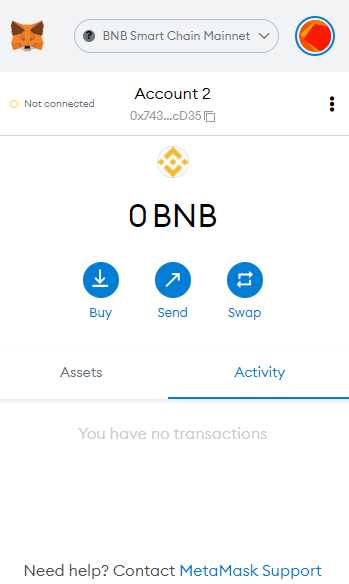
Step 5: Congratulations! You’ve successfully added the BSC Mainnet to your Metamask wallet. You can now switch to the BSC Mainnet by selecting it from the network selection dialog. You’ll be able to see your BSC Mainnet address and manage your BSC tokens from within Metamask.
Adding the BSC Mainnet to your Metamask wallet expands the possibilities of what you can do with your cryptocurrencies. Whether you’re into trading, investing, or participating in decentralized finance (DeFi) protocols, having access to the BSC Mainnet opens up a world of opportunities. So go ahead and add the BSC Mainnet to your Metamask wallet today!
Easy Steps to Add BSC Mainnet to Metamask
Adding Binance Smart Chain (BSC) Mainnet to your Metamask wallet is a simple process that allows you to easily access and interact with decentralized applications (dApps) on the BSC network. Follow the steps below to add BSC Mainnet to Metamask:
Step 1: Install Metamask Extension
- If you haven’t already, install the Metamask browser extension by visiting the official Metamask website or searching for it in your browser’s extension store.
- Follow the installation instructions provided by Metamask to set up the extension.
Step 2: Open Metamask and Access Settings
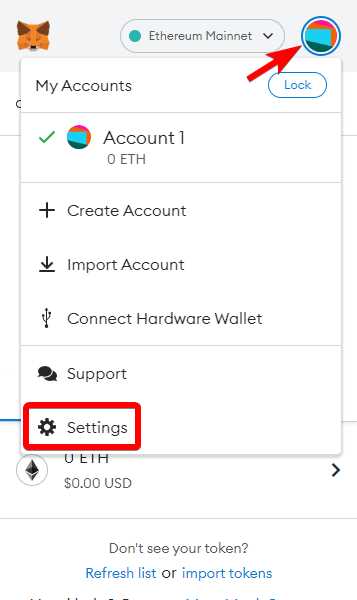
- Once the Metamask extension is installed, click on the Metamask icon in your browser’s toolbar to open the wallet.
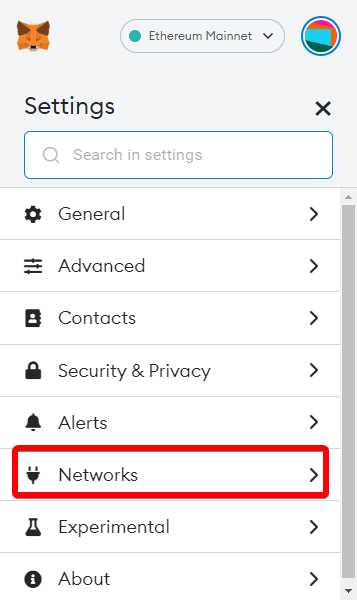
- Click on the profile icon in the top-right corner of the Metamask wallet and select “Settings” from the dropdown menu.
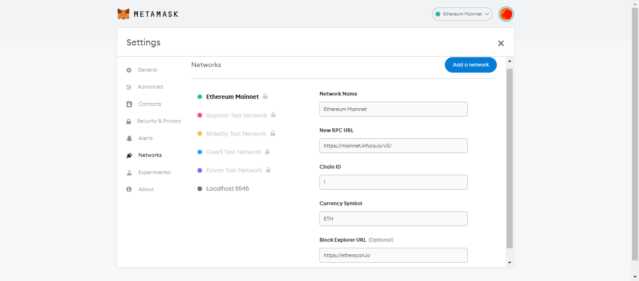
Step 3: Add Custom RPC Network
- Within the Metamask settings, click on the “Networks” tab.
- Scroll down and click on the “Add Network” button to add a custom RPC network.
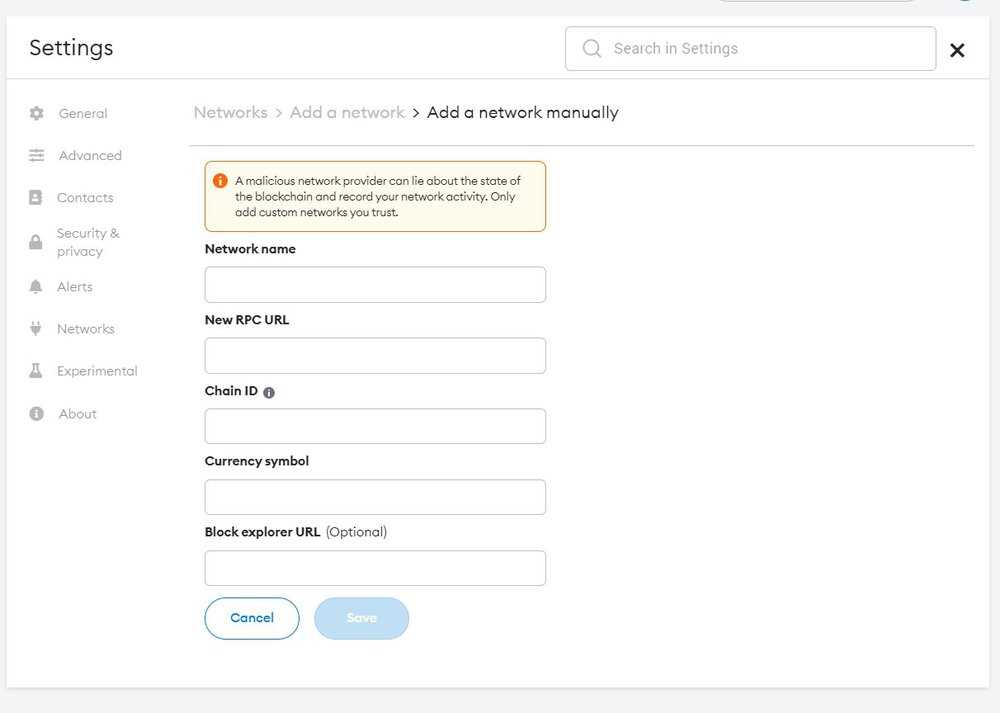
Step 4: Enter BSC Mainnet Details

- In the “New Network” form, enter the following details for BSC Mainnet:
- Network Name: Binance Smart Chain Mainnet
- RPC URL: https://bsc-dataseed.binance.org/
- Chain ID: 56
- Symbol: BNB
- Block Explorer URL: https://bscscan.com/
- Click on the “Save” button to add BSC Mainnet to your Metamask wallet.
Congratulations! You have successfully added BSC Mainnet to your Metamask wallet. You can now easily switch between Ethereum and BSC networks to access and use compatible dApps.
Note: Make sure to have some BNB (Binance Coin) in your wallet to cover transaction fees when interacting with decentralized applications on the BSC network.
Step 1: Install Metamask Extension

To start using the BSC Mainnet on Metamask, the first step is to install the Metamask extension on your browser. Follow the steps below to install it:
1. Install Metamask for Google Chrome:
- Open your Google Chrome browser and visit the Metamask extension page on the Chrome Web Store.
- Click on the “Add to Chrome” button to start the installation.
- A pop-up window will appear. Click on the “Add extension” button to confirm the installation.
- Wait for the installation to complete. Once it’s done, you’ll see the Metamask fox icon added to your browser’s toolbar.
2. Install Metamask for Mozilla Firefox:
- Open your Mozilla Firefox browser and visit the Metamask add-on page on the Firefox Add-ons website.
- Click on the “Add to Firefox” button to start the installation.
- A pop-up window will appear. Click on the “Add” button to confirm the installation.
- Wait for the installation to complete. Once it’s done, you’ll see the Metamask fox icon added to your browser’s toolbar.
Note: Metamask is compatible with most major browsers, including Google Chrome, Mozilla Firefox, Brave, and Microsoft Edge.
Step 2: Create a Wallet in Metamask
Metamask is a popular cryptocurrency wallet that allows users to manage their digital assets and interact with decentralized applications (dApps) on the blockchain. To get started, follow these simple steps to create a wallet in Metamask:
1. Install the Metamask Extension: Visit the official Metamask website or search for “Metamask” in the Google Chrome or Firefox extension stores. Click on the “Install” button and follow the instructions to add the extension to your browser.
2. Set Up a Wallet: Once the extension is installed, click on the Metamask icon in the top right corner of your browser. Click on “Get Started” and then select “Create a Wallet”.
3. Create a Strong Password: Choose a strong and secure password for your wallet. Make sure to include a combination of uppercase and lowercase letters, numbers, and special characters.
4. Save Your Secret Backup Phrase: Metamask will generate a secret backup phrase consisting of 12 random words. Write down this phrase on a piece of paper and store it in a safe place. This backup phrase is essential for restoring your wallet in case you lose access to your device.
5. Confirm Your Secret Backup Phrase: Metamask will ask you to confirm your secret backup phrase by selecting the words in the correct order. This step ensures that you have properly saved your backup phrase.
6. Use Your Wallet: Once your wallet is set up, you can start using it to send and receive cryptocurrencies, interact with dApps, and manage your digital assets. Metamask provides a user-friendly interface that allows you to easily access and control your wallet.
Note: It is important to keep your wallet details and backup phrase confidential. Do not share them with anyone, as this could lead to unauthorized access to your funds.
Step 3: Add BSC Mainnet Network
To add the BSC Mainnet network to your Metamask, follow these simple steps:
- Open your Metamask extension and click on the network selection dropdown.
- Click on the “Custom RPC” option.
- In the “New Network” section, fill in the following details:
| Network Name | BSC Mainnet |
|---|---|
| New RPC URL | https://bsc-dataseed.binance.org/ |
| Chain ID | 56 |
| Symbol | BSC |
| Block Explorer URL | https://bscscan.com/ |
Once you have filled in the details, click on the “Save” button to add the BSC Mainnet network to your Metamask.
Now you have successfully added the BSC Mainnet network to your Metamask and you can start using it to interact with BSC-based decentralized applications.
What is Metamask?
Metamask is a cryptocurrency wallet that allows users to store, manage, and interact with their Ethereum-based assets. It is a browser extension that also acts as a bridge between web browsers and the Ethereum blockchain.
What is BSC Mainnet?
BSC Mainnet refers to the main network of the Binance Smart Chain (BSC), a blockchain platform developed by Binance. It is a parallel blockchain to the Ethereum network and offers fast and low-cost transactions.
Why would I want to add BSC Mainnet to Metamask?
Adding BSC Mainnet to Metamask allows you to access and interact with decentralized applications (dApps) and tokens on the Binance Smart Chain. It broadens your options for using different blockchain networks and provides access to a wider range of cryptocurrencies and services.