
Are you curious about cryptocurrency and want to get started with crypto wallets? Look no further! In this beginner’s guide, we will walk you through the steps of using the Metamask add on, one of the most popular and user-friendly crypto wallets available.
Metamask is a browser extension that allows you to manage your cryptocurrency and interact with decentralized applications (dApps) directly from your web browser. It not only serves as a digital wallet, but also acts as a bridge between your browser and the Ethereum blockchain, making it easy for you to securely store and transfer your digital assets.
Getting started with Metamask is a breeze. First, you need to install the Metamask extension in your preferred web browser (Chrome, Firefox, or Brave). Once installed, you can create a new wallet or import an existing one, depending on your needs. Metamask will generate a unique 12-word seed phrase that you must write down and keep in a secure place. This seed phrase is essential for recovering your wallet in case of loss or theft.
After setting up your wallet, you can now start using Metamask to send, receive, and store cryptocurrencies. You can easily connect to various dApps and interact with them using your Metamask wallet. Transactions made through Metamask are secure and private, thanks to its built-in encryption and protection measures. With Metamask, you have full control over your digital assets, allowing you to manage and access them anytime, anywhere.
What is Metamask Add On and How Does it Work?
Metamask is a popular browser extension that serves as a cryptocurrency wallet, allowing users to manage and interact with decentralized applications (dApps) on the Ethereum blockchain. It is available as an add-on for web browsers like Chrome, Firefox, Brave, and Opera.
When you install Metamask, it creates a non-custodial wallet for you where you can store your Ethereum and ERC-20 tokens. The wallet is protected by a password that only you know, ensuring the security of your funds.
Metamask also provides a user-friendly interface for users to view their account balance, transaction history, and access various Ethereum-based dApps. It acts as a bridge between your browser and the Ethereum network, allowing you to seamlessly interact with blockchain technology without the need to run a full Ethereum node.
One of the key features of Metamask is its ability to inject a web3 object into websites, enabling them to interact with the Ethereum blockchain. This means that dApps can request permission to access your Metamask wallet and execute transactions on your behalf. However, Metamask always asks for your explicit confirmation before executing any transaction, providing an added layer of security.
Metamask also allows users to switch between different Ethereum networks, such as the Ethereum Mainnet, Testnets, and custom networks. This is especially useful during development and testing of dApps on different networks.
In summary, Metamask is a powerful tool that brings the world of decentralized finance and dApps to your web browser. It acts as a secure wallet and provides an interface for interacting with Ethereum-based applications, making it easier for beginners to get started with crypto.
Setting Up Metamask Add On: Step-by-Step Instructions

Step 1: Install Metamask Add On
Start by visiting the official Metamask website and downloading the add on for your preferred web browser. Once the download is complete, follow the installation prompts to add Metamask to your browser.
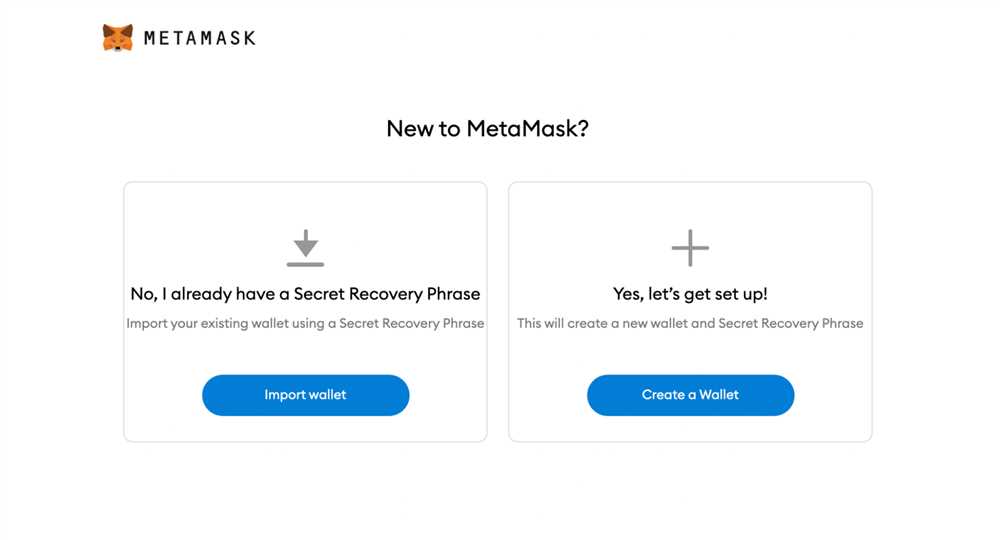
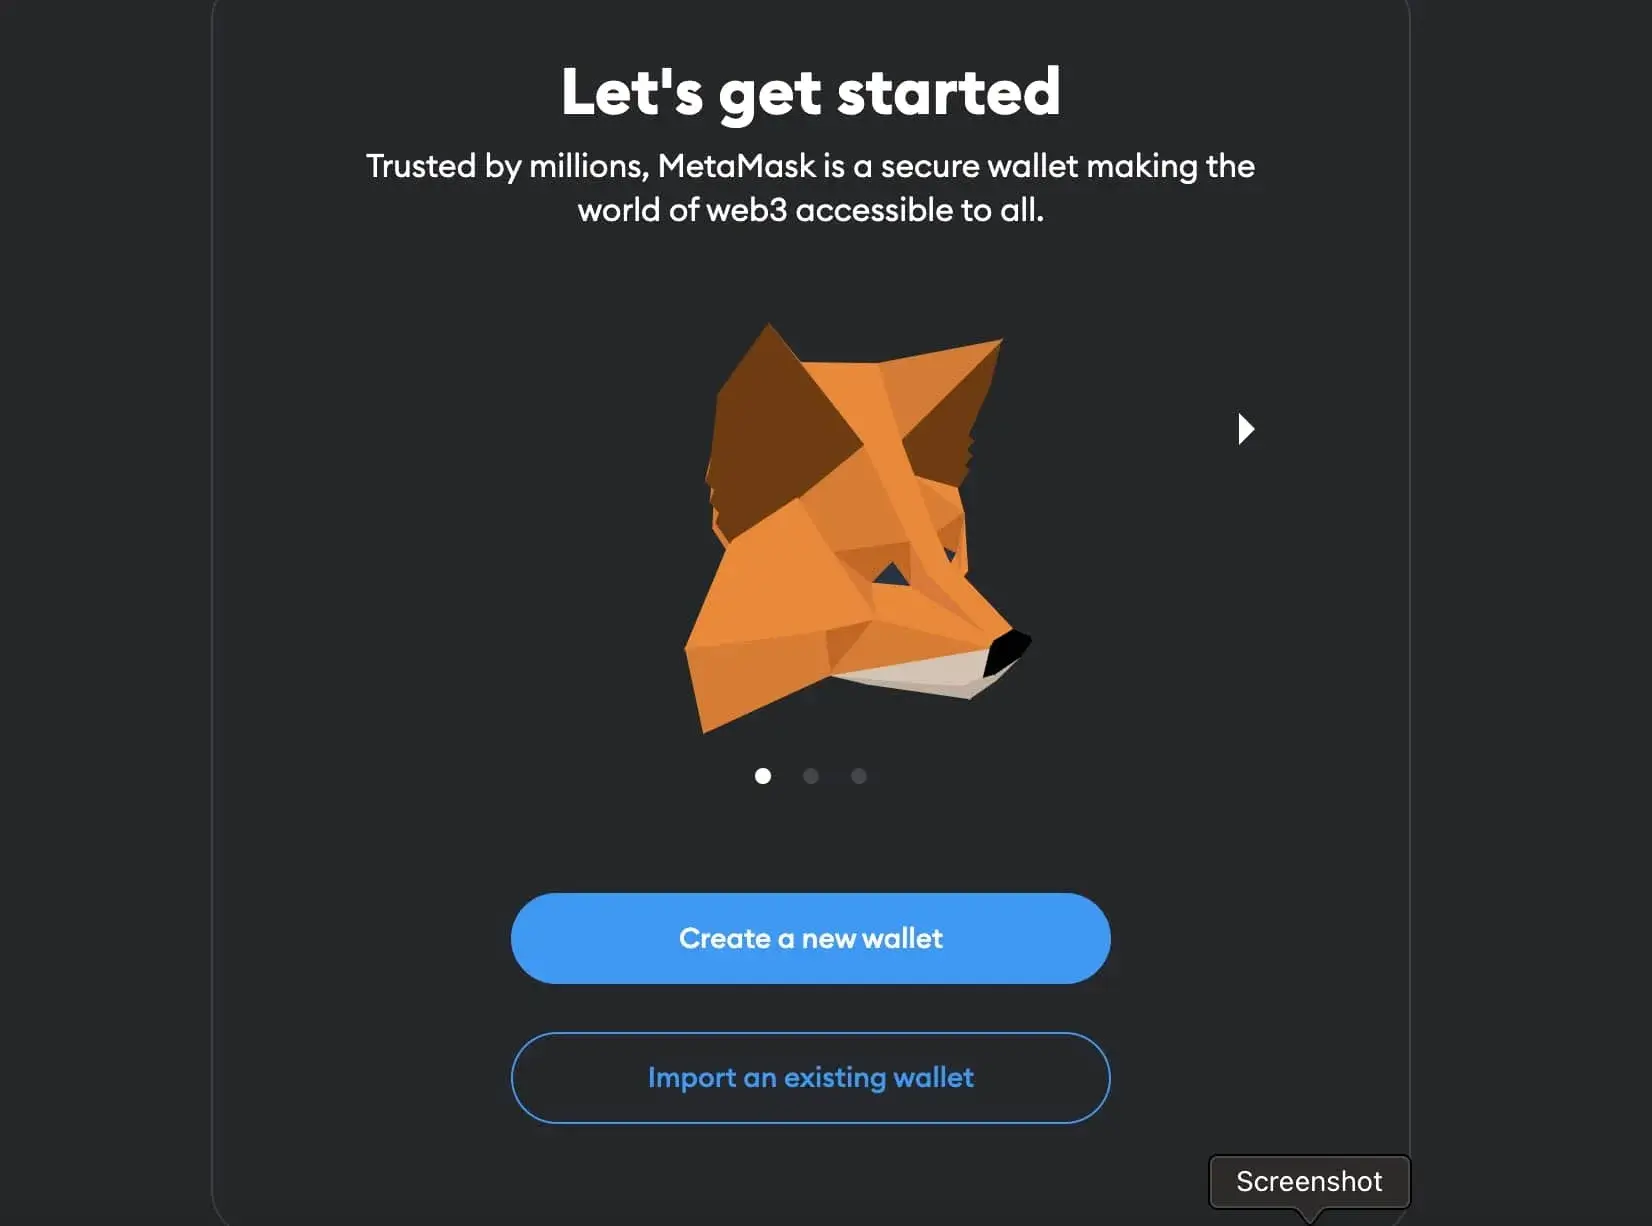
Step 2: Create a Wallet
After installing the add on, click on the Metamask icon in your browser’s toolbar to open the wallet. Click on “Create a Wallet” and agree to the terms of service. Enter a strong password to protect your wallet and click “Create”.
Step 3: Secret Backup Phrase
Write down the secret backup phrase provided by Metamask. This phrase consists of 12 random words and is used to recover your wallet in case you forget your password or lose access to your device. Keep this phrase safe and secure.
Step 4: Confirm Backup Phrase
To ensure that you have correctly written down your backup phrase, Metamask will ask you to select the words in the correct order. This is a security measure to prevent unauthorized access to your wallet. Select the words in the right order and click “Confirm”.
Step 5: Connect to a Network
Once your wallet is set up, you need to connect it to a blockchain network. By default, Metamask is set to the Ethereum Mainnet. To change networks, click on the network name in the top bar of the wallet and select the desired network from the dropdown menu.
Step 6: Import an Existing Wallet (Optional)
If you already have an existing wallet, you can import it into Metamask instead of creating a new one. Click on the Metamask icon in your browser’s toolbar, select “Import Wallet”, and follow the instructions to import your wallet using a private key or JSON file.
Step 7: Funding Your Wallet
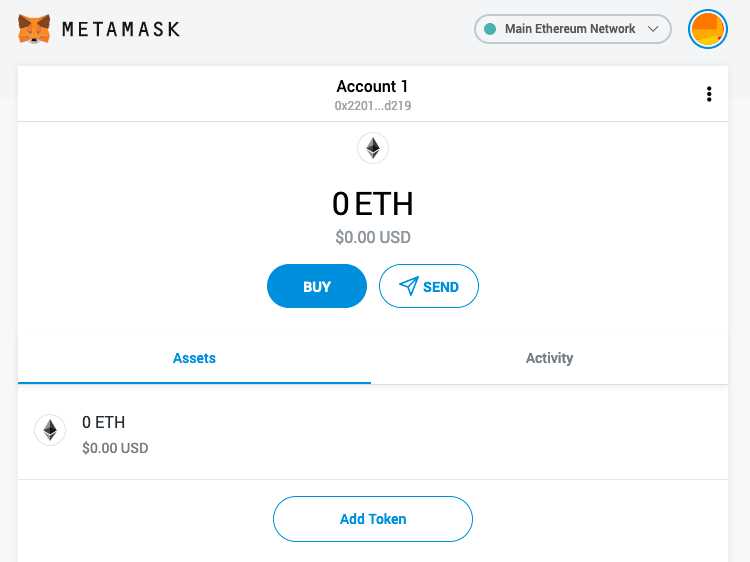
To start using your Metamask wallet, you need to fund it with cryptocurrency. Click on the account balance in the top bar of the wallet, select “Deposit”, and follow the instructions to deposit funds into your wallet from an exchange or another wallet.
Step 8: Using Metamask
Now that your Metamask wallet is set up and funded, you can use it to interact with decentralized applications (DApps) and trade cryptocurrencies. Explore the various features of the wallet, such as sending and receiving tokens, managing multiple accounts, and accessing decentralized exchanges.
Step 9: Security Best Practices
It’s important to take steps to secure your Metamask wallet. Enable two-factor authentication, use hardware wallets for added security, and keep your operating system and browser up to date. Also, be cautious when interacting with unfamiliar websites and always double-check URLs to avoid phishing attacks.
By following these step-by-step instructions, you can easily set up and start using the Metamask add on for your web browser. Enjoy the convenience and security of having a crypto wallet directly in your browser!
Managing Your Crypto Wallet with Metamask Add On
Once you have set up your Metamask wallet and added it as an extension to your web browser, you can start managing your crypto assets with ease. Metamask offers a range of features that allow you to securely store, send, and receive cryptocurrencies.
Secure Storage
Metamask provides a secure environment for storing your crypto assets. When you create your wallet, Metamask generates a unique seed phrase which serves as a backup in case you lose access to your wallet. It is crucial to keep this seed phrase in a safe place and never share it with anyone, as it can be used to recover your wallet.
Sending and Receiving Cryptocurrencies
With Metamask, you can easily send and receive cryptocurrencies. To send a payment, you simply need to enter the recipient’s wallet address, specify the amount, and confirm the transaction. Metamask will display the transaction fee and allow you to adjust it based on your preference.
When receiving cryptocurrencies, you can share your wallet address with the sender, and they can transfer the funds directly to your Metamask wallet. It is important to double-check the wallet address before making any transactions to ensure that you are sending funds to the correct recipient.
Furthermore, Metamask supports multiple blockchains, including Ethereum and Binance Smart Chain. This allows you to manage assets from different blockchain networks within the same user interface. When switching between blockchains, Metamask will prompt you to confirm your choice and display the network fees associated with the selected blockchain.
In summary, Metamask is a powerful tool for managing your crypto wallet. From secure storage to sending and receiving cryptocurrencies, Metamask simplifies the management of your assets, providing a user-friendly experience for both beginners and experienced crypto enthusiasts.
Tips and Best Practices for Using Metamask Add On Effectively
When using the Metamask add on for your crypto transactions, it’s important to keep in mind some tips and best practices to ensure smooth and secure usage. Here are some key points to consider:
1. Keep your software up to date
Metamask regularly releases updates to improve usability and security. It’s essential to install these updates as they become available to ensure you have the latest features and bug fixes.
2. Use strong and unique passwords

Your Metamask wallet is protected by a password, so it’s crucial to choose a strong and unique one. Avoid using common passwords and consider using a password manager to generate and store complex passwords.
3. Enable two-factor authentication
Adding an extra layer of security to your Metamask wallet is highly recommended. Enable two-factor authentication, such as Google Authenticator or Authy, to protect your account from unauthorized access.
4. Be cautious of phishing attempts
Scammers may try to trick you into revealing your wallet information through phishing attempts. Always double-check the website’s URL before entering your details and, if in doubt, directly type the website address into your browser rather than clicking on a link.
5. Verify transactions before confirming
When sending crypto from your Metamask wallet, carefully review the transaction details before confirming. Double-check the recipient’s address and the amount being sent to avoid any mistakes or potential fraud.
6. Keep your recovery phrase secure
Your Metamask recovery phrase is essentially the key to your wallet. Ensure you store it securely offline and avoid sharing it with anyone. Losing your recovery phrase can result in permanent loss of access to your funds.
7. Use hardware wallets for larger amounts
If you plan to store significant amounts of cryptocurrency, consider using a hardware wallet in conjunction with Metamask. Hardware wallets offer an extra layer of security by keeping your private keys offline.
By following these tips and best practices, you can make the most of your Metamask add-on and ensure a secure and convenient experience with your crypto transactions.
What is Metamask?
Metamask is a browser extension that allows users to interact with the Ethereum blockchain. It functions as a crypto wallet, enabling users to store, manage, and transact with Ethereum-based tokens.