
If you are a cryptocurrency enthusiast, you may already be familiar with Metamask – a popular Ethereum wallet that allows you to securely store, manage, and interact with decentralized applications (dApps). One of the most common use cases of Metamask is to store and send USDT, a stablecoin that is pegged to the US dollar.
Sending USDT to your Metamask wallet is a simple process that involves a few steps. To begin, make sure you have already set up your Metamask wallet and have the necessary USDT tokens in another wallet or exchange. Once you have done that, follow these steps:
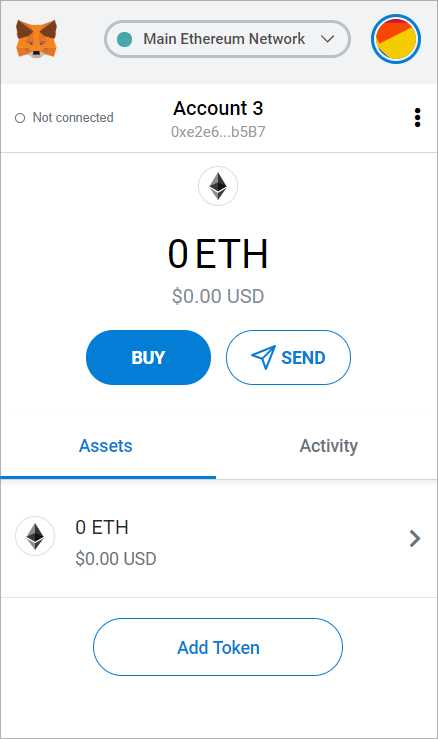
Step 1: Open your Metamask wallet and ensure you are on the Ethereum network. If you are not, click on the network selection button at the top of the Metamask extension and choose the Ethereum network.
Step 2: Locate your Metamask wallet address. To do this, click on the account icon in the top right corner of the Metamask extension, and then click “Copy” next to your wallet address. This address will be used as the recipient address for your USDT transfer.
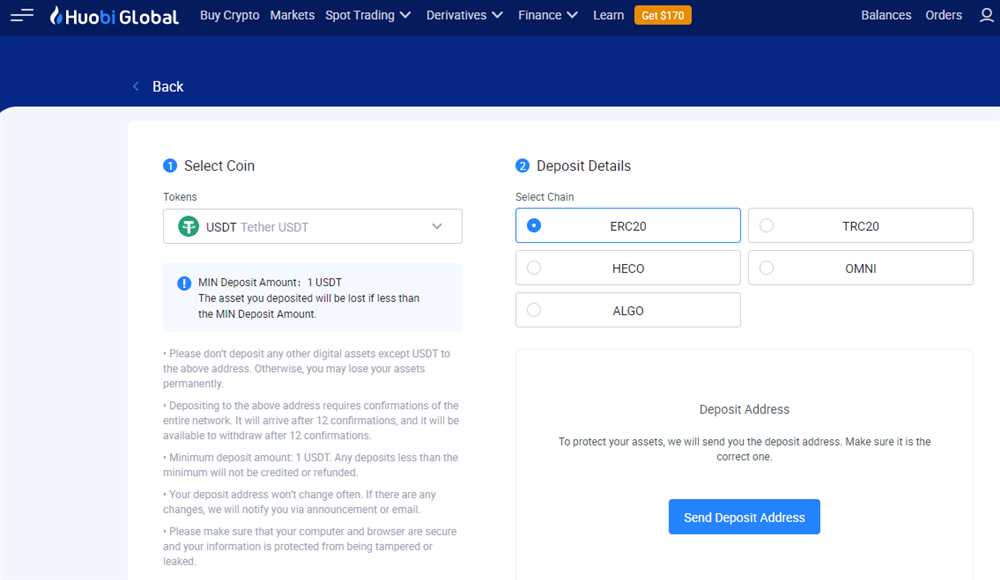
Step 3: Open the wallet or exchange where your USDT tokens are currently stored. Navigate to the “Send” or “Withdraw” section of the wallet or exchange, and enter your Metamask wallet address as the recipient address.
Step 4: Specify the amount of USDT you want to send to your Metamask wallet. Double-check the amount to ensure accuracy, as cryptocurrency transactions are irreversible.
Step 5: Review the transaction details, including the recipient address and the amount of USDT being sent. Confirm that everything looks correct before proceeding.
Step 6: Click the “Send” or “Withdraw” button to initiate the USDT transfer. Depending on the wallet or exchange you are using, you may need to complete additional verification steps, such as confirming the transaction via email or entering a verification code.
Step 7: Wait for the transaction to be confirmed on the Ethereum network. This can typically take a few minutes, but during periods of high network congestion, it may take longer. You can monitor the progress of your transaction by clicking on the transaction history section of Metamask or by using an Ethereum block explorer.
Step 8: Once the transaction is confirmed, you will see the USDT tokens in your Metamask wallet balance. You can now use these tokens to interact with dApps or transfer them to other wallets and exchanges as needed.
By following these simple steps, you can easily send USDT to your Metamask wallet and take advantage of the wide range of features and opportunities offered by the Ethereum ecosystem.
Note: Always exercise caution when making cryptocurrency transactions and ensure you are sending funds to the correct recipient address.
Get Ready to Send USDT
Before sending USDT to your Metamask wallet, make sure you have completed the following steps:
- Create a new Metamask wallet or ensure you have an existing one.
- Make sure your Metamask wallet is connected to the appropriate network (Ethereum Mainnet or Binance Smart Chain) that supports USDT.
- Double-check the receiving address of your Metamask wallet to ensure you are sending USDT to the correct destination.
- Ensure you have enough USDT in the sender’s wallet to cover the transaction fees.
- If you are sending USDT from a centralized exchange, follow their specific withdrawal process to initiate the transfer.
- If you are sending USDT from another wallet, locate the option to send or transfer USDT and provide your Metamask wallet’s receiving address.
Please ensure that you are familiar with the transaction fees associated with sending USDT and confirm any additional requirements or steps specific to your platform or wallet provider.
Step 1: Set Up Your Metamask Wallet
Before you can send USDT to your Metamask wallet, you need to have your wallet set up and ready to go. Follow these simple steps to get your Metamask wallet up and running:
1. Install the Metamask extension
To start, you’ll need to install the Metamask extension in your web browser. Metamask is available for Chrome, Firefox, and Brave browsers. Simply search for “Metamask” in your browser’s extension store and click “Install” to add it to your browser.
2. Create a new wallet
Once you have Metamask installed, click on the extension icon in your browser toolbar to open the Metamask popup. Click “Get Started” to begin creating a new wallet.
Follow the on-screen instructions to set a strong password for your wallet and then click “Create” to generate a new seed phrase. Make sure to write down this seed phrase and store it in a safe place. It is crucial for wallet recovery and account security.
Once you’ve written down your seed phrase, click “Next” to verify your seed phrase. You’ll be presented with a random order of words from your seed phrase, and you’ll need to click on them in the correct order. This is for additional security and ensures that you have correctly recorded your seed phrase.
After verifying your seed phrase, your wallet will be created, and you’ll have access to your unique wallet address.
Note: Do not share your seed phrase or wallet password with anyone. These are the keys to your wallet, and anyone with access to them can access your funds.
3. Connect Metamask to your preferred network
Once your wallet is set up, you’ll need to connect Metamask to the network where your USDT is located. By default, Metamask is usually set to the Ethereum mainnet.
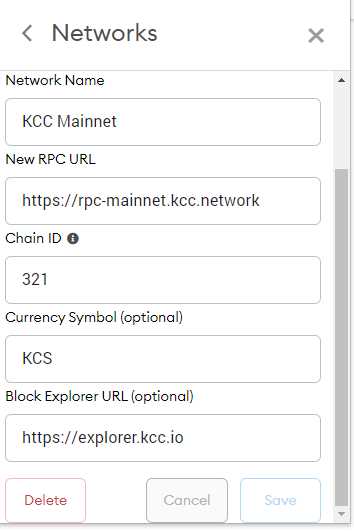
To change your network, simply click on the network selection button in the top left corner of the Metamask popup and choose the network you wish to connect to. For example, if your USDT is on the Binance Smart Chain, select the “Binance Smart Chain” network.
Your Metamask wallet is now set up and connected to the desired network. You are now ready to send USDT to your newly created wallet.
Step 2: Secure Your Wallet and Obtain USDT Address
Securing your wallet is crucial to ensure the safety of your funds. To do this, follow these essential steps:
Create a Strong Password
Choose a password that is unique and complex. Include a combination of uppercase and lowercase letters, numbers, and special characters. Avoid using common words or phrases that can be easily guessed.
Enable Two-Factor Authentication (2FA)
Two-Factor Authentication adds an extra layer of security to your wallet. It requires you to provide a second verification step, usually a unique code generated by a mobile app, in addition to your password.
Backup Your Wallet
Regularly backup your wallet’s private keys or recovery phrase. Store these backups securely offline, such as in a hardware wallet or a piece of paper stored in a safe place. This ensures that even if your device is lost or compromised, you can still recover your funds.
Once you have secured your wallet, you can obtain your USDT (Tether) address by following these steps:
- Launch the MetaMask wallet and log in with your credentials.
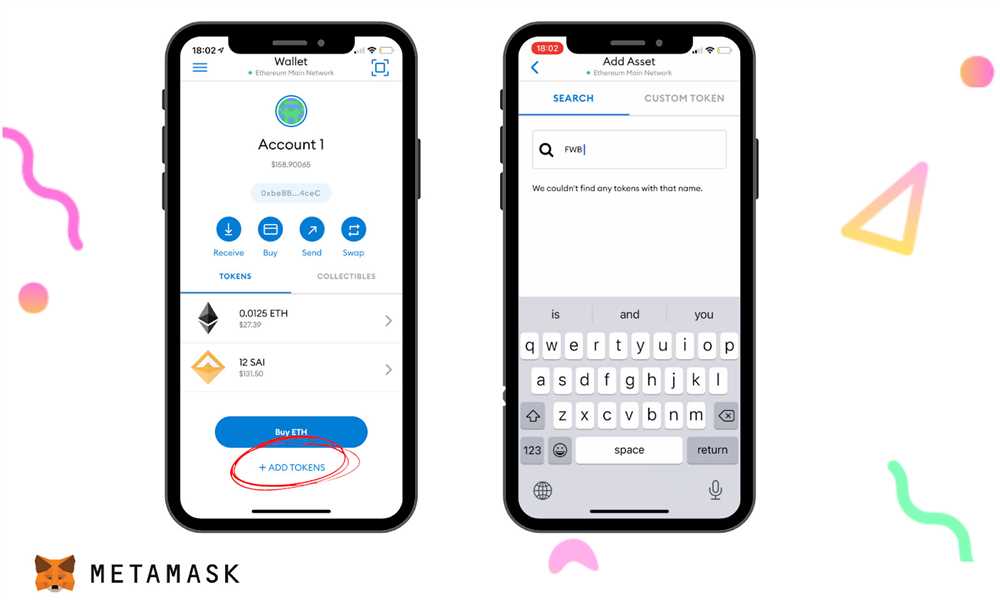
- Click on the “Assets” tab.
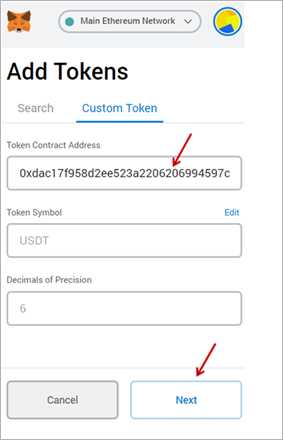
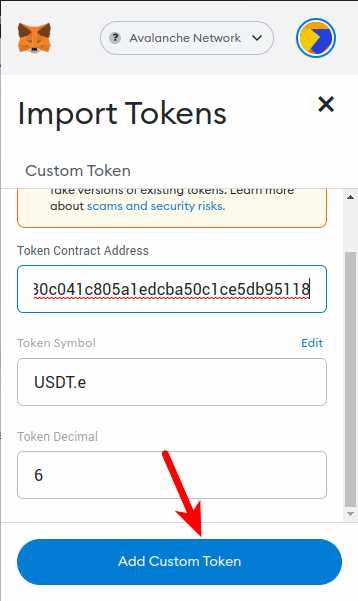
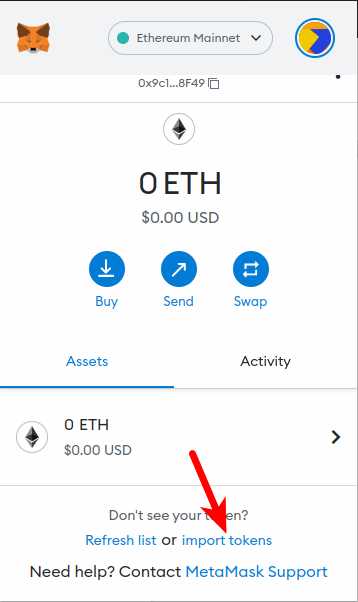
- Scroll down and search for USDT or Tether in the list of supported tokens.
- Click on the “Add” button next to USDT.
- Your USDT address will be displayed along with a QR code.
| Step | Description |
|---|---|
| 1 | Launch the MetaMask wallet and log in with your credentials. |
| 2 | Click on the “Assets” tab. |
| 3 | Scroll down and search for USDT or Tether in the list of supported tokens. |
| 4 | Click on the “Add” button next to USDT. |
| 5 | Your USDT address will be displayed along with a QR code. |
Make sure to double-check your address before sending any USDT to ensure that it matches the one displayed in your MetaMask wallet. Once you have obtained your USDT address, you are ready to proceed to the next step.
Step 3: Transfer USDT to Metamask Wallet
After setting up your Metamask wallet and obtaining the necessary USDT tokens, you are now ready to transfer them to your Metamask wallet. Follow the steps below to complete the process:
1. Open your Metamask Wallet
Make sure your Metamask extension is installed on your web browser and the wallet is open. You can easily access it by clicking on the Metamask icon in your browser toolbar.
2. Copy Your Metamask Wallet Address
In your Metamask wallet, locate your wallet address. It usually starts with “0x” and is a long string of alphanumeric characters. Copy this address to your clipboard as you will need it in the next step.
3. Access Your USDT Wallet
Open the wallet or exchange where you currently hold your USDT tokens. This can be a centralized exchange like Binance or a decentralized exchange like Uniswap. Navigate to the “Wallet” or “Assets” section to access your USDT.
4. Initiate the Transfer
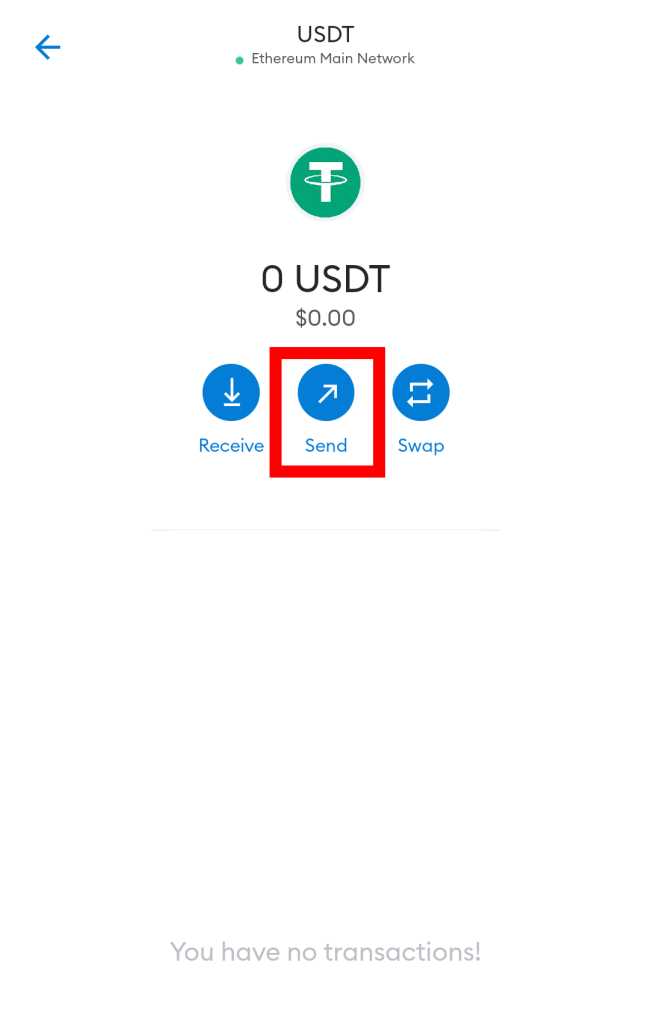
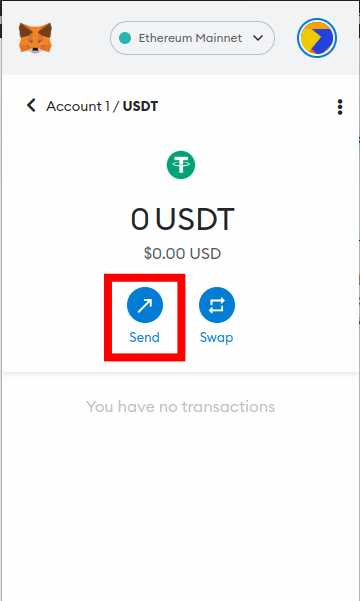
Within your USDT wallet, find the option to initiate a transfer or withdrawal. This may be labeled as “Send,” “Withdraw,” or “Transfer.” Click on it to begin the process.
5. Fill in the Transfer Details
In the transfer form, paste your Metamask wallet address that you copied earlier as the recipient address. Ensure that the address is correct to avoid any errors or loss of funds.
6. Specify the Amount
Enter the amount of USDT you wish to transfer to your Metamask wallet. Make sure to double-check the amount to be accurate before confirming the transfer.
7. Confirm and Execute the Transfer
Review the transfer details one last time to ensure everything is correct. Some wallets may require additional verification steps, such as two-factor authentication or email confirmation. Complete any required steps and confirm the transfer to initiate the process.
8. Wait for Confirmation
After initiating the transfer, you will need to wait for the transaction to be confirmed on the blockchain. The time for confirmation may vary depending on network congestion, but it typically takes a few minutes to complete.
9. Check Your Metamask Wallet
Once the transaction is confirmed, check your Metamask wallet to see if the USDT tokens have been successfully transferred. You should see the updated balance reflected in your wallet.
Congratulations! You have successfully transferred your USDT to your Metamask wallet. Now you can use your tokens for various decentralized finance (DeFi) activities or hold them securely in your Metamask wallet.
What is USDT?
USDT stands for Tether, which is a stablecoin pegged to the US dollar. It is one of the most popular and widely used stablecoins in the cryptocurrency market.
What is a Metamask Wallet?
Metamask is a cryptocurrency wallet that allows users to store, send, and receive various cryptocurrencies, including USDT. It is a browser extension wallet that can be used with popular web browsers like Google Chrome and Firefox.
Can I use a different wallet to receive USDT?
Yes, you can use a different wallet to receive USDT. However, make sure that the wallet you are using supports the USDT token and that you have the correct wallet address to receive the USDT.
Are there any fees associated with sending USDT to my Metamask Wallet?
Yes, there may be fees associated with sending USDT to your Metamask wallet. These fees are determined by the blockchain network and can vary depending on network congestion and other factors. It is important to check the current fee rates before initiating a transaction.