
Welcome to our beginner’s guide on how to purchase AVAX tokens using MetaMask! In this step-by-step tutorial, we will walk you through the simple process of acquiring AVAX tokens, the native cryptocurrency of the Avalanche network. By following these easy steps, you will be able to join the Avalanche ecosystem and start participating in various decentralized applications and protocols that are built on this innovative blockchain platform.
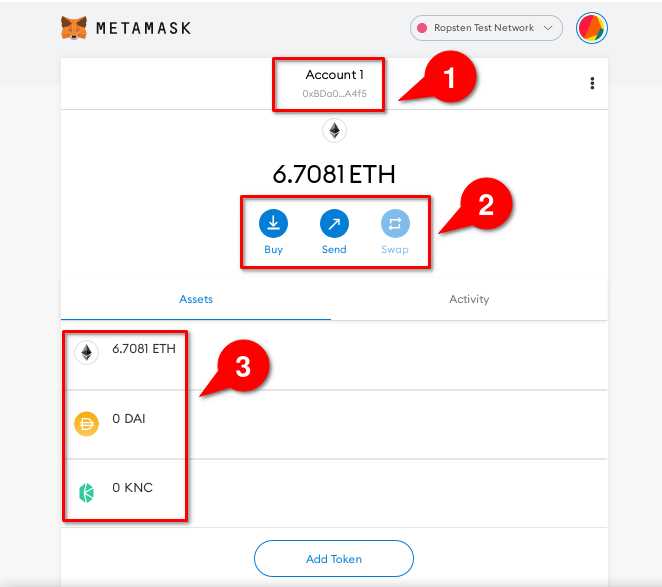
Before we begin, let’s briefly introduce MetaMask. MetaMask is a popular browser extension wallet that allows users to interact with decentralized applications (DApps) on the Ethereum blockchain and other supported networks. With MetaMask, you can securely store your AVAX tokens and seamlessly connect to various decentralized exchanges to buy, sell, and trade cryptocurrencies.
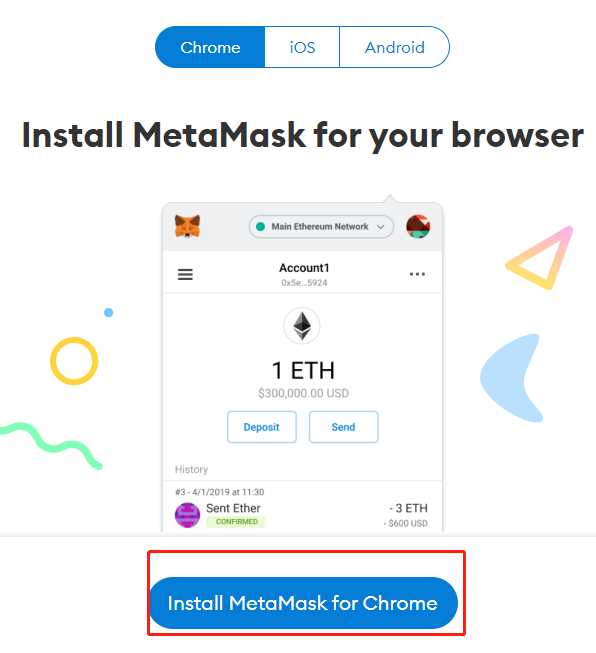
To start purchasing AVAX tokens, the first step is to install MetaMask on your preferred web browser. Simply visit the MetaMask website or search for the MetaMask extension in your browser’s extension store. Once installed, create a new wallet or import an existing one by following the instructions provided by MetaMask. Make sure to securely backup your wallet’s seed phrase, as this will be crucial for recovering your funds in case of any unforeseen circumstances.
After setting up your MetaMask wallet, the next step is to fund your wallet with Ether (ETH), the native cryptocurrency of the Ethereum network. You can either purchase ETH from a supported cryptocurrency exchange or transfer it from another wallet or exchange to your MetaMask wallet. Once you have ETH in your MetaMask wallet, you are ready to proceed to the next step of purchasing AVAX tokens.
How to Purchase AVAX Tokens with MetaMask

If you’re new to the world of cryptocurrencies and want to purchase AVAX tokens using MetaMask, this guide will walk you through the easy steps to get started.
Step 1: Install MetaMask
First, make sure you have the MetaMask wallet installed on your browser. You can download and install it from the official MetaMask website.
Step 2: Set up MetaMask
After installing MetaMask, open the extension and create a new wallet. Make sure to securely save and backup your seed phrase, as it is essential for accessing your wallet in the future.
Step 3: Add AVAX to your MetaMask wallet
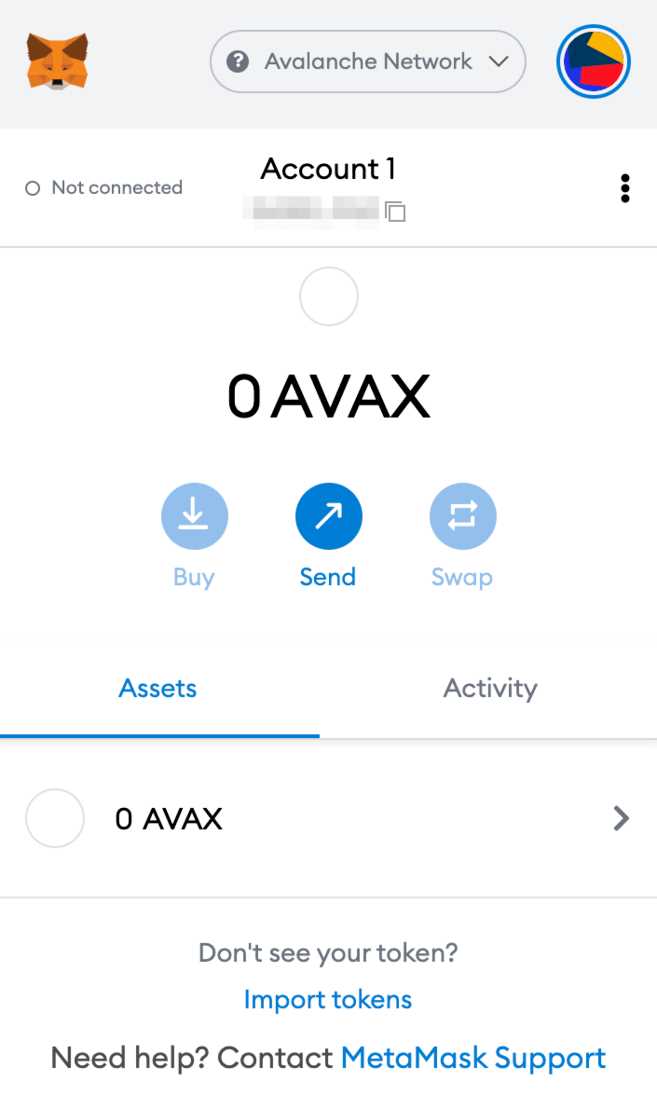
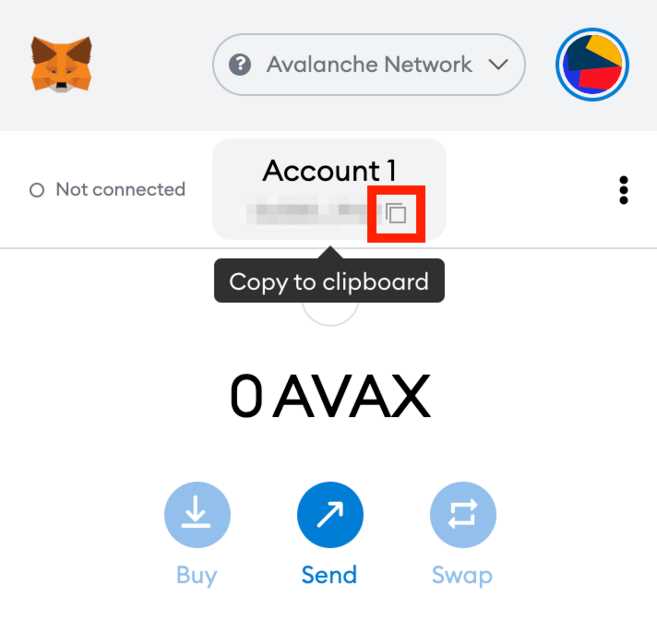
In order to purchase AVAX tokens, you need to add the Avalanche Network to your MetaMask wallet. Open the settings in MetaMask, click on “Networks”, and then “Add Network”. Fill in the required information for the Avalanche Network: network name, RPC URL, chainID, symbol, and explorer URL. After adding the network, you will be able to see the AVAX balance in your wallet.
Step 4: Connect MetaMask to an exchange
In order to purchase AVAX tokens, you need to connect your MetaMask wallet to a cryptocurrency exchange that supports AVAX. Choose a reputable exchange and follow their instructions to connect your MetaMask wallet.
Step 5: Deposit funds
Once your MetaMask wallet is connected to the exchange, you need to deposit funds into your exchange account. Follow the instructions provided by the exchange to deposit a supported cryptocurrency or fiat currency.
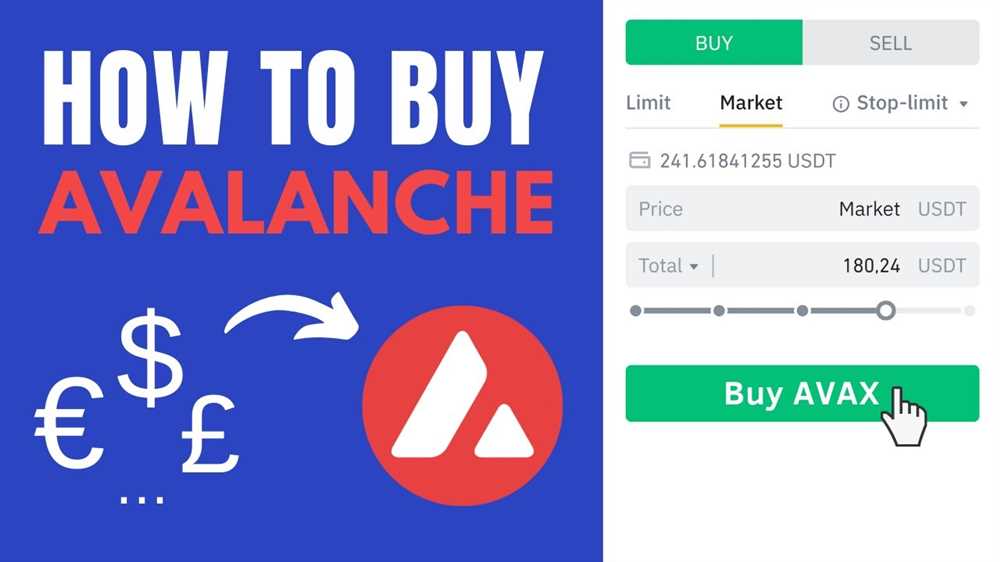
Step 6: Purchase AVAX
After depositing funds into your exchange account, navigate to the AVAX trading pair and place a buy order for the desired amount of AVAX tokens. Review the order details and confirm the transaction.
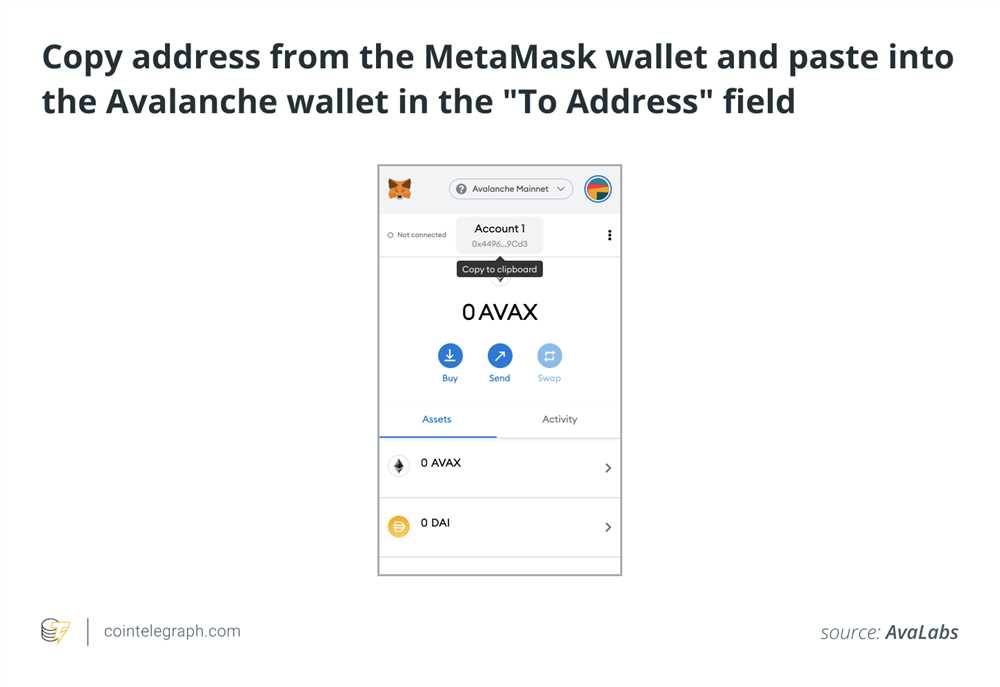
Step 7: Transfer AVAX to your MetaMask wallet
Once the AVAX purchase is complete, withdraw the tokens from the exchange to your MetaMask wallet. Follow the instructions provided by the exchange to initiate the withdrawal and enter your MetaMask wallet address as the destination.
Step 8: Secure your AVAX tokens
After transferring AVAX tokens to your MetaMask wallet, make sure to keep your wallet and seed phrase secure. Enable additional security measures like Two-Factor Authentication (2FA) and keep your wallet software and computer up to date with the latest security patches.
By following these easy steps, you can purchase AVAX tokens with MetaMask and begin participating in the Avalanche Network ecosystem.
Step-by-Step Guide for Beginners
Step 1: Install MetaMask
Before purchasing AVAX tokens, you will need to install the MetaMask browser extension. Visit the MetaMask website and follow the instructions to add it to your preferred browser.
Step 2: Create a MetaMask Wallet
Once MetaMask is installed, click on the extension and select “Create a Wallet.” Follow the prompts to set up a new wallet, including creating a strong password and securely storing your seed phrase.
Step 3: Add Funds to Your MetaMask Wallet
To purchase AVAX tokens, you will need to have Ethereum (ETH) in your MetaMask wallet to use as the currency. Add funds to your wallet by selecting “Buy” or “Deposit” and following the instructions to connect your bank account or crypto exchange.
Step 4: Connect MetaMask to Avalanche Network
Now, you need to connect MetaMask to the Avalanche network to purchase AVAX tokens. Click on the network dropdown in MetaMask and select “Custom RPC.” Enter the following details: Network Name: Avalanche, New RPC URL: https://api.avax.network/ext/bc/C/rpc, ChainID: 43114, Symbol: AVAX, Block Explorer URL: https://cchain.explorer.avax.network/
Step 5: Purchase AVAX Tokens
You are now ready to purchase AVAX tokens. Visit a reputable cryptocurrency exchange that supports AVAX and create an account if necessary. Deposit ETH from your MetaMask wallet to the exchange, and then use the available trading pairs to convert your ETH to AVAX.
Remember to review the transaction details carefully before confirming the trade, including the exchange rate and any fees that may apply. Once the trade is completed, the AVAX tokens will be transferred to your exchange wallet.
Step 6: Withdraw AVAX Tokens to MetaMask
To secure your AVAX tokens, it is recommended to transfer them from the exchange to your MetaMask wallet. Go to your exchange wallet, select the AVAX tokens, and choose the “Withdraw” or “Send” option. Enter your MetaMask wallet address as the destination and initiate the transfer.
After confirming the transaction, wait for it to be processed and verified by the Avalanche network. Once the transfer is complete, you will see your AVAX tokens in your MetaMask wallet.
Remember to store your wallet information and seed phrase securely, as losing them may result in permanent loss of your AVAX tokens. Consider using a hardware wallet or other secure means to protect your funds.
Now you have successfully purchased AVAX tokens with MetaMask! You can hold them as a long-term investment or use them for various purposes in the Avalanche ecosystem.
Setting up MetaMask Wallet

To purchase AVAX tokens using MetaMask, you first need to set up a MetaMask wallet. Here are the steps to get started:
- Install the MetaMask extension: Visit the MetaMask website and follow the instructions to install the MetaMask extension for your web browser.
- Create a new wallet: Once the extension is installed, click on the MetaMask icon in your browser toolbar and select “Create a Wallet” or “Get Started” to begin the wallet setup process.
- Set a strong password: Choose a strong password for your MetaMask wallet. Make sure it is unique and not easy to guess to keep your funds secure.
- Write down the seed phrase: During the wallet setup, MetaMask will provide you with a seed phrase. This phrase acts as the backup for your wallet and can be used to restore your funds if you lose access to your wallet. Make sure to write down the seed phrase and store it in a safe place.
- Confirm the seed phrase: After writing down the seed phrase, MetaMask will ask you to confirm it. This step is important to ensure that you have correctly recorded the seed phrase. Follow the instructions to verify your seed phrase.
- Add a new network: By default, MetaMask is set to the Ethereum network. Since you want to purchase AVAX tokens, you need to add the Avalanche network to MetaMask. Go to the MetaMask settings, click on “Networks”, and select “Add Network”. Enter the following network details for Avalanche:
– Network Name: Avalanche
– New RPC URL: https://api.avax.network/ext/bc/C/rpc
– Chain ID: 43114
– Symbol: AVAX
- Import your wallet: If you already have a MetaMask wallet, you can import it into MetaMask by selecting “Import Wallet” instead of “Create a Wallet” during the wallet setup process. Enter your seed phrase or private key to import your existing wallet.
- Secure your wallet: After setting up your MetaMask wallet, it is essential to take additional security measures. Enable two-factor authentication (2FA) and consider using a hardware wallet for added security.
Once your MetaMask wallet is set up and secure, you are ready to proceed with purchasing AVAX tokens.
Creating a Wallet and Importing Your Seed Phrase
Before you can start purchasing AVAX tokens with MetaMask, you will need to create a wallet and import your seed phrase. Follow these easy steps to get started:
Create a Wallet
1. Download and install the MetaMask extension for your preferred web browser.
2. Once installed, click on the MetaMask icon in the toolbar of your browser to open the extension.
3. Click on “Get Started” and then select “Create a Wallet”.
4. Create a strong password for your MetaMask wallet and confirm it.
5. Read and accept the terms of use and privacy policy by checking the boxes.
6. Click on “Create” to generate your wallet.
Import Your Seed Phrase
1. After creating your wallet, you will see a screen displaying a seed phrase consisting of 12 or 24 words. This seed phrase is the key to your wallet and should be kept secure.
2. Write down your seed phrase on a piece of paper or store it in a secure digital location. Make sure to keep it safe and confidential.
3. Return to the MetaMask extension and click on “I’ve Copied It Somewhere Safe”.
4. Confirm that you have saved your seed phrase and click on “Next”.
5. In the next screen, you will be asked to input your seed phrase words in the correct order. Enter each word in the corresponding input field and click on “Verify”.
6. Once you have successfully verified your seed phrase, your wallet will be imported
By following these steps, you have created a wallet and imported your seed phrase into MetaMask. Your wallet is now ready to use for purchasing AVAX tokens.
Adding AVAX Token to Your Wallet
Once you have set up your MetaMask wallet and have some Ether (ETH) in it, you can proceed to add the AVAX token to your wallet. Following these steps will allow you to track and manage your AVAX tokens within your MetaMask wallet.
Step 1: Open your MetaMask wallet
Open the MetaMask extension in your web browser and enter your password to access your wallet. If you haven’t installed MetaMask yet, you will need to download and install it first.
Step 2: Click on “Assets”
Once you are in your MetaMask wallet, you will see a menu at the top of the interface. Click on “Assets” in the menu.
Step 3: Click on “Add Token”
In the “Assets” tab, you will see a button labeled “Add Token.” Click on it to proceed.
Step 4: Select “Custom Token”
A dialog box will appear, and you will have the option to choose between “Search Token” and “Custom Token.” Select “Custom Token” to manually add the AVAX token to your wallet.
Step 5: Enter AVAX Token Details
In the “Custom Token” dialog box, you will need to enter the details of the AVAX token:
- Token Contract Address: Enter the AVAX token contract address. This is a unique identifier for the AVAX token.
- Token Symbol: Enter “AVAX” as the token symbol.
- Decimals of Precision: Enter “18” as the number of decimals for AVAX token.
Double-check that you have entered the correct information and then click on “Next” to proceed.
Step 6: Confirm Token Addition
A confirmation dialog will appear with the details you entered. Review the information and click on “Add Tokens” to add the AVAX token to your wallet.
Once the AVAX token has been successfully added to your MetaMask wallet, you will be able to see your AVAX token balance and manage your AVAX tokens alongside your other assets in MetaMask.
Choosing an Exchange
When purchasing AVAX tokens with MetaMask, it is essential to choose a reliable and reputable exchange. Here are some factors to consider when selecting an exchange:
- Security: Look for an exchange that prioritizes the security of its users’ funds. Features such as two-factor authentication (2FA) and cold storage wallets can provide an extra layer of protection.
- Liquidity: Opt for an exchange that has good liquidity for the AVAX token, ensuring that you can buy or sell at fair market prices without significant delays.
- User Interface: Consider an exchange with a user-friendly interface that makes it easy to navigate and execute transactions.
- Supported Countries: Check if the exchange is available in your country of residence. Some exchanges have restrictions on certain regions.
- Customer Support: Look for an exchange that offers responsive customer support to address any issues or inquiries you may have.
- Transaction Fees: Compare the transaction fees charged by different exchanges. Some platforms may have higher fees, while others offer discounts or lower fees for certain trading volumes.
- Reputation: Do some research and read reviews about the exchange to gauge its reputation in the crypto community. A trusted exchange with positive feedback is more likely to provide a smooth experience.
By considering these factors, you can choose an exchange that meets your needs and provides a secure and efficient platform for purchasing AVAX tokens with MetaMask.
What is MetaMask?
MetaMask is a cryptocurrency wallet browser extension that allows users to manage their Ethereum-based assets, including AVAX tokens. It provides a secure and user-friendly interface for accessing decentralized applications (dApps) and participating in the blockchain ecosystem.
Can I purchase AVAX tokens with a different cryptocurrency?
Yes, you can purchase AVAX tokens with other cryptocurrencies. However, it depends on the exchange or decentralized exchange (DEX) you use. Some exchanges may offer AVAX trading pairs with popular cryptocurrencies like Bitcoin (BTC) or Ethereum (ETH), while others may only support specific trading pairs.
Is it necessary to have ETH in my MetaMask wallet to purchase AVAX tokens?
Yes, you need to have Ether (ETH) in your MetaMask wallet to purchase AVAX tokens. AVAX is an ERC-20 token, which means it operates on the Ethereum blockchain. When you purchase AVAX, you will need to pay for the transaction fees in ETH.
Are there any fees involved when purchasing AVAX tokens with MetaMask?
Yes, there are fees involved when purchasing AVAX tokens with MetaMask. These fees include transaction fees, which are paid in Ether (ETH), and possibly trading fees imposed by the exchange or decentralized exchange (DEX) where you make the purchase. The exact amount of fees can vary depending on network congestion and the specific platform you use.