
If you’re a crypto investor looking to expand your horizons and explore new blockchain ecosystems, connecting Avalanche to Metamask is a crucial step. By integrating Avalanche, a fast and highly-scalable platform, with the popular Ethereum wallet Metamask, you can access a wide range of decentralized applications (dApps) and take advantage of the vibrant Avalanche ecosystem.
Metamask is a trusted and user-friendly Ethereum wallet that allows you to interact with dApps and manage your crypto assets securely. With the growing popularity of Avalanche, it’s essential to know how to connect your Metamask wallet to this blockchain network, enabling you to seamlessly navigate both networks and access exciting investment opportunities.
In this step-by-step guide, we’ll walk you through the process of connecting Avalanche to Metamask, ensuring you can effortlessly switch between Ethereum and Avalanche without compromising security or convenience. Whether you’re a seasoned investor or just starting your crypto journey, this guide will help you harness the power of Avalanche and maximize your potential for success.
Connecting Avalanche to Metamask
If you are a crypto investor and want to connect Avalanche to Metamask, you can follow these step-by-step instructions to get started:
Step 1: Install the Metamask browser extension, if you haven’t already done so.
Step 2: After installing Metamask, click on the extension icon in your browser’s toolbar to open it.
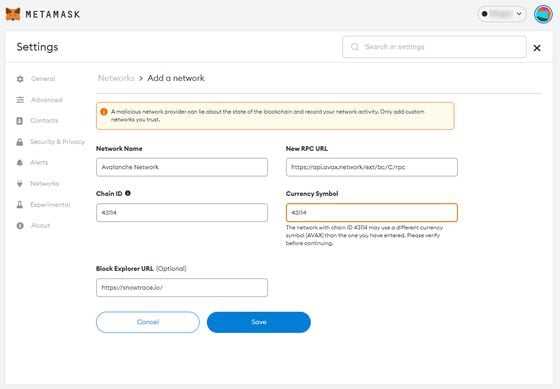
Step 3: Once the Metamask interface is open, click on the network dropdown menu and choose “Custom RPC”.
Step 4: In the “New RPC URL” field, enter the Avalanche network’s RPC URL. If you are not sure what the RPC URL is, you can find it on the Avalanche network’s official documentation.
Step 5: Give your network a name, such as “Avalanche” or “AVAX”.
Step 6: In the “Chain ID” field, enter the Avalanche network’s chain ID. Again, you can find this information on the Avalanche network’s official documentation.
Step 7: Once you have entered the RPC URL and chain ID, click on the “Save” button to save your settings.
Step 8: You should now see the Avalanche network listed in the network menu. Click on it to switch to the Avalanche network.
Step 9: Congratulations! You have successfully connected Avalanche to Metamask. You can now use Metamask to interact with decentralized applications (dApps) on the Avalanche network.
Remember to exercise caution and do your own research before engaging in any financial transactions or using any dApps on the Avalanche network.
Note: The steps mentioned above may vary slightly depending on the version of Metamask you are using. Make sure to refer to the official documentation or support resources for the most up-to-date instructions.
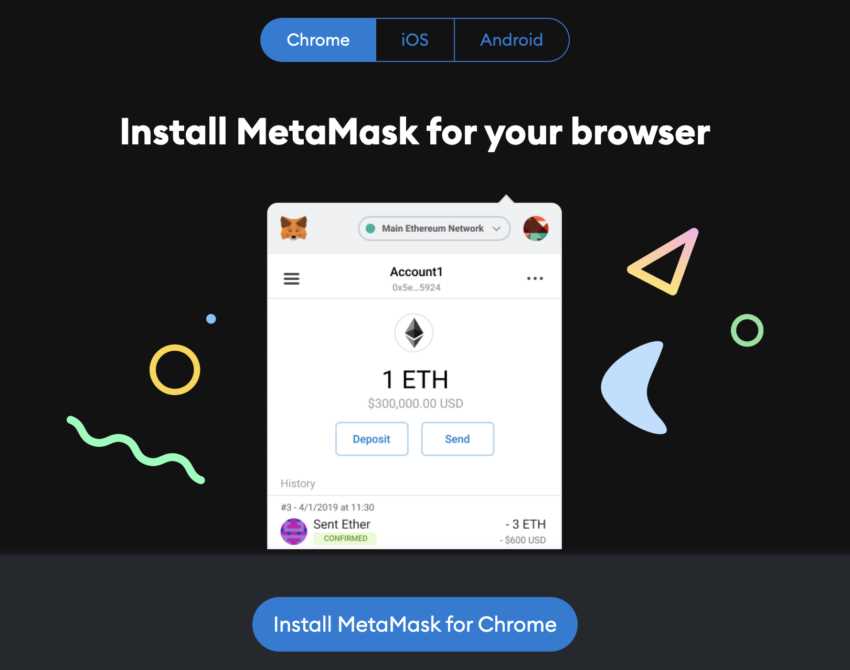
Step 1: Install Metamask Extension
Before you can connect Avalanche to Metamask, you need to install the Metamask extension on your browser. Metamask is a popular cryptocurrency wallet that allows you to interact with decentralized applications (DApps) on the Ethereum network, and it can also be used to connect to other compatible blockchains like Avalanche. Follow the steps below to install Metamask:
- Open your preferred browser and go to the Metamask website.
- Click on the “Get Chrome Extension” or “Get Firefox Extension” button, depending on your browser.
- A new tab or window will open, taking you to the Metamask extension page on the Chrome Web Store or the Firefox Add-ons website.
- Click on the “Add to Chrome” or “Add to Firefox” button to start the installation process.
- A pop-up window will appear, asking for confirmation to add the extension. Click on the “Add extension” button to proceed.
- The Metamask extension will now be installed on your browser.
- After the installation is complete, you will see the Metamask icon in the toolbar of your browser.
- Click on the Metamask icon to open the extension.
- A welcome screen will appear, asking you to create a new wallet or import an existing one. Follow the on-screen instructions to set up your wallet.
- Once you have set up your wallet, you are ready to connect Avalanche to Metamask.
Congratulations! You have successfully installed the Metamask extension on your browser. In the next step, we will guide you through how to connect Avalanche to your Metamask wallet.
Step 2: Create an Avalanche Wallet
Once you have your MetaMask installed and set up, the next step is to create an Avalanche wallet. Here’s how you can do it:
1. Open the Avalanche Wallet App
First, open the official Avalanche Wallet app on your device. You can find it on the official Avalanche website or through a quick internet search.
2. Click on “Create a New Wallet”
Once the app is open, you will see an option to create a new wallet. Click on it to begin the creation process.
3. Set a Strong Password
Choose a strong and secure password for your wallet. Make sure that it is unique and something that you can remember easily. Remember, the security of your funds depends on the strength of your password.
4. Write Down the Recovery Phrase
During the wallet creation process, you will be given a recovery phrase. This is a series of words that can be used to restore your wallet if you ever lose access to it. Write down this phrase and keep it in a safe and secure location. Do not share it with anyone else.
5. Confirm the Recovery Phrase
After writing down the recovery phrase, the wallet app will ask you to confirm it. This is to ensure that you have written it down correctly. Carefully enter the words in the order they were given to you.
6. Create the Wallet
Once you have confirmed the recovery phrase, the wallet app will create your Avalanche wallet. This may take a few seconds. Once the process is complete, you will be taken to the main wallet interface.
Note: It is crucial to keep your recovery phrase safe and secure. If anyone gains access to it, they can potentially steal your funds. Consider using a hardware wallet or other secure storage methods to protect your recovery phrase.
By following these steps, you have successfully created an Avalanche wallet. You are now one step closer to connecting Avalanche to your MetaMask.
Step 3: Connect Avalanche to Metamask

Once you have installed and set up Metamask, the next step is to connect it to the Avalanche network. Here’s how:
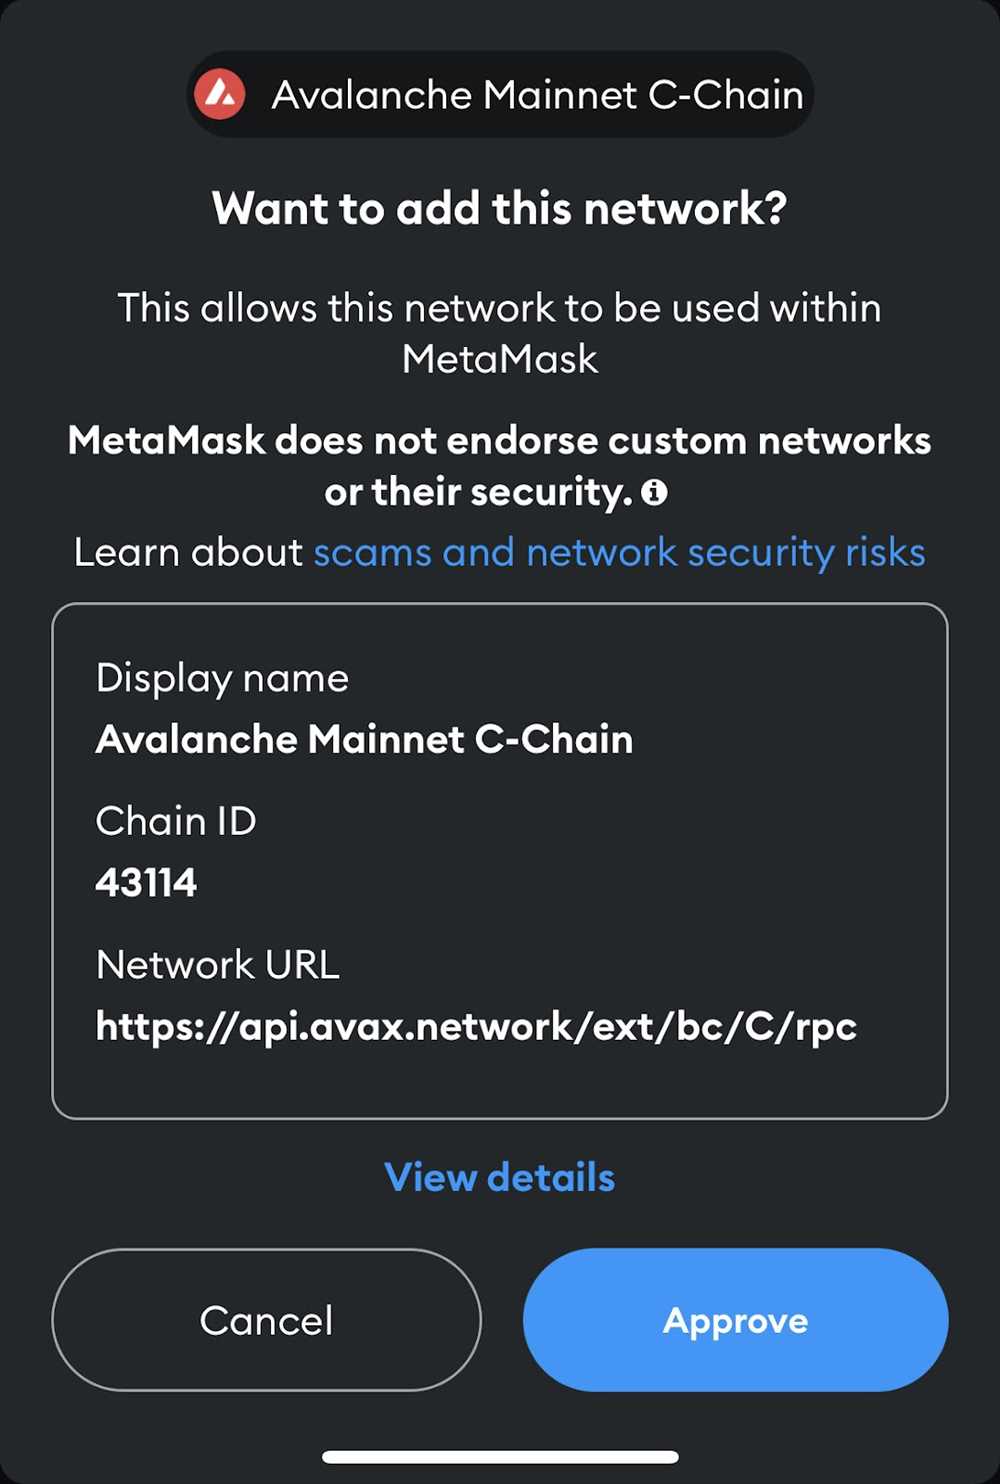
- Open Metamask and click on the network dropdown on the top of the Metamask extension popup.
- Select “Custom RPC” at the bottom of the network list.
- In the “New Network” form, enter the following details:
| Network Name: | Avalanche Mainnet |
| New RPC URL: | https://api.avax.network/ext/bc/C/rpc |
| ChainID: | 43114 |
| Symbol: | AVAX |
| Block Explorer URL: | https://cchain.explorer.avax.network/ |
Once you have entered all the details, click on the “Save” button to save the network settings.
After saving the network settings, you will see the newly added Avalanche Mainnet option in the network dropdown. Select it to connect Metamask to the Avalanche network.
Congratulations! You have successfully connected Avalanche to Metamask. Now you can start using Metamask to interact with Avalanche-based decentralized applications (dApps) and manage your AVAX tokens.
Can I connect Avalanche to Metamask?
Yes, you can connect Avalanche to Metamask by following these steps.
What is Avalanche?
Avalanche is an open-source platform that enables the creation of decentralized applications and the issuance of digital assets. It aims to provide a fast, secure, and scalable infrastructure for the blockchain industry.
Why would I want to connect Avalanche to Metamask?
By connecting Avalanche to Metamask, you can access and interact with the Avalanche ecosystem and use your Metamask wallet to manage your Avalanche assets. It provides a familiar and convenient interface for crypto investors.
How do I add Avalanche to my Metamask wallet?
To add Avalanche to your Metamask wallet, you need to add the Avalanche network as a custom network in your Metamask settings. Then, you can import your Avalanche wallet into Metamask using your 24-word recovery phrase or private key.
Are there any risks involved in connecting Avalanche to Metamask?
While connecting Avalanche to Metamask is generally safe, it is important to exercise caution and ensure that you are using official and trusted sources when adding custom networks or importing wallets. Always double-check the URLs and be wary of phishing attempts.