
Welcome to our step-by-step tutorial on how to import tokens on Metamask for beginners! Metamask is a popular cryptocurrency wallet that allows users to manage their digital assets and interact with decentralized applications (dapps) on the Ethereum blockchain. By importing tokens onto Metamask, you can seamlessly transfer and trade your tokens within the wallet, making it a crucial skill for anyone in the crypto space.
Step 1: Install and Set Up Metamask
If you haven’t done so already, the first step is to install and set up Metamask on your browser. You can find the Metamask extension on the Chrome Web Store or the Firefox Add-ons store. Once installed, create a new wallet or import an existing one using your seed phrase. Make sure to securely store your seed phrase as it serves as a backup to your wallet.
Step 2: Access the Token Import Interface
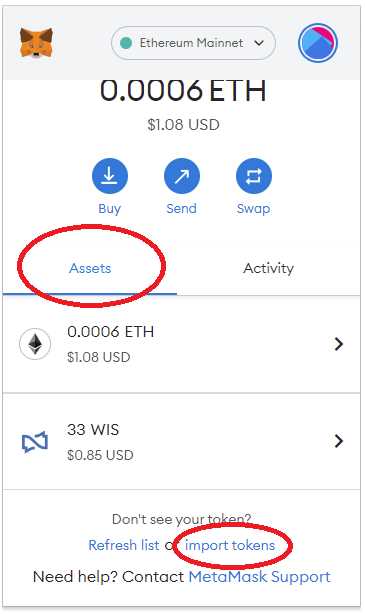
Once you have Metamask set up, access your wallet by clicking on the Metamask icon in your browser’s toolbar. This will open the Metamask interface, where you can view your account balance and manage your assets. To import tokens, click on the “Assets” tab at the top of the interface, and then select “Import Tokens” from the dropdown menu.
Step 3: Enter Token Contract Details
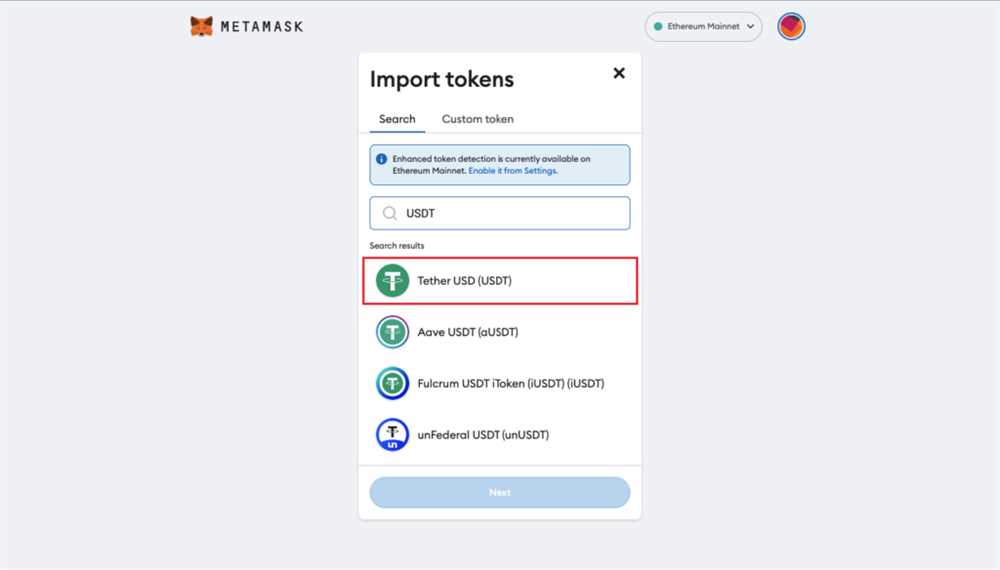
In the Token Import interface, you will need to enter the contract details of the token you wish to import. This includes the token’s contract address, symbol, and decimals. You can find this information on the token’s website or by searching for the token on a reputable token explorer such as Etherscan. Ensure that you have the correct information to avoid any errors.
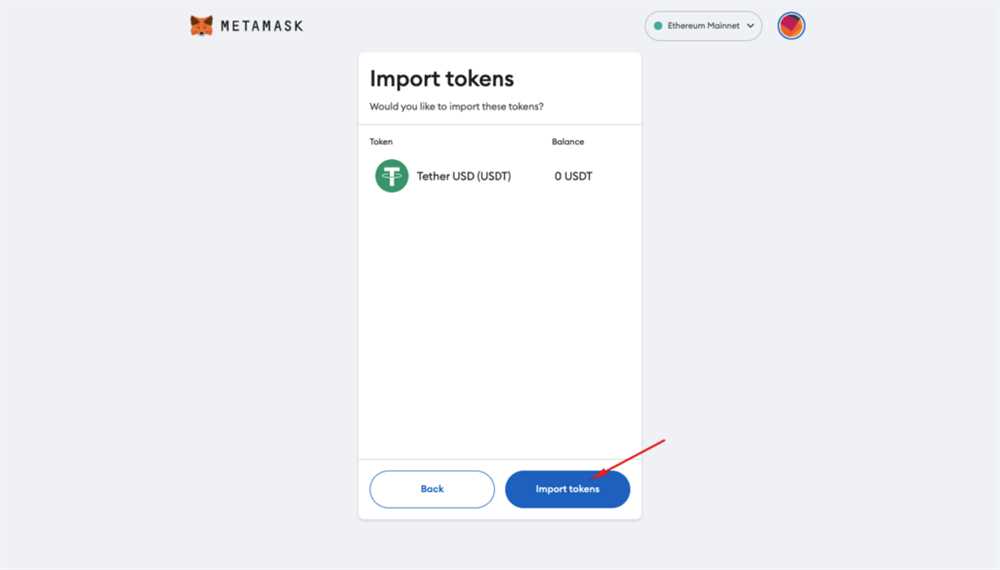
Step 4: Confirm and Import Tokens
After entering the token contract details, click on the “Next” button to proceed. Review the details once again to confirm that they are correct. Once you are satisfied, click on the “Import” button to import the tokens onto your Metamask wallet. The imported tokens will now appear in your wallet’s asset list, and you will be able to view, transfer, and trade them within the Metamask interface.
That’s it! You have successfully imported tokens on Metamask. You can now start managing your tokens with ease and explore the numerous DeFi applications and exchanges that are compatible with Metamask. Remember to always exercise caution and conduct thorough research before engaging in any financial transactions in the crypto space. Happy token importing!
What is Metamask?
Metamask is a popular browser extension that allows users to interact with the Ethereum blockchain. It serves as a wallet, enabling users to securely store, send, and receive Ether (ETH) and other ERC-20 tokens. Metamask makes it easy for users to access decentralized applications (dApps) directly from their browsers.
With Metamask, users have full control over their private keys, ensuring the security and ownership of their digital assets. The extension provides a simple and intuitive interface, making it accessible for beginners and experienced users alike.
Metamask is compatible with popular web browsers like Chrome, Firefox, and Brave, making it widely accessible across different platforms. It is a crucial tool for anyone looking to interact with the Ethereum blockchain, whether it be participating in decentralized finance (DeFi) applications, investing in token sales, or simply managing their digital assets.
Using Metamask, users can connect their wallets to various Ethereum-based applications without the need to create separate accounts or remember multiple passwords. This seamless integration streamlines the user experience and simplifies the process of interacting with the blockchain.
Key Features of Metamask:
- Secure Wallet: Metamask allows users to store their private keys locally, keeping their funds safe from potential online threats or exchange hacks.
- One-Click Login: Users can easily log in to dApps using their Metamask credentials without the hassle of creating new accounts or remembering multiple passwords.
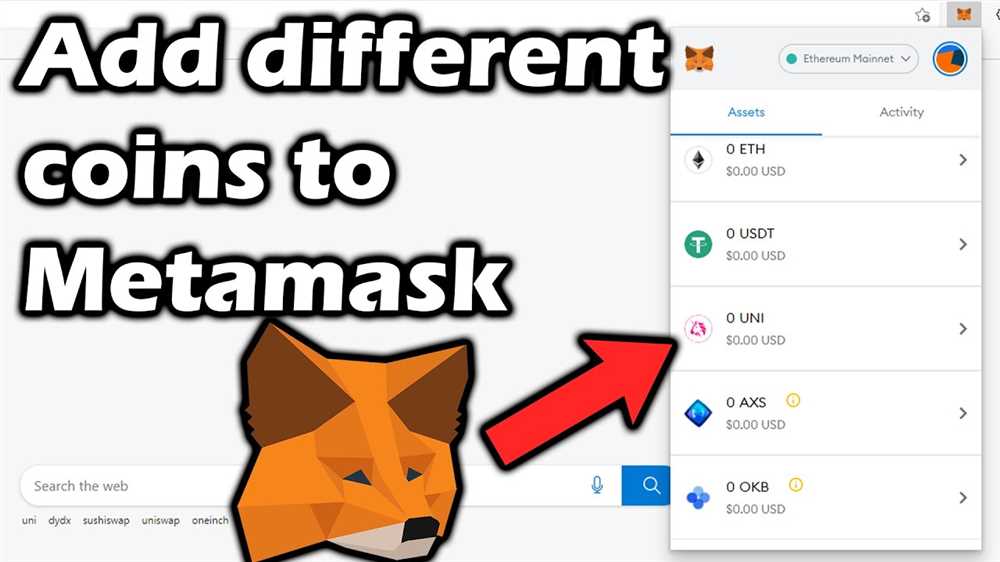
- Token Management: Metamask lets users manage and interact with an extensive range of ERC-20 tokens, making it easy to send, receive, and track their token holdings.
- Transaction History: Users can view their transaction history directly within the extension, providing transparency and visibility into their past interactions on the blockchain.
Metamask has become an essential tool for anyone wanting to explore and participate in the Ethereum ecosystem. Its user-friendly interface and robust features make it a popular choice among blockchain enthusiasts and everyday users.
Step 1: Install Metamask
In order to import tokens on Metamask, the first step is to have the Metamask extension installed in your web browser. Follow the steps below to install Metamask:
1. Go to the Metamask website
Open your web browser and go to the official Metamask website. You can do this by typing “Metamask” in your preferred search engine or by directly entering the URL: https://metamask.io/
2. Install the Metamask extension
On the Metamask website, you will find a button that says “Get Chrome Extension” or “Get Firefox Extension” depending on your browser. Click on the button that corresponds to your browser.
A pop-up window will appear, asking for confirmation to add the extension to your browser. Click on “Add to Chrome” or “Add to Firefox”.
Metamask will then be added as an extension to your browser.
Note: Metamask is currently available for Google Chrome, Mozilla Firefox, and Brave browsers. Make sure you are using a compatible browser before proceeding.
Step 2: Create a Metamask account
To begin using Metamask, you will need to create an account. Follow the steps below to create your account:
- Go to the Metamask website and click on the “Get Chrome Extension” button.
- A new tab will open in your browser. Click on the “Add to Chrome” button to add the Metamask extension.
- Click on the Metamask icon in your browser’s toolbar, then click on “Create Account” to start the account creation process.
- Set a strong password for your account. Make sure to use a combination of uppercase and lowercase letters, numbers, and special characters.
- Read and accept the terms of use and privacy policy.
- You will be presented with a set of words, known as a “seed phrase”. It is crucial to write down this seed phrase and keep it in a safe place. The seed phrase can be used to restore your account in case you forget your password or lose access to your device.
- Confirm the seed phrase by selecting the words in the correct order.
- Your Metamask account is now created! You can now start using it to import tokens and interact with decentralized applications.
Remember to always keep your Metamask account secure and never share your password or seed phrase with anyone.
Step 3: Import tokens
After setting up your Metamask wallet and connecting to the Ethereum network, you can now import tokens into your wallet. Importing tokens allows you to track and manage your token balances directly within Metamask.
To import tokens, follow these steps:
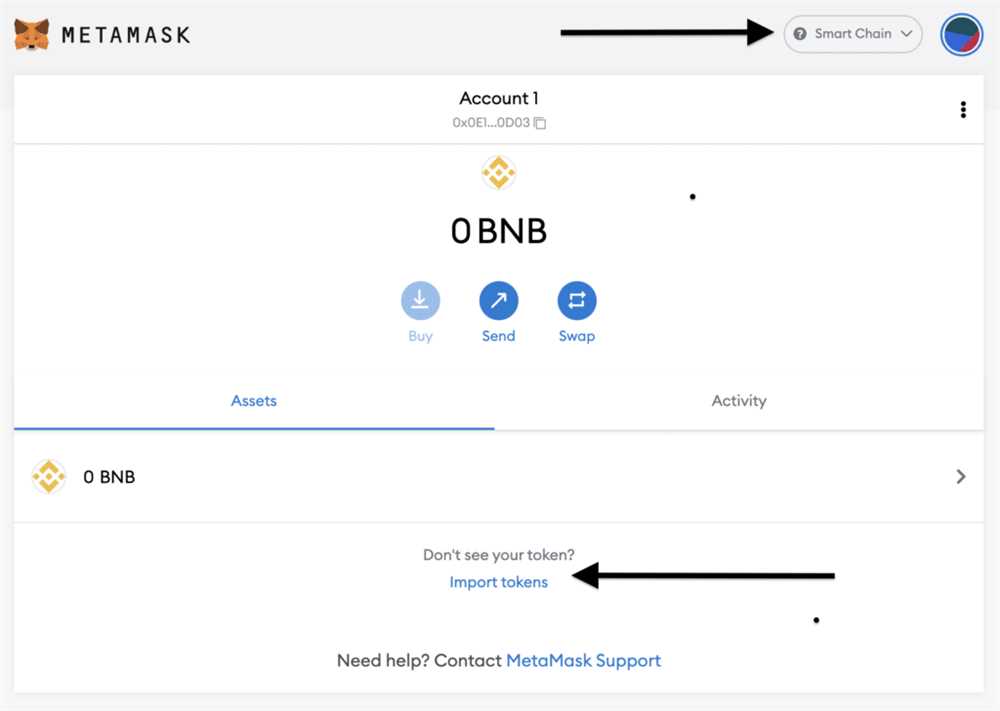
- Click on the Metamask extension icon in your browser’s toolbar to open the wallet.
- Click on the menu icon (three horizontal lines) in the top-right corner of the wallet.
- Select “Add Token” from the dropdown menu.
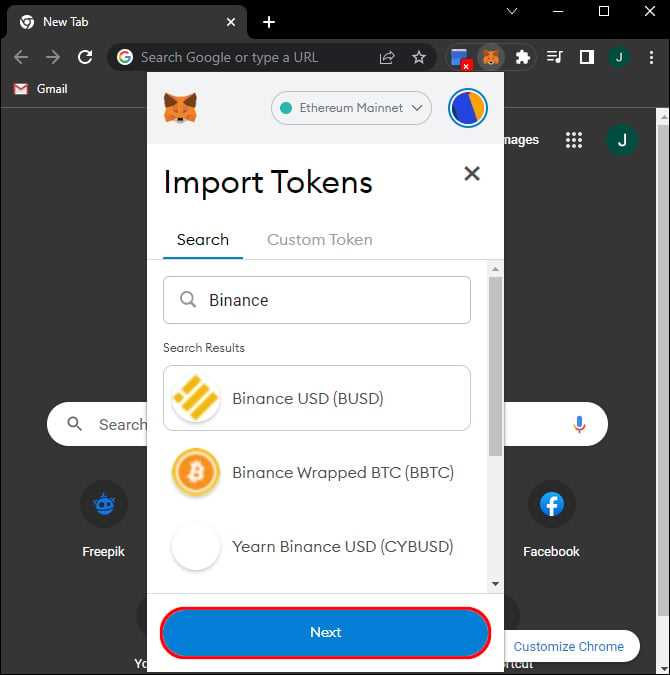
- Choose the “Custom Token” option.
- Enter the contract address of the token you want to import.
- The token’s symbol and decimals will be automatically filled in. If not, you can manually enter these details.
- Click on “Next”.
- Review the token details and click on “Add tokens” if everything looks correct.
- The token will now appear in your Metamask wallet under the “Assets” tab.
Note: Make sure you obtain the correct contract address from a reliable source, such as the token’s official website or a reputable token listing platform. Importing tokens with incorrect contract addresses may result in the loss of your tokens.
Tip: You can import multiple tokens by repeating the above steps for each token you want to add. This allows you to keep track of all your tokens in one place.
Now that you have successfully imported tokens into your Metamask wallet, you can start managing and trading them without leaving your wallet interface.
Keep in mind that while Metamask provides a convenient way to import and manage tokens, it is essential to exercise caution and do thorough research before adding any tokens to your wallet.
Step 4: Add custom token
After setting up your Metamask wallet and importing your accounts, it’s time to add a custom token to your wallet.
Adding a custom token allows you to view and manage tokens that are not listed by default on Metamask. To add a custom token:
- Click on the Metamask extension in your browser toolbar to open the wallet.
- Select the account you want to add the token to.
- Click on “Add Token” on the left side of the screen.
- A new window will appear where you can enter the token contract address.
- Enter the token contract address provided by the token issuer or copy it from a trusted source.
- Metamask will automatically populate the token symbol and decimal places fields based on the contract information.
- Click on “Next” to proceed.
- Review the token details and click on “Add Tokens” to confirm.
Once the custom token is added, you will be able to see your token balance and perform token-related operations directly from your Metamask wallet.
What is Metamask?
Metamask is a digital wallet that allows users to manage and interact with Ethereum decentralized applications (DApps) directly in their web browser.
How do I import tokens on Metamask?
To import tokens on Metamask, you first need to open your Metamask wallet and click on the “Add Token” button. Then, you will need to enter the token contract address, token symbol, and decimal places. Finally, click “Add” to import the tokens.