
Welcome to our comprehensive guide on how to send Ethereum from Coinbase to your Metamask wallet. Metamask is a popular browser extension wallet that allows you to safely store and manage your Ethereum and ERC-20 tokens. Coinbase, on the other hand, is a well-known cryptocurrency exchange where you can buy, sell, and trade cryptocurrencies including Ethereum.
Transferring Ethereum from Coinbase to Metamask is a straightforward process that requires a few simple steps. In this guide, we will walk you through each step, ensuring that you understand the process and can complete it successfully. By the end of this guide, you will be able to confidently send Ethereum from Coinbase to your Metamask wallet.
Before we begin, it is important to note that you will need to have both a Coinbase account and the Metamask extension installed in your browser. If you don’t have these set up yet, we recommend creating a Coinbase account and then installing the Metamask extension in your browser. Once you have everything ready, let’s dive into the step-by-step process of sending Ethereum from Coinbase to Metamask.
A Step-by-Step Guide to Sending Ethereum
Here is a step-by-step guide on how to send Ethereum from Coinbase to Metamask:
Step 1: Open your Coinbase account and log in.
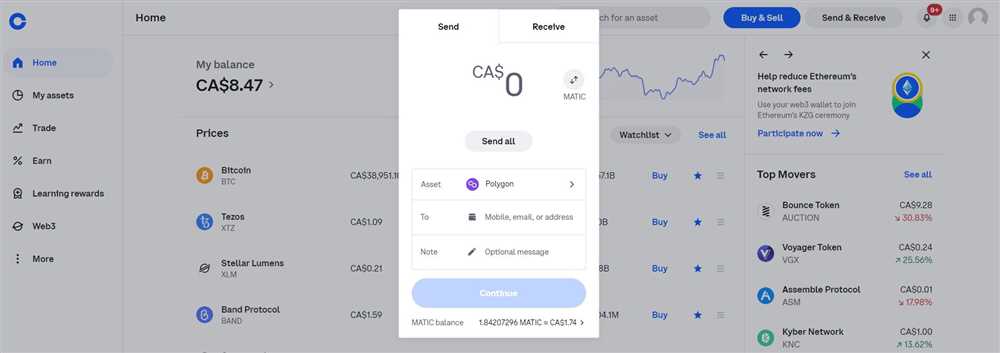
Step 2: Click on the “Send/Receive” button on the dashboard.
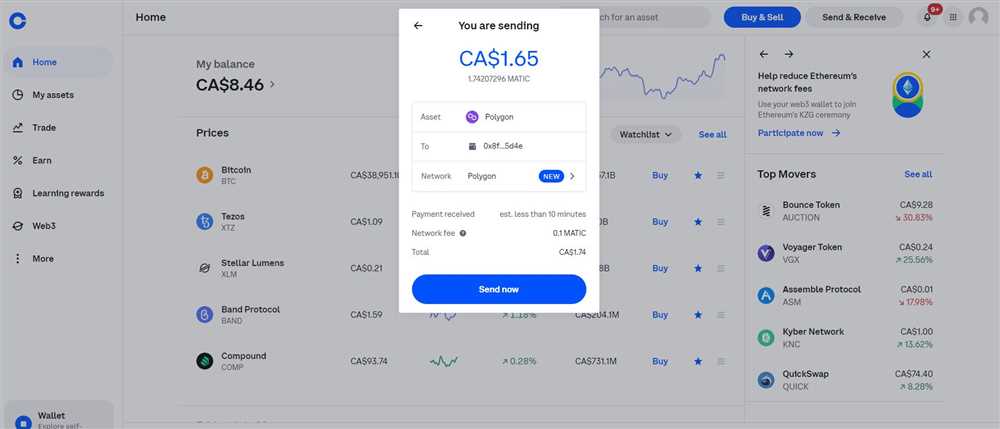
Step 3: Enter the recipient’s Ethereum address in the “Recipient” field. Make sure to double-check the address to avoid any mistakes.
Step 4: Enter the amount of Ethereum you want to send in the “Amount” field. You can either enter the amount in Ethereum or in your local currency, depending on your preference.
Step 5: Review all the details of your transaction, including the recipient’s address and the amount of Ethereum you are sending.
Step 6: Once you are satisfied with the details, click on the “Send” button to initiate the transaction.
Step 7: You will be asked to confirm the transaction. Review the details once again and click on the “Confirm” button to proceed.
Step 8: Wait for the transaction to be confirmed on the Ethereum network. This process may take a few minutes, depending on the network congestion.
Step 9: Once the transaction is confirmed, your Ethereum will be sent to the recipient’s Metamask wallet.
Step 10: You can check the status of your transaction by clicking on the “History” tab on Coinbase or by checking your transaction history on the Ethereum blockchain using a blockchain explorer like Etherscan.
That’s it! You have successfully sent Ethereum from Coinbase to Metamask following these step-by-step instructions.
Create a Coinbase Account
To send Ethereum from Coinbase to Metamask, you will need to have an account with Coinbase. Follow the steps below to create an account:
- Go to the Coinbase website at www.coinbase.com.
- Click on the “Get started” button to begin the registration process.
- Fill in your first name, last name, email address, and password in the registration form.
- Read and accept the terms of service and privacy policy.
- Verify your email address by clicking on the verification link sent to your inbox.
- Complete the identity verification process by providing the required documents and information.
- Once your account is verified, you will be able to access your Coinbase account.
It is important to note that Coinbase may require additional verification steps depending on your location and the amount of Ethereum you plan to send. Make sure to follow all the necessary steps to comply with their verification processes.
Set Up a Metamask Wallet

Before you can send Ethereum from Coinbase to Metamask, you first need to set up a Metamask wallet. Metamask is a popular Ethereum wallet that allows you to store, send, and receive Ethereum and other ERC-20 tokens.
Here’s how you can set up a Metamask wallet:
- Visit the Metamask website at https://metamask.io/ and click on the “Get Started” button.
- Choose the browser you are using (e.g., Chrome, Firefox) and click on the respective option.
- You will be redirected to the browser’s extension store, such as the Chrome Web Store.
- Click on the “Add to Chrome” button (or the equivalent for your browser).
- A pop-up window will appear. Click on the “Add extension” button.
- After the extension is installed, click on the Metamask icon in your browser’s toolbar.
- Click on the “Get Started” button.
- Create a new wallet by clicking on the “Create a Wallet” button.
- Read and accept the terms of use by checking the box and clicking on the “Continue” button.
- You will be presented with a random set of words. Write them down in the correct order and keep them in a safe place. This is your wallet’s recovery phrase, and it can be used to restore your wallet if needed.
- Confirm your recovery phrase by selecting the words in the correct order when prompted.
- Create a password for your wallet and click on the “Create” button.
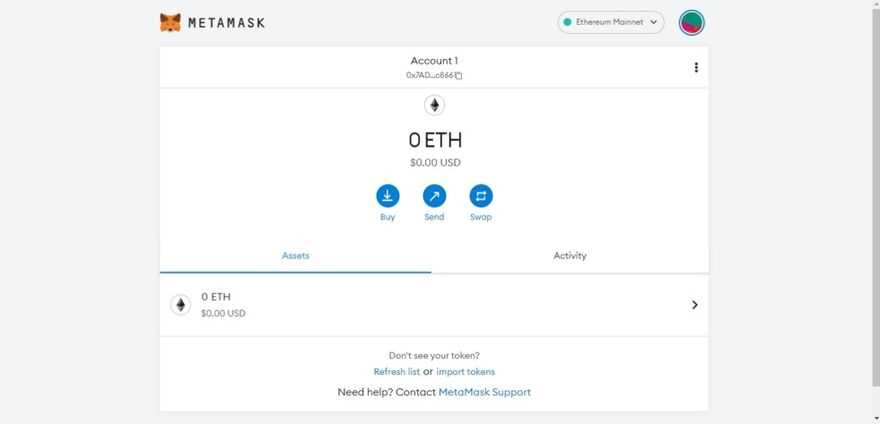
- Your Metamask wallet is now set up and ready to use!
Make sure to keep your wallet’s recovery phrase and password secure as anyone with access to this information can control your wallet.
Connect Coinbase to Metamask

To connect your Coinbase account to Metamask, follow these steps:
- Open your Metamask extension in your browser and click on the account avatar located in the top right corner.
- Select “Import Account” from the dropdown menu.
- A dialogue box will appear. Click on “Connect Coinbase Wallet”.
- You will be redirected to the Coinbase website where you can authorize the connection.
- Sign in to your Coinbase account using your credentials.
- Once logged in, you will be prompted to authorize Coinbase to connect with Metamask. Click on the “Connect” button.
After completing these steps, your Coinbase account will be connected to Metamask. You can now use your Coinbase wallet to send and receive Ethereum tokens seamlessly through Metamask.
Transfer Ethereum from Coinbase to Metamask
Metamask is a popular Ethereum wallet that allows you to store, manage, and interact with your Ethereum holdings. If you have Ethereum stored on Coinbase and want to transfer it to your Metamask wallet, follow the step-by-step guide below.
Step 1: Set up Metamask
If you haven’t already, install the Metamask extension for your web browser and create a new wallet. Make sure to securely back up your seed phrase in a safe place, as it’s the only way to restore your wallet if you lose access to your device.
Step 2: Get your Metamask wallet address
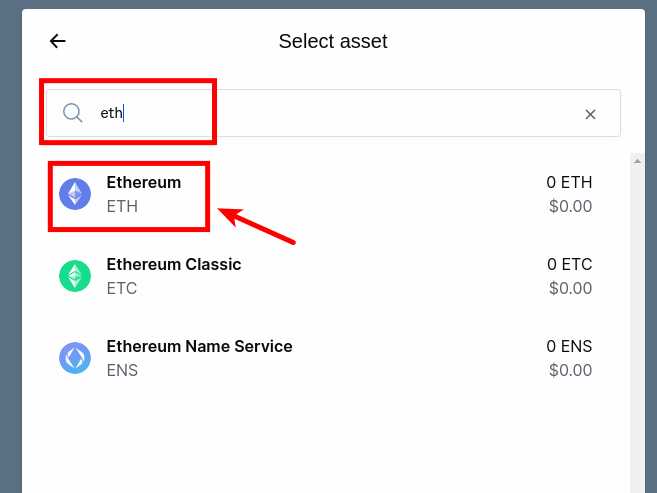
Once your Metamask wallet is set up, click on the extension icon in your browser and log in to your wallet. On the main screen, you will find your Ethereum wallet address, which looks something like this: 0x123456789abcdef123456789abcdef12345678. Copy this address to your clipboard.
Step 3: Withdraw Ethereum from Coinbase
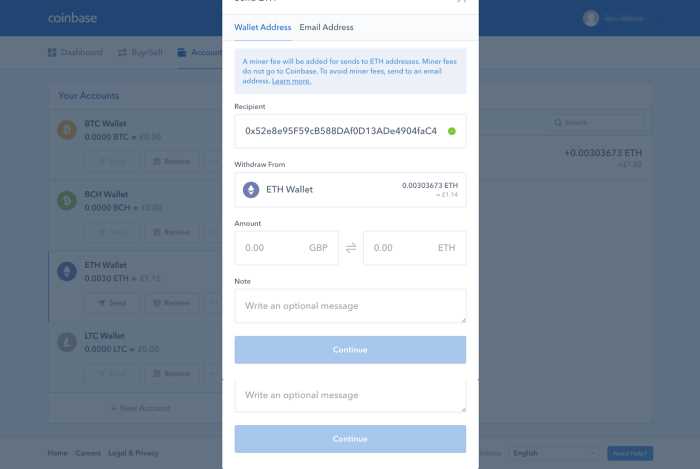
Go to Coinbase and log in to your account. Navigate to the “Accounts” tab and find your Ethereum wallet. Click on the “Send” button, which will open a new window where you can enter the recipient address.
Paste your Metamask wallet address in the recipient field. Make sure to double-check the address to ensure there are no mistakes.
Enter the amount of Ethereum you want to transfer to your Metamask wallet and review the transaction details. Once everything looks correct, click “Continue” to initiate the transfer.
Step 4: Confirm the transfer

On Coinbase, you will be prompted to confirm the transfer. Verify the details once again and click “Confirm” to proceed with the transfer. Coinbase may also require you to authenticate the transaction using two-factor authentication or other security measures.
After the transfer is confirmed, it may take a few minutes for the Ethereum to appear in your Metamask wallet. You can check the status of the transfer by clicking on the transaction hash on Coinbase or using an Ethereum blockchain explorer like Etherscan.
Once the Ethereum has been successfully transferred to your Metamask wallet, you can use it to interact with decentralized applications, participate in token sales, or simply hold it as an investment.
Remember to always exercise caution and double-check all details when sending cryptocurrencies to ensure they are going to the correct address.
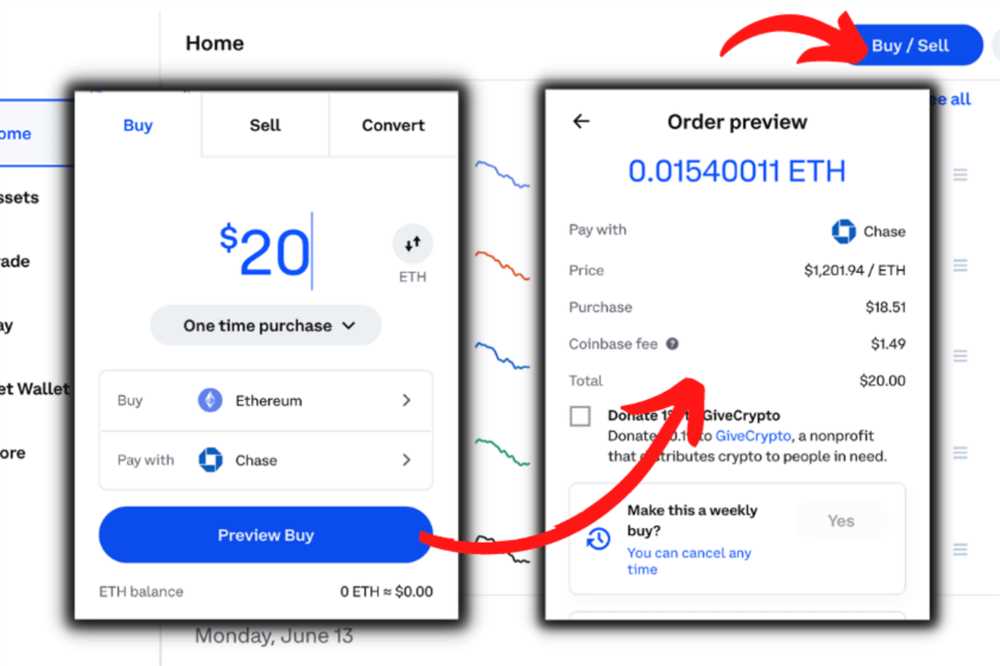
Note: This guide assumes you already have Ethereum in your Coinbase wallet. If not, you will need to purchase Ethereum on Coinbase before proceeding with the steps above.