
Welcome to the world of cryptocurrencies! If you’re interested in exploring the Tron network and its TRC20 tokens, you’ve come to the right place. In this article, we will guide you through the process of setting up and using a TRC20 wallet with MetaMask, one of the most popular and user-friendly wallets in the cryptocurrency world.
Before we dive into the details, let’s start with the basics. TRC20 is a technical standard used for implementing tokens on the Tron blockchain. These tokens can represent any digital or physical asset, and they can be transferred, traded, or stored in TRC20-compatible wallets. MetaMask, on the other hand, is a browser extension wallet that allows you to interact with the Tron network and manage your TRC20 tokens with ease.
Now that you understand the concept, let’s get started with the setup process. The first step is to install MetaMask on your preferred web browser. You can find the MetaMask extension in the Chrome Web Store or the Firefox Add-ons Marketplace. Once installed, you will need to create a new wallet or import an existing one. Make sure to keep your seed phrase and password in a safe place, as they are crucial for accessing your wallet in the future.
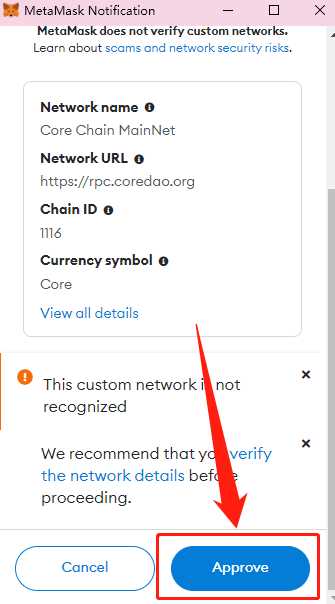
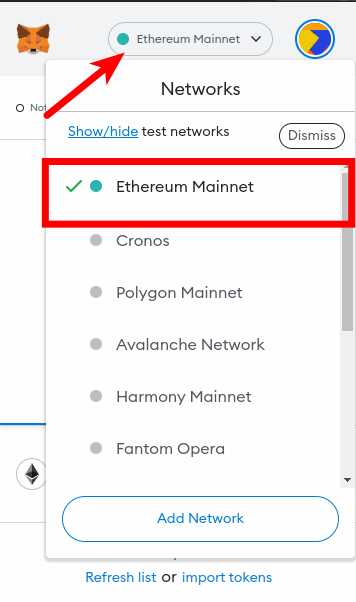
After setting up your wallet, it’s time to connect it to the Tron network. Open MetaMask, click on the network selection dropdown, and choose the “Custom RPC” option. In the network details, enter the following information:
Network Name: Tron
New RPC URL: https://api.trongrid.io/
Chain ID: 1
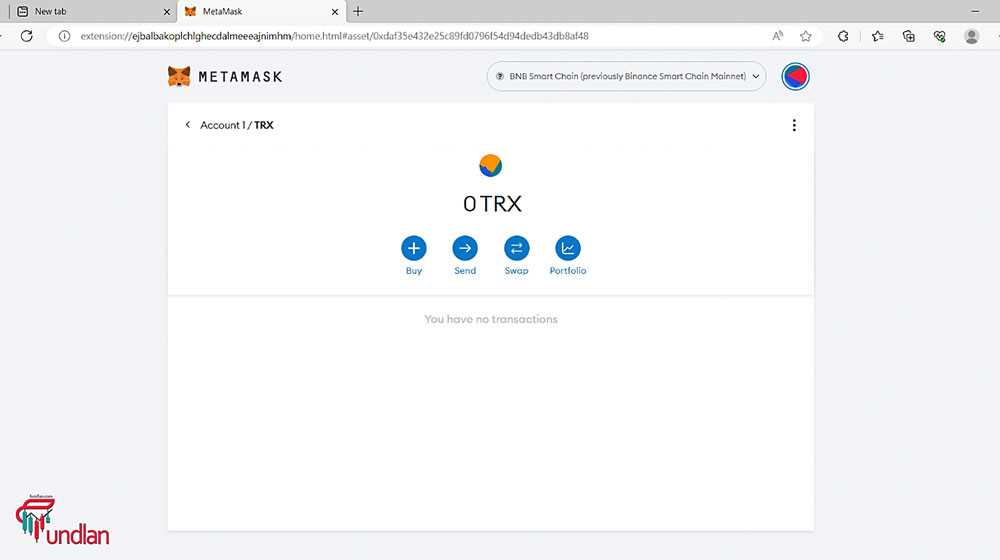
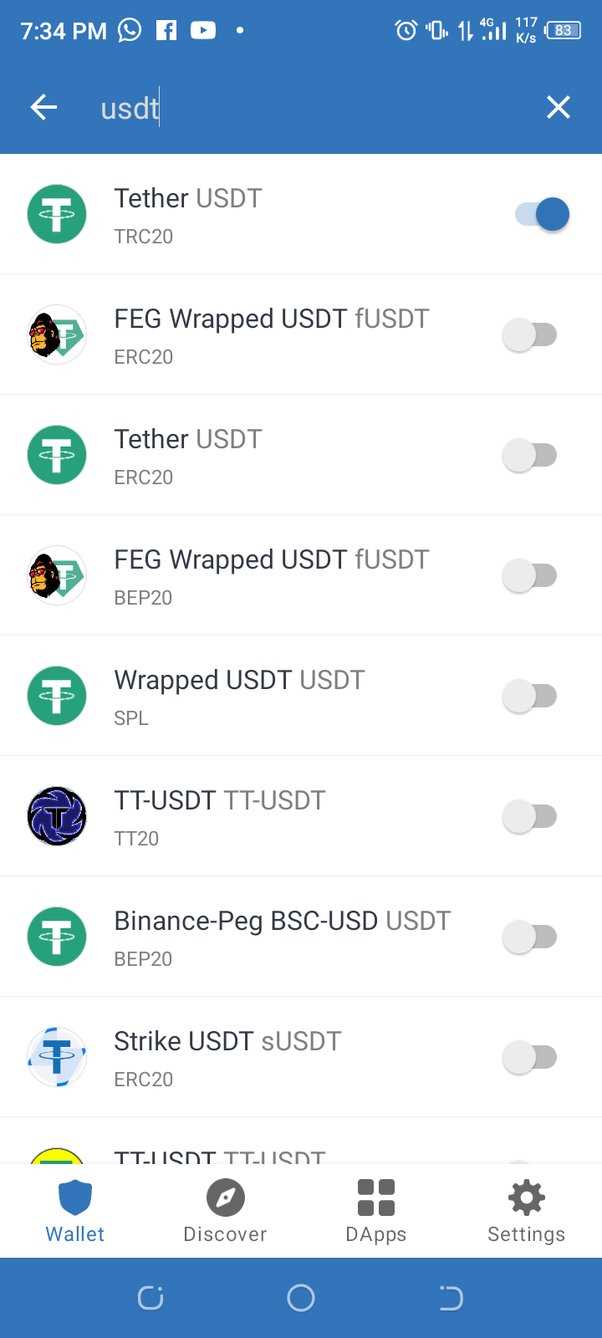
Save the changes, and you’re now connected to the Tron network through MetaMask. The next step is to add a TRC20 token to your wallet. To do this, click on the “Add Token” button in the MetaMask interface, and enter the token contract address, symbol, and decimal places. Once added, you will be able to see your TRC20 tokens in your wallet and perform various actions with them.
Congratulations! You have successfully set up and configured a TRC20 wallet with MetaMask. Now you can explore the Tron network, interact with decentralized applications, and manage your TRC20 tokens with ease. Remember to always stay vigilant and keep your wallet credentials secure to ensure a safe and enjoyable crypto journey.
What is a TRC20 Wallet?
A TRC20 wallet is a type of digital wallet that supports the TRC20 token standard on the TRON blockchain. TRC20 is a technical standard used for smart contracts on the TRON network, which is similar to the ERC20 standard used on the Ethereum blockchain.
With a TRC20 wallet, you can store, send, and receive TRC20 tokens. These tokens are created and managed through smart contracts on the TRON blockchain. They can represent various types of digital assets, such as cryptocurrencies, utility tokens, or even virtual goods.
One popular TRC20 token is TRON (TRX), the native cryptocurrency of the TRON blockchain. However, there are many other TRC20 tokens available, each with its own unique features and use cases.
To use a TRC20 wallet, you typically need to set it up and connect it with the TRON network. This allows you to interact with smart contracts and manage your TRC20 tokens securely. One commonly used wallet for this purpose is MetaMask, which is a browser extension compatible with popular web browsers like Chrome and Firefox.
Overall, a TRC20 wallet is an essential tool for anyone looking to participate in the TRON ecosystem and make use of TRC20 tokens. Whether you are a trader, investor, or developer, having a TRC20 wallet gives you the ability to store and transact with these tokens easily and effectively.
Learn about the benefits and features of TRC20 wallets
TRC20 wallets are specifically designed to handle tokens on the TRON blockchain. They come with a range of benefits and features that make them a popular choice for users of TRON-based tokens. Here are some key benefits and features of TRC20 wallets:
- Compatibility: TRC20 wallets are compatible with any TRC20 token, which means you can easily store, send, and receive any token built on the TRON blockchain.
- Security: TRC20 wallets offer high-level security measures, including encryption and password protection, to ensure the safety of your tokens and private keys.
- Convenience: With a TRC20 wallet, you can access your tokens anytime, anywhere, as long as you have an internet connection. This allows for easy management and quick transactions.
- Decentralization: TRC20 wallets are decentralized, meaning that you have full control over your tokens and transactions. There is no central authority governing your funds.
- Token management: TRC20 wallets provide features to manage your tokens, such as viewing your token balance, transaction history, and the ability to import/export tokens.
- Interaction with DApps: TRC20 wallets are compatible with decentralized applications (DApps) built on the TRON blockchain. This allows you to use your TRC20 tokens for various purposes within the TRON ecosystem.
- Community support: TRC20 wallets are backed by a vibrant community of developers and users who provide support and guidance for wallet usage and troubleshooting.
Overall, TRC20 wallets offer a secure and convenient way to manage and interact with tokens on the TRON blockchain. Whether you are a token holder or an active participant in the TRON ecosystem, having a TRC20 wallet is essential for seamless token transactions and engagement with DApps.
Setting Up Your TRC20 Wallet
Before you can start using a TRC20 wallet with MetaMask, you need to set it up and connect it to your MetaMask account. Follow these steps to get started:
Create a New Wallet
If you don’t have a TRC20 wallet, you’ll need to create one first. There are several options available, but one of the most popular and secure options is the TronLink wallet. Visit the TronLink website and download the wallet for your preferred browser.
Once the wallet is downloaded, follow the installation instructions to add it as an extension to your browser. Once installed, you’ll be prompted to create a new wallet. Choose a strong password and securely backup your wallet mnemonic. This mnemonic is extremely important and should be kept safe as it can be used to access your wallet if needed.
Connect Your Wallet to MetaMask
Once your TRC20 wallet is set up, you’ll need to connect it to your MetaMask account. First, ensure that you have the MetaMask extension installed on your browser.
On the MetaMask extension, click on the account icon and select “Add Account.” Choose the option to import an account using the wallet’s mnemonic phrase. Enter the mnemonic phrase from your TRC20 wallet and set a strong password for your MetaMask account.
After you’ve imported your account, you’ll see it listed in your MetaMask accounts. You can switch between your different accounts by clicking on the account icon and selecting the desired account.
With your TRC20 wallet connected to MetaMask, you can now start using it to interact with TRC20 tokens and decentralized applications (dApps) on the Tron network. Make sure to keep your wallet and MetaMask account secure and backup your wallet mnemonic phrase regularly.
Note: It’s always recommended to do thorough research and follow best practices when it comes to handling cryptocurrencies and wallets. Keep updated with the latest security measures and stay vigilant to protect your assets.
Step-by-step guide on how to create a TRC20 wallet with MetaMask
Step 1: Install MetaMask
First, you need to install the MetaMask extension on your browser. MetaMask is available for Chrome, Firefox, and Brave. Go to the respective browser’s extension store and search for “MetaMask” to download and install the extension.
Step 2: Set up a new wallet
Once you have installed MetaMask, click on the extension icon in your browser’s toolbar to launch it. A welcome screen will appear, and you can click on the “Get Started” button. On the next screen, choose the option to “Create a Wallet” and then click on “Next”.
Step 3: Create a strong password
Create a strong and secure password for your MetaMask wallet. Make sure your password is unique and something that you can remember. Enter the password in the provided field and click on “Next” when you are done.
Step 4: Backup your wallet
MetaMask will then show you a secret backup phrase consisting of 12 words. It is very important that you write down this backup phrase and keep it safe. This backup phrase can be used to restore your wallet if you ever lose access to your account. Click on “Next” after you have written down the backup phrase.
Step 5: Confirm your backup phrase
To ensure that you have correctly written down the backup phrase, MetaMask will ask you to select the words in the correct order. Click on each word in the correct order until you have completed the confirmation process.
Step 6: Unlock your wallet
After confirming your backup phrase, you will be prompted to unlock your wallet. Enter your password and click on “Unlock”. You have now successfully created a TRC20 wallet with MetaMask!
Step 7: Connect to the TRON network
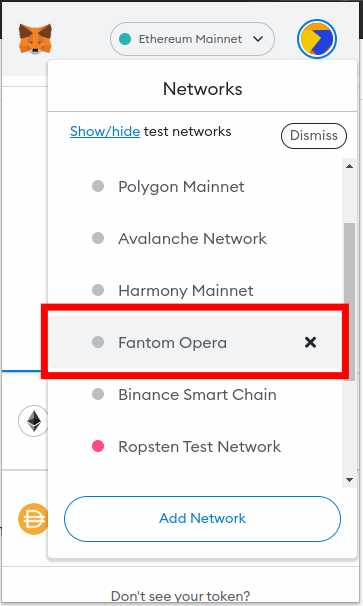
In order to use your TRC20 wallet with MetaMask, you need to connect it to the TRON network. Click on the network dropdown in the top center of the MetaMask extension and select “Custom RPC”.
Step 8: Add the TRON RPC URL
In the “New RPC URL” field, enter the following TRON RPC URL: https://api.trongrid.io/. Once you have entered the URL, click on “Save” to connect your MetaMask wallet to the TRON network.
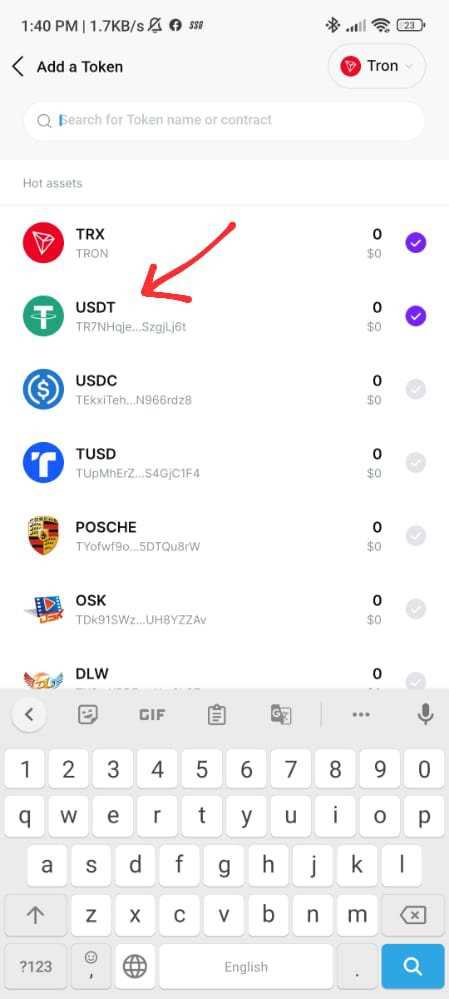
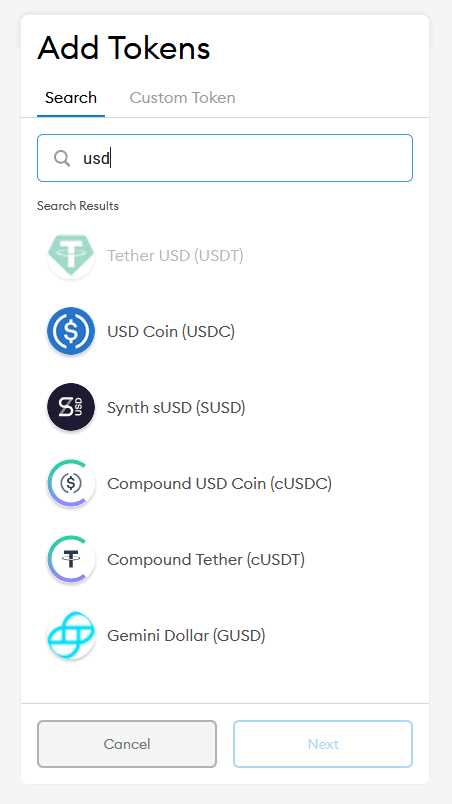
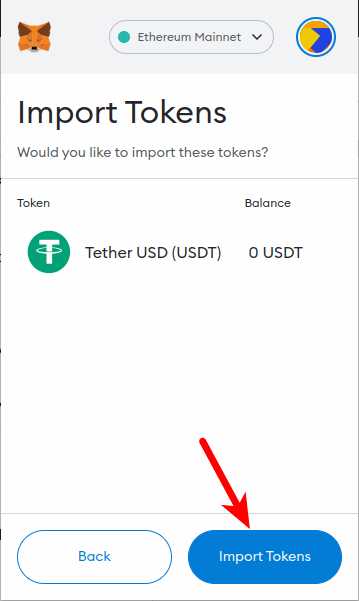
Step 9: Import your TRC20 tokens
To import your TRC20 tokens into your MetaMask wallet, click on the “Add Token” button and enter the contract address of the token you want to import. Make sure to double-check the contract address to ensure accuracy. Once you have entered the contract address, click on “Next” and follow the on-screen instructions to complete the token import process.
Step 10: Start using your TRC20 wallet
You can now start using your TRC20 wallet with MetaMask. You can send and receive TRC20 tokens, participate in decentralized applications (DApps) built on the TRON network, and explore the TRON ecosystem. Make sure to keep your wallet and backup phrase safe to protect your funds and assets.
Importing Your TRC20 Wallet
To import your TRC20 wallet into MetaMask, follow these steps:
Step 1: Access the MetaMask Extension
If you haven’t already, download and install the MetaMask browser extension for your preferred web browser.
Step 2: Create a New Wallet or Import an Existing Wallet
Once MetaMask is installed, click on the extension icon in your browser toolbar and select “Get Started”. You can either create a new wallet or import an existing wallet using your recovery phrase or key file.
Step 3: Import Your TRC20 Wallet
To import your TRC20 wallet, click on the account icon in the top right corner of the MetaMask popup and select “Import Account”.
Enter the private key or recovery phrase for your TRC20 wallet and click “Import”. MetaMask will import your TRC20 wallet into the app.
Note: Importing your TRC20 wallet will not transfer any funds from your wallet, it simply allows you to manage your TRC20 tokens within MetaMask.
Congratulations! You have successfully imported your TRC20 wallet into MetaMask. You can now use MetaMask to send, receive, and manage your TRC20 tokens.
Import an existing TRC20 wallet into MetaMask
If you have an existing TRC20 wallet that you’d like to use with MetaMask, you can easily import it into the extension. Follow the steps below:
Step 1: Open MetaMask Extension
Start by opening the MetaMask extension in your browser. If you don’t have it installed, you can download and install it from the official MetaMask website.
Step 2: Access Wallet Settings
Once you have the MetaMask extension open, click the account icon in the top right corner of the screen. From the dropdown menu, select “Settings”.
Step 3: Import Wallet
In the settings menu, you’ll see an option called “Import Wallet”. Click on it to proceed with the wallet import process.
Step 4: Choose Import Method
Next, you’ll be prompted to select an import method. Since you have a TRC20 wallet, choose the option “Import using seed phrase” if you have the seed phrase, or “Import using private key” if you have the private key.
Step 5: Enter Seed Phrase or Private Key
Enter the seed phrase or private key associated with your existing TRC20 wallet into the designated input field. Make sure to double-check your input to avoid any mistakes.
Step 6: Set Password
After entering the seed phrase or private key, you’ll need to set a password for your imported TRC20 wallet within MetaMask. Choose a strong, unique password that you can remember, but others cannot easily guess.
Once you’ve completed these steps, your existing TRC20 wallet will be successfully imported into MetaMask. You can now use your TRC20 wallet within the extension to interact with TRC20 tokens and DApps on the TRON network.
Using Your TRC20 Wallet
Once you have successfully set up your TRC20 wallet with MetaMask, you can start using it to interact with TRC20 tokens and the TRON network. Here are a few key steps to get you started:
- Make sure you have some TRC20 tokens in your wallet. If you don’t have any, you can obtain them through an exchange or by participating in a token sale.
- To receive TRC20 tokens, you will need to provide your wallet address to the sender. Your wallet address can be found in the MetaMask extension by clicking on the account icon and selecting “Copy Address”.
- To send TRC20 tokens, click on the “Send” button in MetaMask. Enter the recipient’s wallet address and the amount of tokens you want to send. Double-check the address to ensure it is correct before confirming the transaction.
- You can view your past transactions by clicking on the “Activity” tab in MetaMask. This will show you a list of all the transactions associated with your wallet.
- Remember to keep your private key secure and never share it with anyone. Your private key is essentially the key to your wallet and should be treated with the utmost care.
Using a TRC20 wallet with MetaMask allows you to easily manage your TRC20 tokens and interact with the TRON network. Whether you want to send or receive tokens, view transaction history, or participate in decentralized applications, MetaMask provides a user-friendly interface to facilitate these actions.
| Key Features of a TRC20 Wallet with MetaMask |
|---|
| Easy token management |
| Secure storage of private keys |
| Ability to interact with TRON decentralized applications |
| Transaction history |
By following these steps and utilizing the features of your TRC20 wallet with MetaMask, you can fully leverage the capabilities of the TRC20 protocol and the TRON network.
What is a TRC20 wallet?
A TRC20 wallet is a type of cryptocurrency wallet that supports tokens created on the TRC20 protocol, which is used by the Tron blockchain. It allows users to store and manage their TRC20 tokens.
Can I use MetaMask as a TRC20 wallet?
Yes, you can use MetaMask as a TRC20 wallet. MetaMask is primarily known as an Ethereum wallet, but it also has support for the TRON network, which means you can manage your TRC20 tokens using MetaMask.
How do I set up a TRC20 wallet with MetaMask?
To set up a TRC20 wallet with MetaMask, you first need to install the MetaMask browser extension. Then, click on the MetaMask icon in your browser toolbar and follow the prompts to create a new wallet. Once your wallet is set up, you can add the TRON network by clicking on the network selection dropdown and choosing “Custom RPC”. Enter the TRON network details and save the changes. Your MetaMask wallet is now ready to be used as a TRC20 wallet.
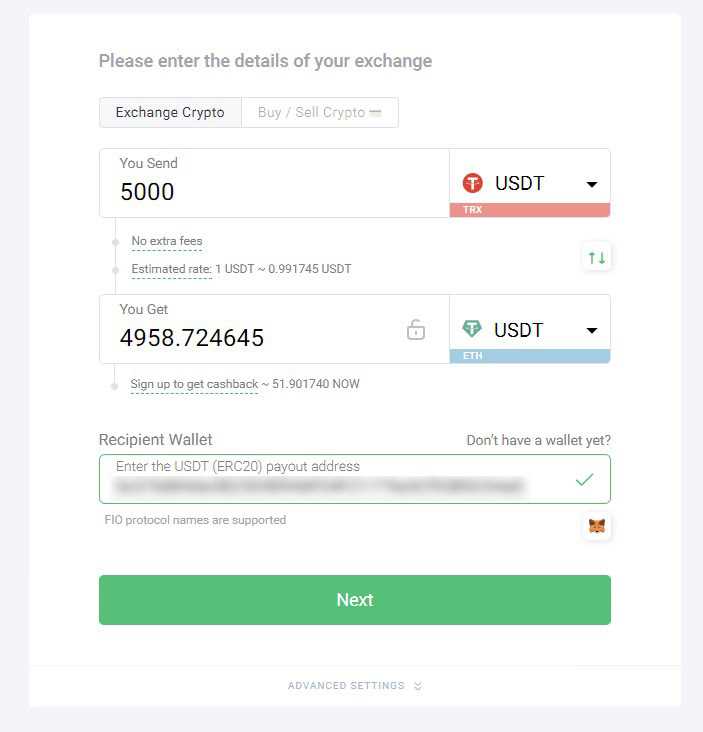
Can I transfer TRC20 tokens to my MetaMask wallet?
Yes, you can transfer TRC20 tokens to your MetaMask wallet. To do this, you need to find your wallet address in MetaMask and provide it to the sender of the tokens. Make sure to select the TRON network in MetaMask before receiving the tokens, as TRC20 tokens are specific to the TRON network. Once you receive the tokens, they will show up in your MetaMask wallet.