
If you’re new to the world of cryptocurrency and decentralized finance, you may have heard about Avalanche (AVAX) and Metamask. Avalanche is a cutting-edge blockchain platform that aims to provide scalability, speed, and a wide range of financial tools. On the other hand, Metamask is a popular cryptocurrency wallet and browser extension that allows users to manage their digital assets securely.
Now, you may be wondering how to send AVAX to Metamask. Well, you’re in the right place! In this step-by-step guide, we’ll walk you through the process of sending AVAX tokens to Metamask in a few simple steps.
Step 1: Access your Metamask Wallet
To begin, make sure you have Metamask installed and set up on your browser. If you don’t have Metamask installed, you can easily download and install it from the official Metamask website.
Once you have Metamask installed, open your browser and click on the Metamask extension icon. Enter your password or seed phrase to access your Metamask wallet. Make sure you are connected to the appropriate network, such as the Avalanche Mainnet or the Avalanche Testnet, depending on your needs.
Step 2: Obtain your AVAX Address
Next, you’ll need to obtain your AVAX address. In your Metamask wallet, click on the “…” menu next to your account name, and then select “Copy Address to Clipboard.” This will copy your AVAX address to your clipboard, which you’ll need in the next step.
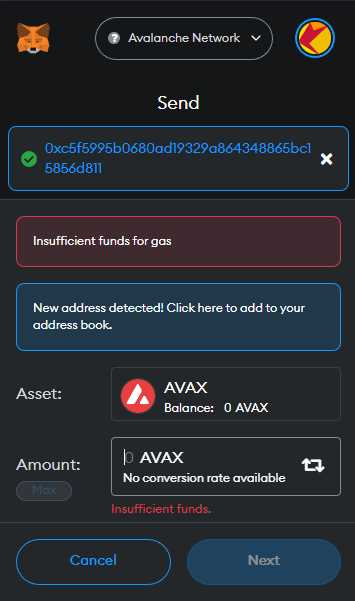
Step 3: Send AVAX to Metamask
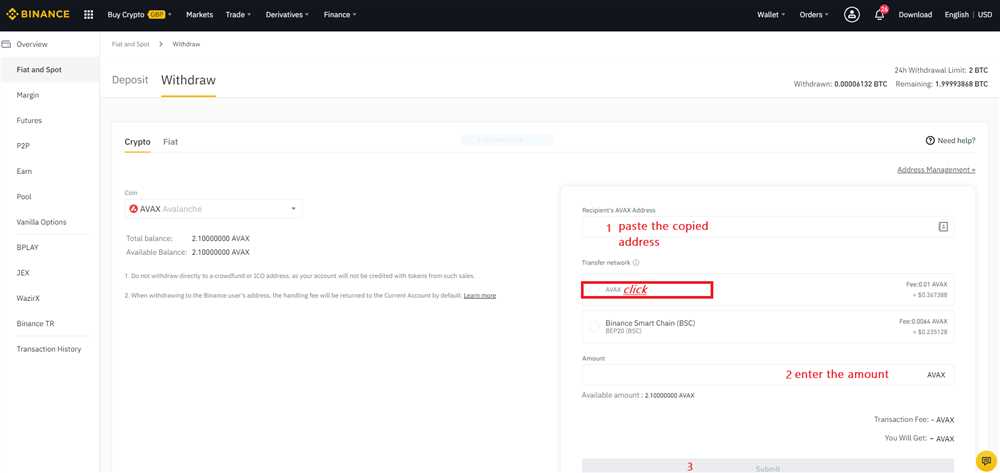
Now that you have your AVAX address, navigate to the platform or exchange where your AVAX tokens are stored. Find the option to withdraw or send AVAX tokens, and paste your Metamask AVAX address in the appropriate field. Double-check the address to ensure its accuracy, as sending AVAX to the wrong address can result in permanent loss of funds.
Specify the amount of AVAX you wish to send to Metamask and complete the transaction. Depending on the platform or exchange you use, you may need to pay network fees for the transaction to be processed.
Step 4: Verify the Transaction
After your transaction is processed, you can verify its status by checking your Metamask wallet. Click on the “Activity” tab in your Metamask wallet to view the transaction details, including the amount sent and the transaction confirmation status.
Congratulations! You have successfully sent AVAX tokens to your Metamask wallet. You can now use your AVAX tokens for various purposes, such as participating in decentralized finance protocols or simply holding them as an investment.
Note: Always exercise caution when sending and receiving cryptocurrency. Double-check addresses, be aware of potential scams, and ensure the security of your Metamask wallet.
Setting Up Avalanche Network on Metamask
To send AVAX to Metamask, you first need to set up the Avalanche network on your Metamask wallet. Here’s a step-by-step guide on how to do it:
Step 1: Install Metamask Extension
If you haven’t already, install the Metamask browser extension on your preferred web browser. Metamask is available for Google Chrome, Mozilla Firefox, Brave, and Microsoft Edge.
Step 2: Create or Import a Wallet
Once Metamask is installed, click on the extension icon and create a new wallet or import an existing one. Follow the instructions to set up your wallet and create a strong password.
Step 3: Switch to Avalanche Network
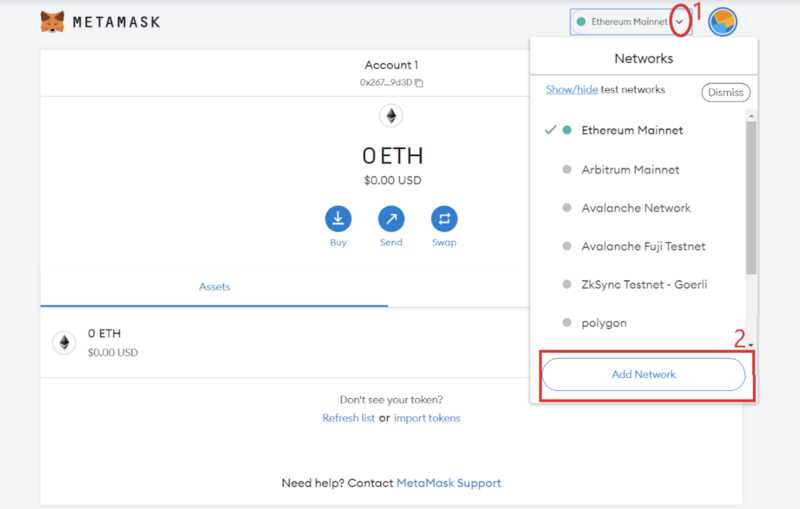
After creating or importing your wallet, click on the network dropdown at the top of the Metamask extension. Scroll down and select “Custom RPC.”
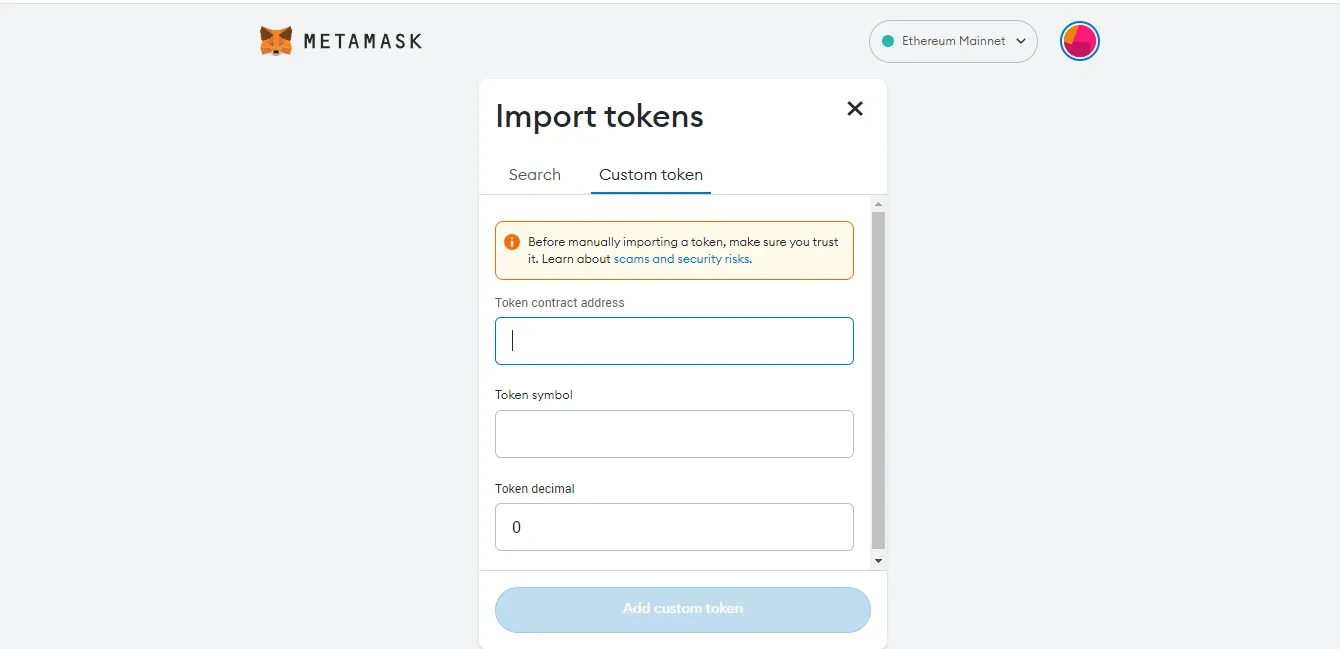
Enter the following details:
- Network Name: Avalanche
- New RPC URL: https://api.avax.network/ext/bc/C/rpc
- Chain ID: 43114
- Symbol: AVAX
- Block Explorer URL: https://cchain.explorer.avax.network/
Click “Save” to switch to the Avalanche network.
Step 4: Check Network Connection
Ensure that Metamask is now connected to the Avalanche network. The network dropdown at the top of the extension should display “Avalanche”.
Additionally, you can check the network details by clicking on the network dropdown and selecting “Avalanche.” This will show you information about the network, such as block height and gas price.
Now that you have successfully set up the Avalanche network on Metamask, you can proceed to send AVAX to your Metamask wallet or perform other transactions on the Avalanche network.
Connecting Metamask to Avalanche Wallet
Metamask is a popular cryptocurrency wallet that allows you to easily manage your digital assets. If you’re looking to send AVAX to your Metamask wallet, you’ll first need to connect it to the Avalanche network. Here’s a step-by-step guide on how to do that:
-
Make sure you have the latest version of Metamask installed on your browser.
-
Open Metamask and click on the network dropdown at the top of the screen. Choose “Custom RPC”.
-
In the “New RPC URL” field, enter the Avalanche network’s endpoint URL: “https://api.avax.network/ext/bc/C/rpc”.
-
In the “Chain ID” field, enter the Avalanche chain ID: 43114 (or 0x2B896).
-
Click on “Save” to add the Avalanche network to Metamask.
-
You should now see the Avalanche network listed in the network dropdown. Select it to switch your wallet to the Avalanche network.
-
Once you’ve connected Metamask to the Avalanche network, you can now send AVAX to your Metamask wallet. You can do this by copying your Metamask wallet address and using it as the recipient address when sending AVAX from another wallet or exchange.
With Metamask connected to the Avalanche network, you’ll be able to easily manage your AVAX assets and interact with decentralized applications (dApps) on Avalanche. Make sure to double-check the recipient address when sending AVAX and always exercise caution when dealing with cryptocurrency.
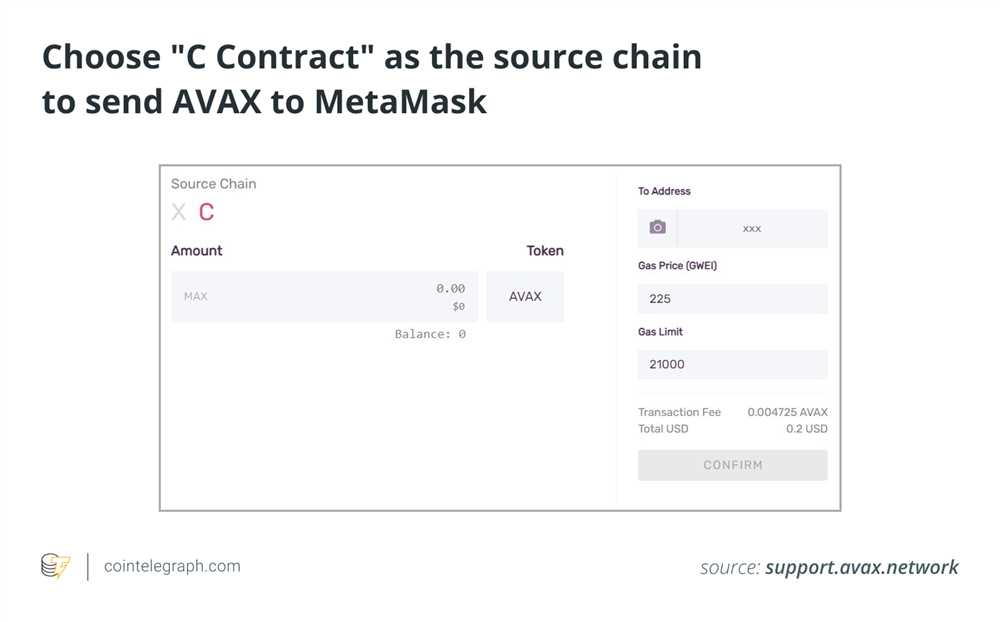
Sending AVAX from Avalanche Wallet to Metamask

If you have AVAX tokens in your Avalanche Wallet and want to transfer them to your Metamask wallet, follow these steps:
- Open your Avalanche Wallet and make sure you are connected to the Avalanche Mainnet.
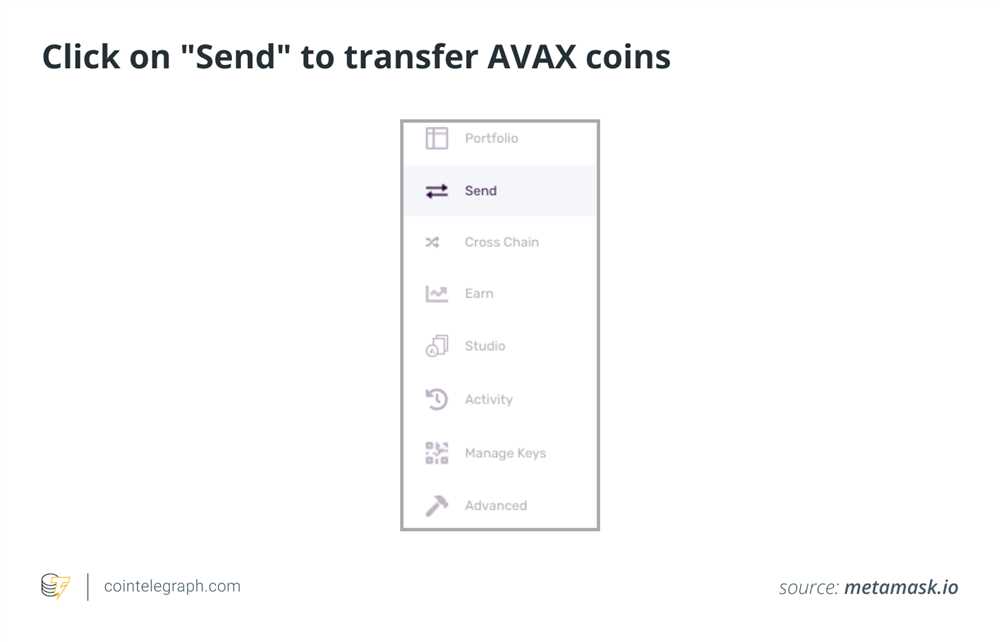
- Click on the “Send” button in your Avalanche Wallet to initiate a transaction.
- In the “To” field, enter your Metamask wallet address where you want to send the AVAX tokens.
- Specify the amount of AVAX tokens you want to send.
- Review the transaction details and make sure everything is correct.
- Click on the “Send” or “Confirm” button to finalize the transaction.
- Wait for the transaction to be confirmed on the Avalanche network.
- Once the transaction is confirmed, the AVAX tokens will be sent from your Avalanche Wallet to your Metamask wallet.
Please note that sending AVAX tokens from the Avalanche Wallet to the Metamask wallet may require a small transaction fee.
Make sure you double-check the recipient’s address to avoid any loss of funds.
By following these simple steps, you can easily send AVAX tokens from your Avalanche Wallet to your Metamask wallet and have them available for use in the Ethereum ecosystem.
Verifying Reception of AVAX on Metamask
After successfully sending AVAX to your Metamask wallet, you can verify that the transaction was successful and confirm that your AVAX balance has been updated.
Here are the steps to verify the reception of AVAX on Metamask:
Step 1: Open Metamask
Open the Metamask extension in your web browser and make sure you are logged in with your wallet address.
Step 2: Click on the Metamask Icon
Click on the Metamask icon in the top right corner of your browser window to open the Metamask interface.
Step 3: Select “Assets”
In the Metamask interface, click on the “Assets” tab in the navigation menu at the top.
Step 4: Check AVAX Balance
In the “Assets” tab, you will see a list of all the tokens in your Metamask wallet. Look for AVAX in the list and check the balance to verify that the AVAX has been successfully received.
Step 5: View Transaction Details
To view the transaction details of the AVAX reception, click on the three dots (…) next to the transaction in the transaction history. You will be able to see the transaction hash, block number, and other relevant information.
Step 6: Verify on the Avalanche Explorer
If you want to further verify the reception of AVAX on your Metamask wallet, you can use the Avalanche Explorer. Copy the transaction hash from step 5 and paste it into the search bar on the Avalanche Explorer to view the transaction details on the Avalanche network.
By following these steps, you can easily verify the reception of AVAX on your Metamask wallet and ensure that your balance has been updated correctly.
| Step | Description |
|---|---|
| Step 1 | Open Metamask |
| Step 2 | Click on the Metamask Icon |
| Step 3 | Select “Assets” |
| Step 4 | Check AVAX Balance |
| Step 5 | View Transaction Details |
| Step 6 | Verify on the Avalanche Explorer |
What is AVAX?
AVAX is the native cryptocurrency of the Avalanche network. It is used for various purposes, including paying for transaction fees, participating in consensus, and securing the network.
What is Metamask?
Metamask is a popular cryptocurrency wallet and browser extension that allows users to store, manage, and interact with their cryptocurrencies and decentralized applications (dApps) on the Ethereum network.
Are there any fees associated with sending AVAX to Metamask?
Yes, there are fees associated with sending AVAX to Metamask. These fees are used to incentivize network validators and ensure the security and efficiency of the Avalanche network. The fee amount may vary depending on network demand and the size of your transaction.
Is it safe to send AVAX to Metamask?
Yes, it is generally safe to send AVAX to Metamask as long as you ensure the accuracy of the recipient address and use trusted wallets and platforms. However, it is always recommended to double-check the recipient address and be cautious of potential phishing attempts or scams. It’s also important to keep your Metamask wallet seed phrase and private keys secure to protect your funds.