
If you are new to the world of cryptocurrency and decentralized finance, you may be wondering how to add money to your Metamask wallet. Metamask is a popular web3 wallet that allows you to securely store and manage your digital assets, such as Ethereum and ERC-20 tokens. Adding money to your Metamask wallet is a simple process that involves a few easy steps.
Step 1: Install and set up Metamask
Before you can add money to your Metamask wallet, you need to install the Metamask extension on your web browser. Once installed, follow the on-screen prompts to create a new wallet or import an existing one. Make sure to securely store your seed phrase, as it is needed to recover your wallet if you ever lose access to it.
Step 2: Transfer funds to your Metamask wallet address
After setting up your Metamask wallet, you will be provided with a unique wallet address. To add money to your wallet, you need to transfer funds from another wallet or exchange to this address. Copy your Metamask wallet address and paste it into the recipient field of the wallet or exchange you are sending funds from. Double-check the address to ensure it is correct, as sending funds to the wrong address may result in permanent loss.
Step 3: Confirm the transaction
Once you have initiated the transfer, you need to wait for the transaction to be confirmed on the blockchain. This may take a few minutes or longer, depending on the network congestion and the transaction fee you have chosen. You can track the progress of your transaction by clicking on the transaction hash in your Metamask wallet.
Step 4: Check your Metamask wallet balance
After the transaction is confirmed, you can check your Metamask wallet balance to see if the funds have been successfully added. Open your Metamask wallet and navigate to the “Assets” tab to view the list of tokens and their corresponding balances. If you do not see the funds immediately, you may need to add the token manually by clicking on the “Add Token” button and entering the token’s contract address.
Adding money to your Metamask wallet is an essential step in getting started with cryptocurrency and decentralized finance. By following these simple steps, you can securely store and manage your digital assets, and participate in the exciting world of blockchain technology.
What is Metamask and why do you need it?
Metamask is a cryptocurrency wallet that allows users to securely store, manage, and interact with decentralized applications (dApps) on the Ethereum blockchain. It is available as a browser extension for popular browsers like Chrome, Firefox, and Brave.
With Metamask, users can easily send and receive Ethereum and other digital assets, as well as participate in token sales and decentralized finance (DeFi) platforms. It acts as a bridge between users and the Ethereum network, providing a user-friendly interface and enhanced security features.
One of the main reasons why you need Metamask is to access and interact with various dApps on the Ethereum network. Many decentralized applications require users to have a wallet like Metamask in order to connect and authenticate transactions. By using Metamask, you can access a wide range of decentralized finance applications, decentralized exchanges, NFT platforms, and more.
Key Features of Metamask:
- Secure Wallet: Metamask uses encryption to securely store private keys and provide a user-friendly interface for managing cryptocurrencies.
- Easy Ethereum Transactions: With Metamask, you can easily send and receive Ethereum and other ERC-20 tokens without the need for a separate wallet.
- Connect with dApps: Metamask allows you to seamlessly connect with decentralized applications on the Ethereum network, enabling you to use and interact with various blockchain-based services.
- Token Swapping: Metamask integrates with decentralized exchanges (DEXs) like Uniswap, allowing you to swap tokens directly within the wallet.
- DeFi Access: By using Metamask, you can access decentralized finance platforms and services, such as lending and borrowing, yield farming, and liquidity pools.
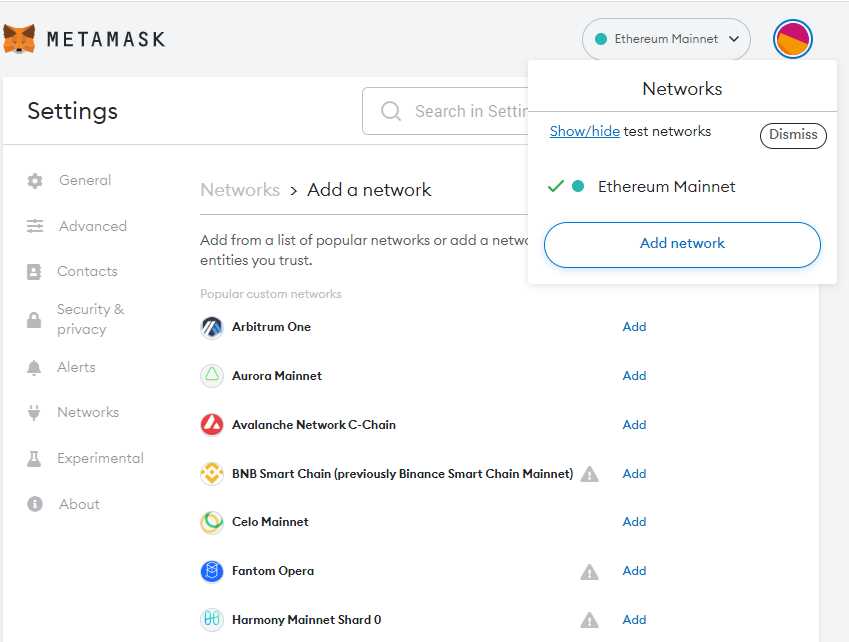
- Customizable Network Settings: Metamask allows you to connect to different Ethereum networks, including the mainnet, testnets, and private networks, giving you flexibility in your blockchain interactions.
Conclusion:
Metamask is a powerful tool for anyone who wants to explore the world of decentralized finance and interact with Ethereum-based applications. Its user-friendly interface, enhanced security features, and seamless integration with dApps make it an essential tool for managing your digital assets on the Ethereum blockchain.
Setting up Metamask
Metamask is a popular Ethereum wallet and browser extension that allows users to interact with decentralized applications (DApps) on the Ethereum network. In order to add money to your Metamask wallet, you first need to set it up.
Here’s a step-by-step guide to setting up Metamask:
Step 1: Install Metamask
The first step is to install the Metamask extension on your preferred browser. Metamask is available for Chrome, Firefox, and Brave browsers. Simply go to the browser’s extension store and search for “Metamask.” Click on the “Add to Chrome (or Firefox, or Brave)” button, and the extension will be added to your browser.
Step 2: Create a Wallet
Once you have installed the Metamask extension, click on the Metamask icon in your browser’s toolbar to open the extension. You will see a welcome screen with an option to import a wallet or create a new one. Click on the “Create a Wallet” button.
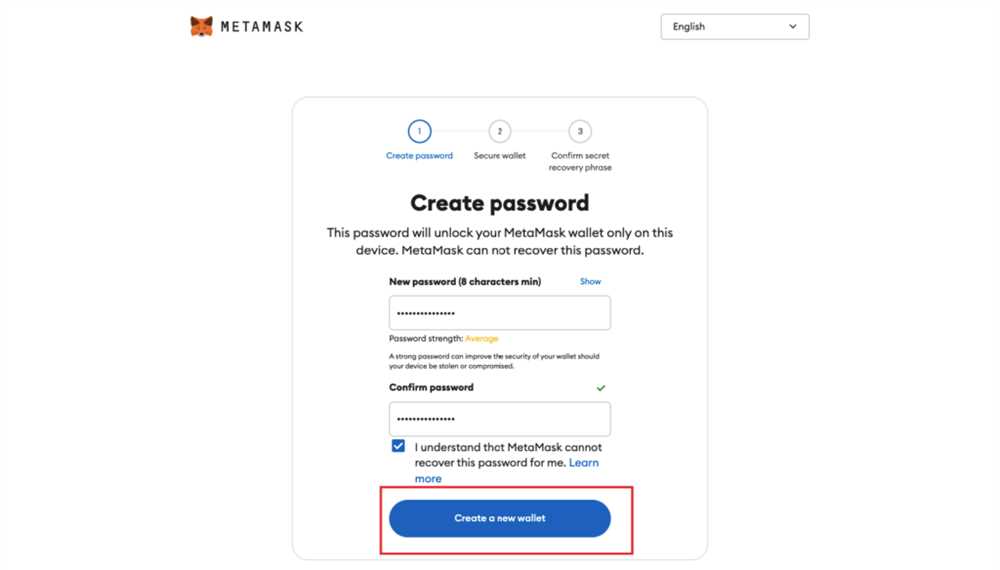
Enter a strong password for your wallet and click “Create.” Make sure to create a password that is unique and not easily guessable. Remember to store your password in a secure place as it cannot be recovered if lost.
Next, you will be shown a seed phrase. This is a series of 12 random words that can be used to recover your wallet in case you forget your password or lose access to your wallet. Write down the seed phrase and keep it in a safe place.
Step 3: Accept Terms and Conditions
After creating your wallet, you will be asked to accept the terms and conditions of Metamask. Read through the terms and conditions and click on the “Accept” button if you agree. This will enable you to use the Metamask extension.
Step 4: Explore the Interface
Once you have set up your wallet, you can start exploring the Metamask interface. Familiarize yourself with the various options and features, such as your wallet address, account balance, transaction history, and network settings. You can also customize your account by adding a nickname or profile picture.
Now that your Metamask wallet is set up, you can proceed to add money to it by following the instructions in the “How to Add Money to Metamask” guide.
Downloading and installing Metamask
To add money to Metamask, you first need to download and install the Metamask extension on your web browser. Follow these simple steps to get started:
Step 1: Open your web browser
Launch your preferred web browser on your device. Metamask supports various browsers like Chrome, Firefox, Brave, and Edge.
Step 2: Go to the Metamask website
Visit the official Metamask website by typing “metamask.io” in the address bar of your web browser.
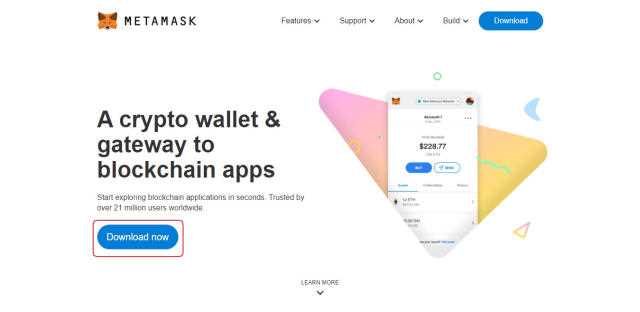
Step 3: Download the Metamask extension
On the Metamask website, locate the download button or link and click on it. This will initiate the download of the Metamask extension file.
Step 4: Install the Metamask extension
Once the file is downloaded, locate it in your device’s Downloads folder or the default location set by your browser. Open the file and follow the on-screen instructions to install the Metamask extension.
Step 5: Set up your Metamask account
After the installation process is complete, click on the Metamask extension icon in your browser’s toolbar to launch it. Follow the prompts to create a new Metamask account or import an existing one using your seed phrase.
Congratulations! You have successfully downloaded and installed Metamask on your web browser. Now you can proceed to add money to your Metamask wallet.
Creating a new Metamask wallet
If you want to add money to your Metamask wallet, you first need to create a new wallet. Follow the step-by-step guide below to get started:
Step 1: Install the Metamask extension
The first thing you need to do is install the Metamask extension in your web browser. Metamask is available for Google Chrome, Mozilla Firefox, and Brave browsers.
Step 2: Launch Metamask
Once you have installed the Metamask extension, you can launch it by clicking on the Metamask icon in your browser toolbar.
Step 3: Create a new wallet
In the Metamask popup, click on the “Get Started” button to create a new wallet. You will be asked to review and accept the terms of use.
Note: Before creating a new wallet, make sure to read and understand the terms of use.
Step 4: Set up your wallet
Next, you will need to set up your wallet by creating a password. Make sure to choose a strong and secure password that you can remember. After entering your password, click on the “Create” button.
Pro tip: Use a password manager to securely store your wallet password.
Step 5: Backup your seed phrase
Metamask will then generate a seed phrase – a combination of 12 or 24 words that you can use to restore your wallet if you forget your password or lose access to your device. It is crucial to write down your seed phrase and store it in a safe place. Click on the “Next” button to reveal your seed phrase.
Important: Do not share your seed phrase with anyone, as it can be used to access your wallet and funds.
Step 6: Confirm your seed phrase
To ensure that you have correctly written down your seed phrase, Metamask will ask you to confirm some of the words in a specific order. This step helps to verify that you have securely backed up your seed phrase. Select the words as requested and click on the “Confirm” button.
Once you have completed these steps, your new Metamask wallet will be created, and you will be ready to add funds to it.
Adding funds to Metamask using a cryptocurrency exchange
Metamask is a popular wallet for storing Ethereum and other ERC-20 tokens. If you already have funds on a cryptocurrency exchange, you can easily transfer them to your Metamask wallet. Here’s a step-by-step guide on how to do it:
Step 1: Access your cryptocurrency exchange account
Log in to your cryptocurrency exchange account using your credentials. Ensure that you have sufficient funds available for withdrawal.
Step 2: Generate your Metamask wallet address

In your Metamask wallet, click on the account icon located at the top right corner of the extension. From the dropdown menu, select “Copy Address.” This will copy your wallet address to your clipboard.
Step 3: Initiate a withdrawal
In your cryptocurrency exchange account, navigate to the withdrawal or transfer section. Choose the cryptocurrency you want to transfer to your Metamask wallet.
Step 4: Paste your Metamask wallet address
Paste your copied Metamask wallet address into the withdrawal address field on the cryptocurrency exchange. Double-check to ensure that the address is correct to avoid any loss of funds.
Step 5: Enter the amount to transfer
Specify the amount you want to transfer from the cryptocurrency exchange to your Metamask wallet. Double-check the amount, as once the transfer is initiated, it cannot be reversed.
Step 6: Confirm the withdrawal
Review the withdrawal details, including the wallet address and the transfer amount. Once you are certain that everything is accurate, confirm the withdrawal request. The withdrawal process may take some time to complete, depending on network congestion.
By following these steps, you should be able to easily add funds to your Metamask wallet using a cryptocurrency exchange. Remember to always verify the wallet address and the withdrawal amount before making any transfers to ensure the security of your funds.
Choosing a cryptocurrency exchange
When it comes to adding money to your Metamask wallet, one of the first steps is choosing a cryptocurrency exchange where you can buy or trade cryptocurrencies. A cryptocurrency exchange is a platform where you can buy, sell, or trade different cryptocurrencies such as Bitcoin, Ethereum, or Litecoin.
Here are a few factors to consider when choosing a cryptocurrency exchange:
Security
Security should be a top priority when selecting a cryptocurrency exchange. Look for exchanges that have a good reputation and employ strong security measures such as encrypted connections and two-factor authentication.
Liquidity
Liquidity refers to the ease with which you can buy or sell cryptocurrencies on an exchange. Choose an exchange with high liquidity to ensure that you can quickly and easily complete your transactions.
Keep in mind that liquidity can vary between different exchanges and different cryptocurrencies. Some popular exchanges with high liquidity include Binance, Coinbase, and Kraken.
Fees
Exchanges charge fees for buying, selling, and trading cryptocurrencies. These fees can vary widely, so it’s important to consider them when choosing an exchange. Some exchanges offer lower fees for larger trading volumes, so if you plan to make frequent or large trades, this may be something to consider.
Additionally, be aware of any deposit or withdrawal fees that may be associated with moving funds into or out of your exchange account.
Overall, take the time to research and compare different cryptocurrency exchanges to find one that best suits your needs in terms of security, liquidity, and fees. Once you have chosen an exchange, you can proceed with adding money to your Metamask wallet.
Creating an account on the exchange
To add money to your MetaMask wallet, you will need to create an account on a cryptocurrency exchange platform. Here is a step-by-step guide on how to do it:
Step 1: Choose a reputable cryptocurrency exchange platform that supports the currency you want to add to your MetaMask wallet.
Step 2: Visit the exchange’s website and click on the “Sign Up” or “Register” button.
Step 3: Fill in the required information, such as your email address, username, and password. Make sure to choose a strong password and enable two-factor authentication if available for added security.
Step 4: Verify your email address by clicking on the verification link sent to your inbox.
Step 5: Complete any additional verification steps required by the exchange, such as providing identification documents or completing KYC (Know Your Customer) procedures. This is necessary to comply with anti-money laundering regulations.
Step 6: Once your account is verified, log in to the exchange using your credentials.
Step 7: Navigate to the “Wallet” or “Balance” section of the exchange’s platform.
Step 8: Look for the option to deposit or add funds to your account and select the cryptocurrency you want to add. Make sure you choose the same currency that you want to add to your MetaMask wallet.
Step 9: Follow the instructions provided by the exchange to generate a deposit address or scan a QR code.
Step 10: Copy the deposit address or scan the QR code using your MetaMask wallet.
Step 11: In your MetaMask wallet, select the option to send funds and paste the deposit address or scan the QR code provided by the exchange.
Step 12: Enter the amount of cryptocurrency you want to add and confirm the transaction.
Once the transaction is confirmed on the blockchain, the funds should appear in your MetaMask wallet, allowing you to use them for various purposes, such as interacting with decentralized applications or participating in token sales.
What is Metamask?
Metamask is a digital wallet that allows users to store, manage, and interact with digital assets on the Ethereum blockchain. It is an extension for web browsers that acts as a bridge between the user and the blockchain.