
If you’re a user of the popular Ethereum wallet, Metamask, you may be interested in adding the TRC20 network to your wallet. TRC20 is a technical standard used for smart contracts on the TRON blockchain. By adding the TRC20 network to your Metamask wallet, you’ll be able to interact with TRON dapps and tokens right from the comfort of your Metamask interface.
Adding the TRC20 network to Metamask is a straightforward process that can be completed in a few simple steps. In this step-by-step guide, we’ll walk you through the process to ensure you have a smooth experience.
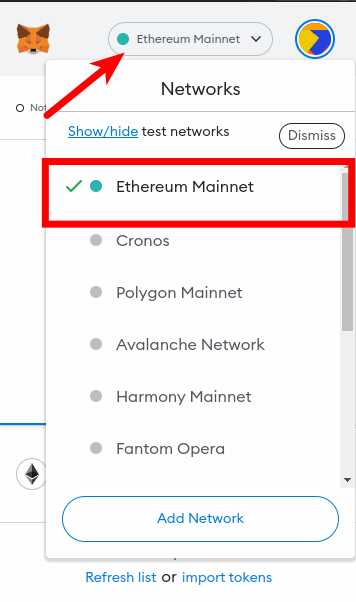
Step 1: Open Metamask and click on the network dropdown
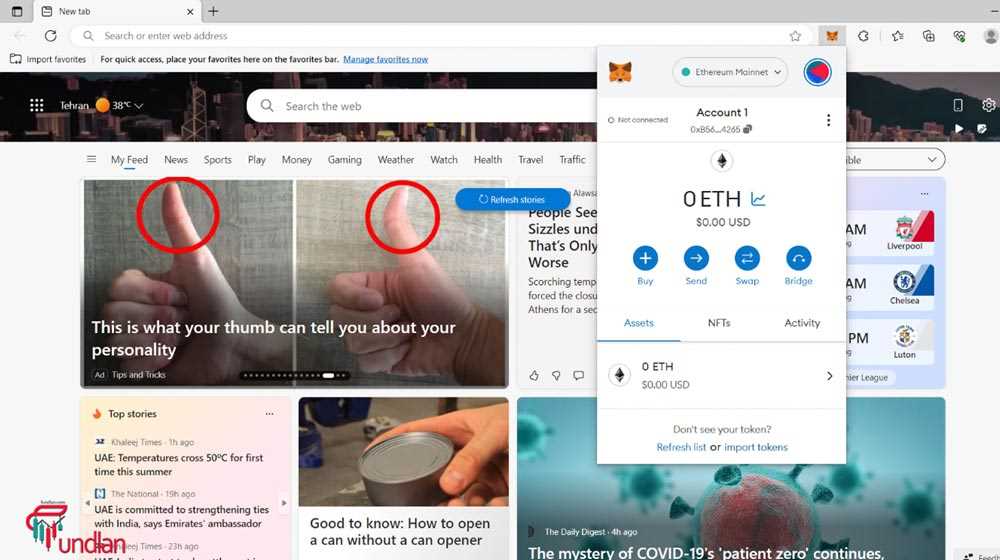
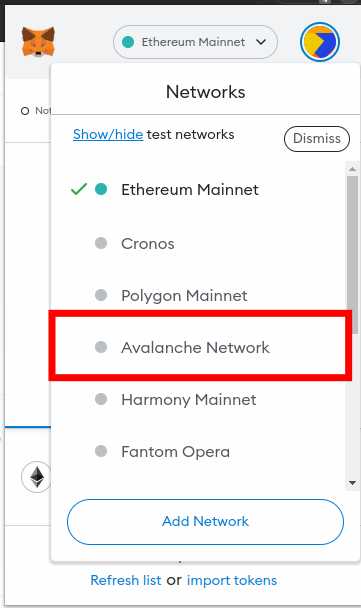
First, open your Metamask wallet by clicking on the Metamask icon in your browser toolbar. Once your wallet is open, click on the network dropdown menu located at the top of the wallet interface.
Step 2: Scroll down and click on “Custom RPC”
After clicking on the network dropdown, scroll down to the bottom of the list and click on the “Custom RPC” option. This will allow you to manually add a new network to your Metamask wallet.
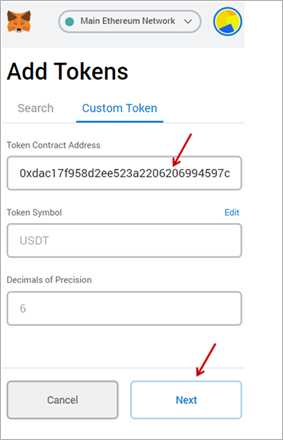
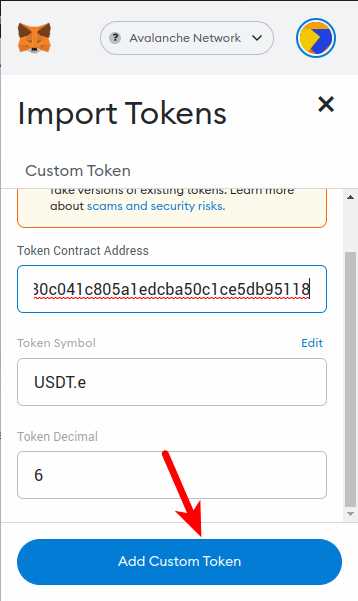
Step 3: Enter the TRC20 network details
Next, a popup window will appear where you can enter the details for the TRC20 network. In the “Network Name” field, enter a name for the network (e.g., “TRC20 Network”). In the “New RPC URL” field, input the URL for the TRC20 network. Lastly, in the “ChainID” field, enter the unique identifier for the TRC20 network.
Step 4: Save and switch to the TRC20 network
After inputting the TRC20 network details, click on the “Save” button. The TRC20 network will now be added to your Metamask wallet. To switch to the TRC20 network, simply click on the network dropdown again and select the “TRC20 Network” option.
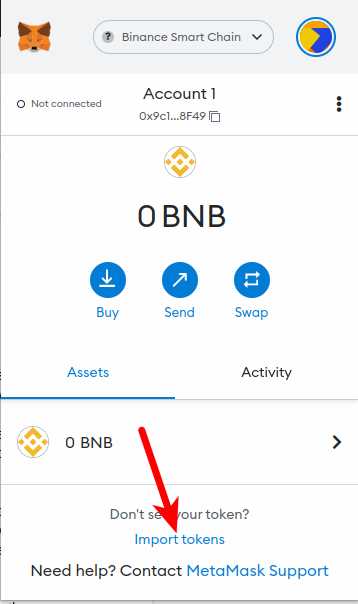
Step 5: Interact with TRON dapps and tokens
Now that you’ve successfully added the TRC20 network to your Metamask wallet, you can start interacting with TRON dapps and tokens. Explore the TRON ecosystem, engage with decentralized applications, and manage your TRX and TRC20 tokens all within your familiar Metamask interface.
In conclusion, adding the TRC20 network to Metamask opens up a world of possibilities for interacting with the TRON blockchain. By following this step-by-step guide, you’ll be able to seamlessly integrate the TRC20 network into your Metamask wallet and enjoy the benefits of the TRON ecosystem.
How to Add TRC20 Network to Metamask – Step-by-Step Guide
In this step-by-step guide, we will walk you through the process of adding the TRC20 network to your Metamask wallet.
- Open your Metamask wallet by clicking on the extension icon in your browser.
- Click on the menu icon (three horizontal lines) at the top right corner of your wallet and select “Settings”.
- In the Settings menu, scroll down and click on “Networks”.
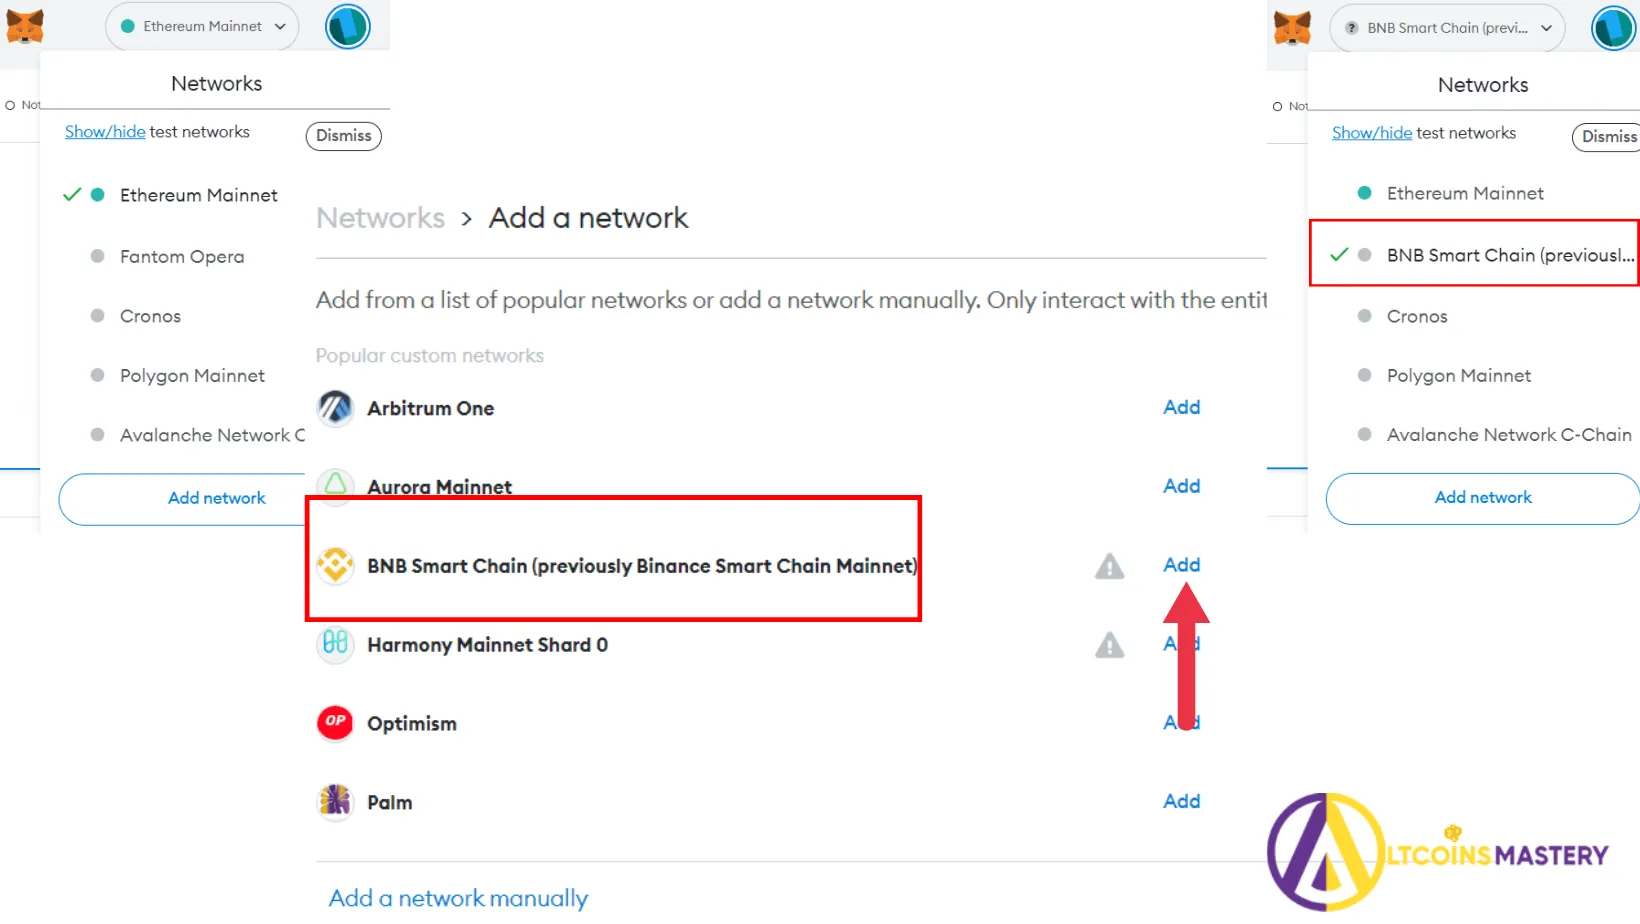
- Click on the “Add Network” button.
- Enter the following details for the TRC20 network:
- Network Name: TRC20
- New RPC URL: https://mainnet.infura.io/v3/YOUR_INFURA_PROJECT_ID
- Chain ID: 195
- Symbol: TRX
- Block Explorer URL: https://tronscan.io/
- Click on “Save” to add the TRC20 network to your Metamask.
Congratulations! You have successfully added the TRC20 network to your Metamask wallet. Now you can easily manage your TRC20 tokens and interact with TRC20 decentralized applications.
Download and Install the Metamask Browser Extension
To begin using the Metamask wallet and add the TRC20 network, you’ll first need to download and install the Metamask browser extension. Follow the steps below to get started:
Step 1: Visit the Metamask website
Go to the official Metamask website by typing “metamask.io” into your browser’s address bar and press Enter.
Step 2: Download the extension
Once on the Metamask website, locate the “Download” button and click on it. This will redirect you to the page where you can download the extension for your preferred browser.
Step 3: Choose your browser
On the download page, you’ll see various browser options available. Click on the button that corresponds to the browser you are currently using (e.g., Chrome, Firefox, Edge).
Step 4: Install the extension
After clicking on the download button, the extension will begin to download. Once the download is complete, open the file and follow the prompts to install the extension on your browser.
That’s it! Once the installation process is complete, you’ll have successfully downloaded and installed the Metamask browser extension. You can now move on to adding the TRC20 network to Metamask.
Create a New Wallet or Import an Existing Wallet
If you don’t already have a wallet in Metamask, you’ll need to create one to add the TRC20 network. Here’s a step-by-step guide on creating a new wallet or importing an existing one:
|
1. Open the Metamask extension in your browser, and if you haven’t installed it yet, download it from the official Metamask website. |
|
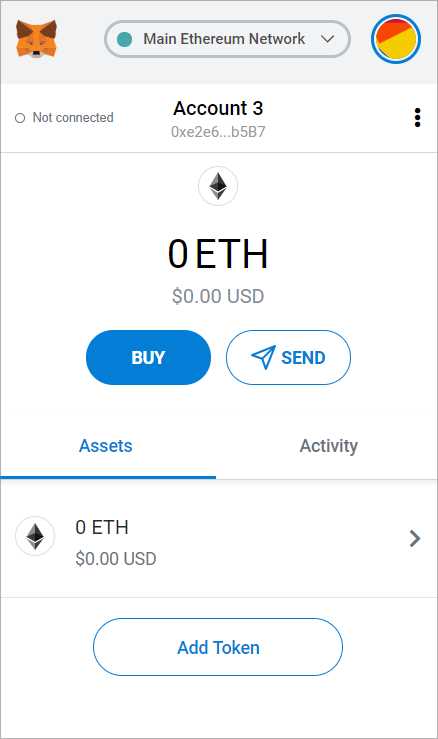
2. Once the extension is installed, click on the Metamask icon located at the top right of your browser to open the Metamask panel. |
|
3. Click on the “Get Started” button to begin the wallet creation process. |
|
4. Choose whether you want to import an existing wallet or create a new one. If you already have a wallet, select “Import wallet.” If not, select “Create a wallet.” |
|
5. If you selected “Import wallet,” enter your wallet’s seed phrase or private key. If you selected “Create a wallet,” enter a password and confirm it. |
|
6. Click on the “I agree” button to accept the terms of service. |
|
7. If you created a new wallet, Metamask will now display your recovery seed phrase. Make sure to write this down and store it in a safe place. Your seed phrase is the only way to recover your wallet if you lose your password or device. |
|
8. Click on the “All Done” button to finish the wallet creation process. |
Once you have created or imported your wallet, you can proceed to the next step of adding the TRC20 network to Metamask.
Access Metamask Settings
To begin the process of adding TRC20 network to Metamask, you first need to access the Metamask settings. Follow the steps below:
Step 1: Open Metamask
Open your Metamask extension or mobile application. Make sure you are logged in to your account.
Step 2: Click on the Profile Icon

In the top-right corner of the Metamask interface, you will see a profile icon. Click on it to open a drop-down menu.
Step 3: Select “Settings”
In the drop-down menu, you will see a “Settings” option. Click on it to access the Metamask settings page.
Add TRC20 Network
To add the TRC20 network to Metamask, follow these steps:
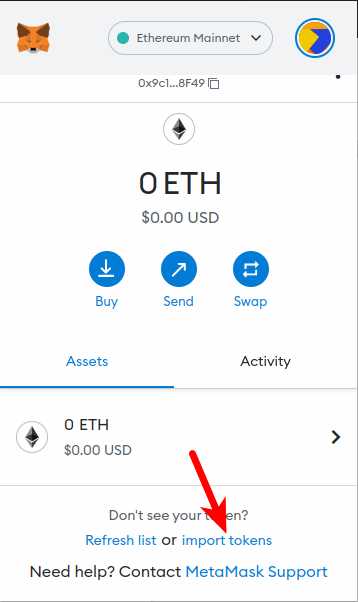
- Open the Metamask extension in your browser.
- Click on the “Networks” tab.
- Scroll down to the bottom and click on “Add Network.”
- Enter the following information:
- Network Name: TRC20 Network
- New RPC URL: enter the URL for the TRC20 network you want to add
- Chain ID: enter the chain ID for the TRC20 network you want to add
- Symbol: enter the symbol for the TRC20 token on the network
- Block Explorer URL: enter the URL for the block explorer of the TRC20 network
- Click on “Save” to add the TRC20 network to Metamask.
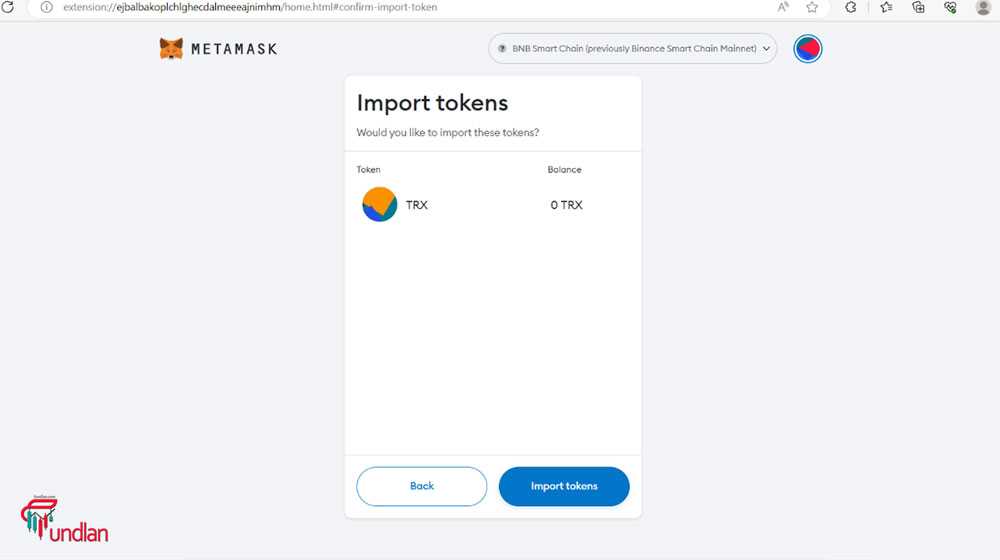
Once you have added the TRC20 network, you can switch to it by clicking on the Metamask extension icon, selecting the TRC20 network from the networks dropdown, and confirming the switch.
Now you can interact with TRC20 tokens on the added network using your Metamask wallet.
Note: Make sure you have the correct RPC URL, chain ID, symbol, and block explorer URL for the TRC20 network you want to add. It is recommended to double-check this information with a reliable source.
Test and Verify the TRC20 Network Connection
Once you have added the TRC20 network to your MetaMask wallet, you can test and verify the connection to ensure it is working properly. Here are the steps to do so:
Step 1: Connect to the TRC20 Network
Open your MetaMask wallet and ensure that you are connected to the TRC20 network. To do this, click on the MetaMask extension in your browser and select the TRC20 network from the list of available networks.
Step 2: Verify the Network Settings
After connecting to the TRC20 network, verify that the network settings are correct. Check the network name, chain ID, and RPC URL to ensure they match the settings provided by the network provider.
| Network Name | TRC20 |
|---|---|
| Chain ID | TRC20 Chain ID |
| RPC URL | TRC20 RPC URL |
Make sure the network settings match exactly to avoid any connectivity issues.
Step 3: Test the Network Connection
To test the network connection, you can try performing a simple transaction on the TRC20 network. Send a small amount of TRC20 tokens from one wallet address to another to verify that the transaction goes through successfully.
Ensure that you have enough TRC20 tokens in your wallet to cover the transaction fees. If you don’t have any TRC20 tokens, you can acquire some from a TRC20 token exchange or a token faucet.
Once you have sent the transaction, check the transaction status on the TRC20 network explorer. Verify that the transaction is confirmed and the tokens have been successfully transferred.
If the transaction is successful and the tokens are transferred correctly, this confirms that the TRC20 network connection is working properly.
Congratulations! You have successfully tested and verified the TRC20 network connection in your MetaMask wallet.
Why should I add TRC20 network to Metamask?
You should add TRC20 network to Metamask if you want to interact with TRC20 tokens on the Tron blockchain. By adding this network, you can view and manage your TRC20 tokens directly from your Metamask wallet.
Can I use the same process to add other custom networks to Metamask?
Yes, you can use the same process to add other custom networks to Metamask. Simply choose “Custom RPC” from the network dropdown and enter the details specific to the network you want to add. Make sure you have the correct RPC URL, Chain ID, and other necessary information for the network you are adding.