
MetaMask is a popular Ethereum wallet and browser extension that allows users to interact with decentralized applications (dapps) on the Ethereum network. Coinbase, on the other hand, is a leading cryptocurrency exchange that lets users buy, sell, and store various cryptocurrencies, including Ethereum. By linking Coinbase to MetaMask, users can easily transfer funds between the two platforms and enjoy the benefits of both.
Linking Coinbase to MetaMask is a straightforward process that can be completed in just a few simple steps. In this guide, we will walk you through the process, ensuring that you can seamlessly transfer your funds and access the world of decentralized finance.
Step 1: Install MetaMask extension – Before you can link Coinbase to MetaMask, you need to have the MetaMask browser extension installed. You can find and install MetaMask from the official website or from the extensions store of your preferred browser. Once installed, create a new MetaMask wallet or import your existing one.
Step 2: Open Coinbase and go to Settings – After installing MetaMask, open Coinbase and navigate to the Settings page. Look for the section that mentions “Wallet Addresses” or “Connect Wallet” and click on it. This section will allow you to connect your MetaMask wallet to Coinbase.
Creating a MetaMask Wallet
To use MetaMask with Coinbase, you first need to create a MetaMask wallet. Follow these steps to get started:
1. Install the MetaMask Extension
Go to the MetaMask website and click on the “Download” button to install the MetaMask browser extension. Choose the browser you are using and follow the prompts to install the extension.
2. Set Up Your Wallet
Once the extension is installed, click on the MetaMask icon in your browser toolbar, then click on “Get Started”. You will be guided through the process of creating a new wallet.
During the setup, you will be asked to create a strong password. Make sure to choose a password that is unique and secure. Additionally, you will be given a secret backup phrase. It is crucial to write down this backup phrase and store it in a safe place, as it can be used to recover your wallet if you ever lose access.
3. Connect Your Wallet to Coinbase
After creating your MetaMask wallet, it’s time to link it to your Coinbase account.
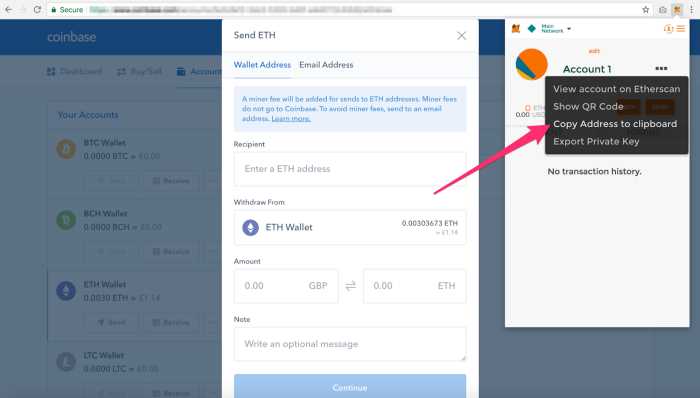
Open the Coinbase website and log in to your account. Go to the “Settings” page and select “Wallets & Addresses”. Click on “Link a New Wallet”, then choose “MetaMask” from the list of options.
MetaMask will open automatically, and you will be asked to authorize the connection. Click “Connect” to link your MetaMask wallet to Coinbase.
That’s it! Your MetaMask wallet is now successfully linked to Coinbase, allowing you to easily transfer funds and interact with decentralized applications on the Ethereum blockchain.
Installing and Setting up MetaMask Extension
MetaMask is a browser extension that allows you to manage your cryptocurrencies and interact with decentralized applications (dApps). Follow the steps below to install and set up MetaMask on your browser:
Step 1: Install MetaMask Extension
- Open your preferred browser (Google Chrome, Firefox, or Brave) and navigate to the browser’s extension store.
- Search for “MetaMask” and click on the extension from the search results.
- Click on the “Add to [Browser Name]” button to start the installation process.
- After the installation is complete, you will see the MetaMask icon added to your browser’s toolbar.
Step 2: Create a MetaMask Account
- Click on the MetaMask icon in your browser’s toolbar.
- A new tab will open with the MetaMask welcome screen. Click on the “Get Started” button.
- Read and accept the Terms of Service, then click on the “Create a Wallet” button.
- You will be prompted to create a password for your MetaMask account. Make sure to choose a strong and secure password.
- Click on the “Create” button to create your MetaMask account.
- Next, you will be presented with a secret backup phrase. This phrase is very important as it can be used to restore your MetaMask account. Write down the backup phrase and keep it in a safe place.
- Confirm your backup phrase by selecting the words in the correct order.
- Your MetaMask account is now created and ready to use.
Step 3: Connect MetaMask to Coinbase
After setting up your MetaMask account, you can connect it to your Coinbase account by following these steps:
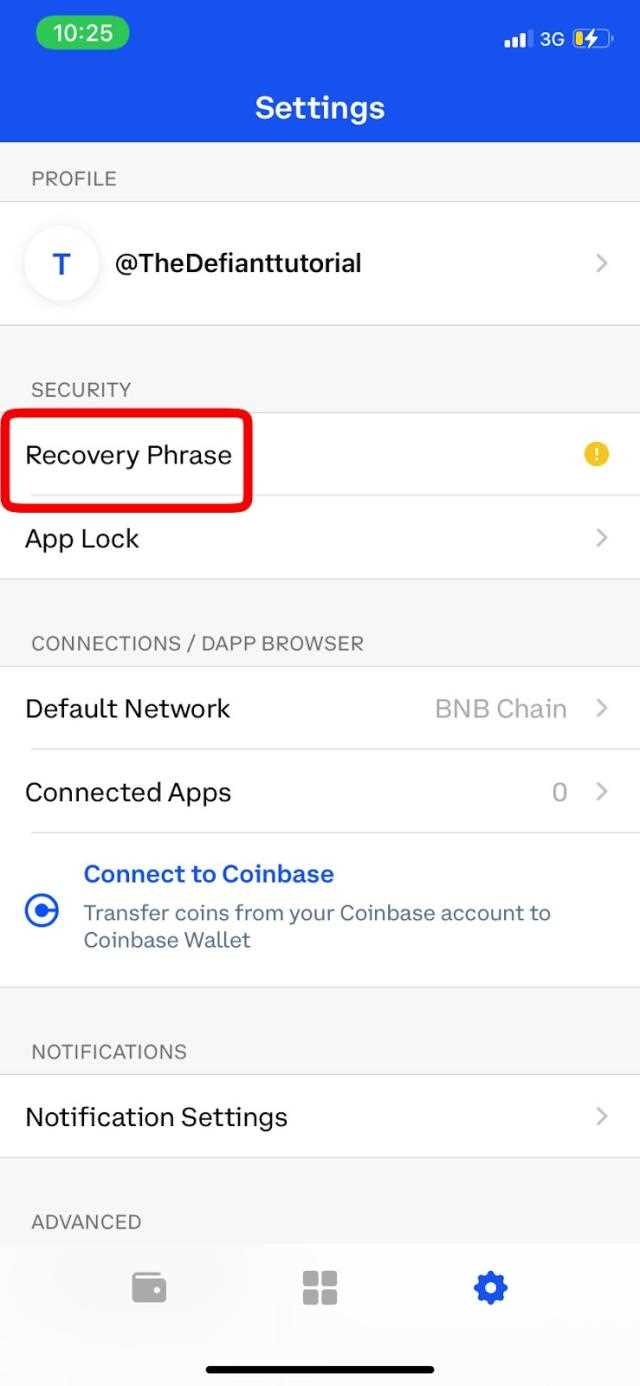
- Open your Coinbase account and navigate to the “Settings” or “Security” menu.
- Look for the “Connected Apps” or “Third-Party Applications” section.
- Click on the “Connect Wallet” or “Add Wallet” button.
- Select “MetaMask” from the list of available wallets.
- You will be redirected to MetaMask to authorize the connection. Click on the “Connect” button.
- Your Coinbase account is now linked to MetaMask.
By following these steps, you have successfully installed and set up the MetaMask extension on your browser and linked it to your Coinbase account. You can now use MetaMask to manage your cryptocurrencies and interact with dApps.
Logging in to Coinbase Account

To link your Coinbase account to MetaMask, you first need to have a Coinbase account and make sure you are logged in.
If you don’t have a Coinbase account, you can sign up for free on the Coinbase website. Once you have created an account, make sure to verify your email address and complete any additional security measures required by Coinbase.
To login to your Coinbase account, follow these steps:
- Go to the Coinbase website (www.coinbase.com) in your web browser.
- Click on the “Sign In” button located at the top right corner of the website.
- Enter your Coinbase email address and password in the designated fields.
- Click on the “Sign In” button to access your Coinbase account.
Once you have successfully logged in to your Coinbase account, you are ready to proceed with linking it to MetaMask.
Connecting Coinbase to MetaMask
MetaMask is a popular cryptocurrency wallet and browser extension that allows users to interact with the Ethereum blockchain. If you already have a Coinbase account and want to link it to MetaMask for seamless transactions, follow these steps:
Step 1: Install MetaMask
If you haven’t already, install the MetaMask extension in your browser. You can find it in the Chrome Web Store or the Firefox Add-ons marketplace.
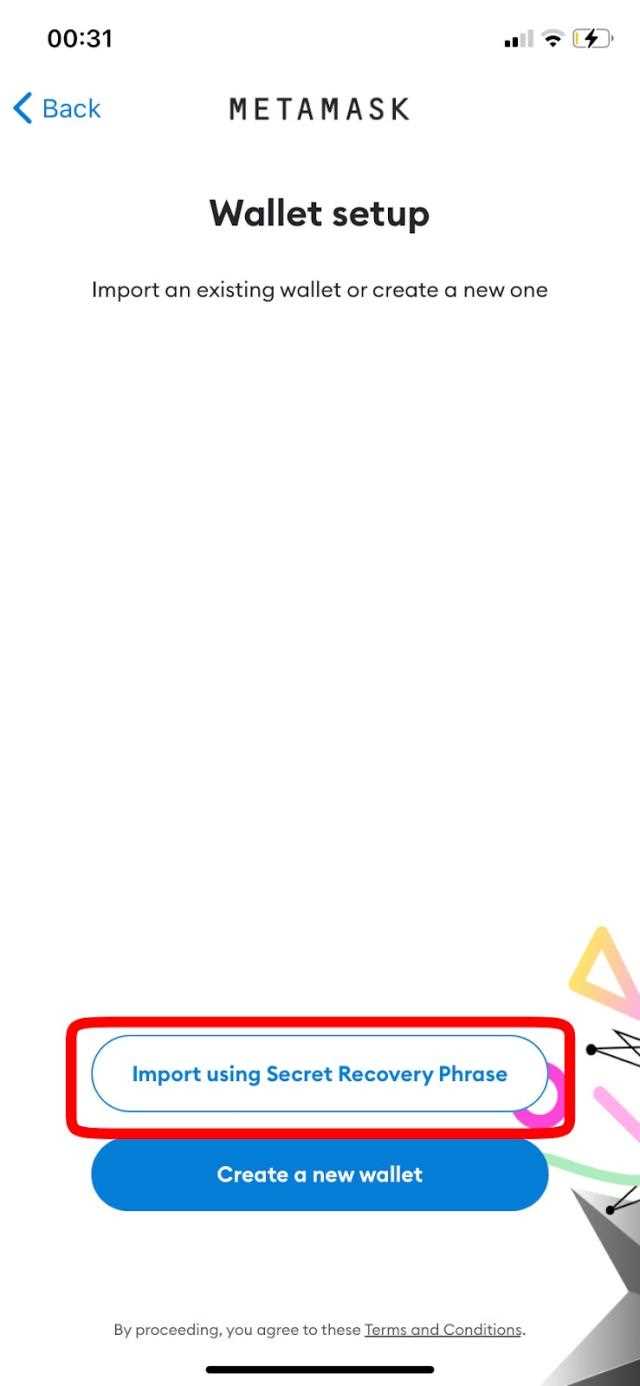
Step 2: Create or Import a MetaMask Wallet

Once the extension is installed, create a new wallet in MetaMask by following the on-screen instructions. Alternatively, If you already have a MetaMask wallet, you can import it using your private key or seed phrase.
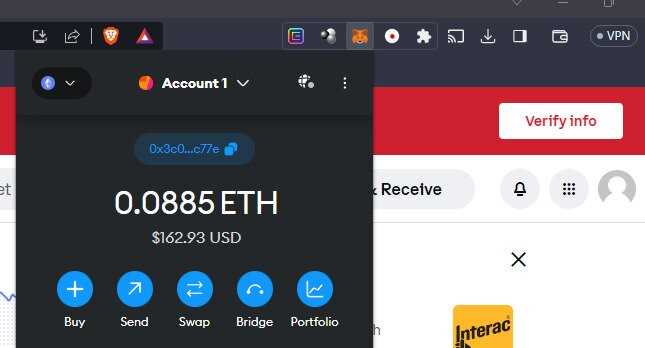
Step 3: Click on the MetaMask Icon
After setting up your MetaMask wallet, you will see a small fox icon in the top-right corner of your browser. Click on it to open the MetaMask popup window.
Step 4: Connect Coinbase to MetaMask
In the MetaMask popup, click on the “Connect” button. This will open a new tab/window with a list of supported wallets and exchanges.
Look for Coinbase in the list and click on it. You may be prompted to sign in to your Coinbase account if you haven’t already.
After signing in, you will see a confirmation screen asking if you want to connect your Coinbase account to MetaMask. Click on the “Connect” button to proceed.
Step 5: Grant Permissions
Once you have connected Coinbase to MetaMask, you will see a permissions screen. Review the permissions requested by Coinbase and click on the “Connect” button to grant access.
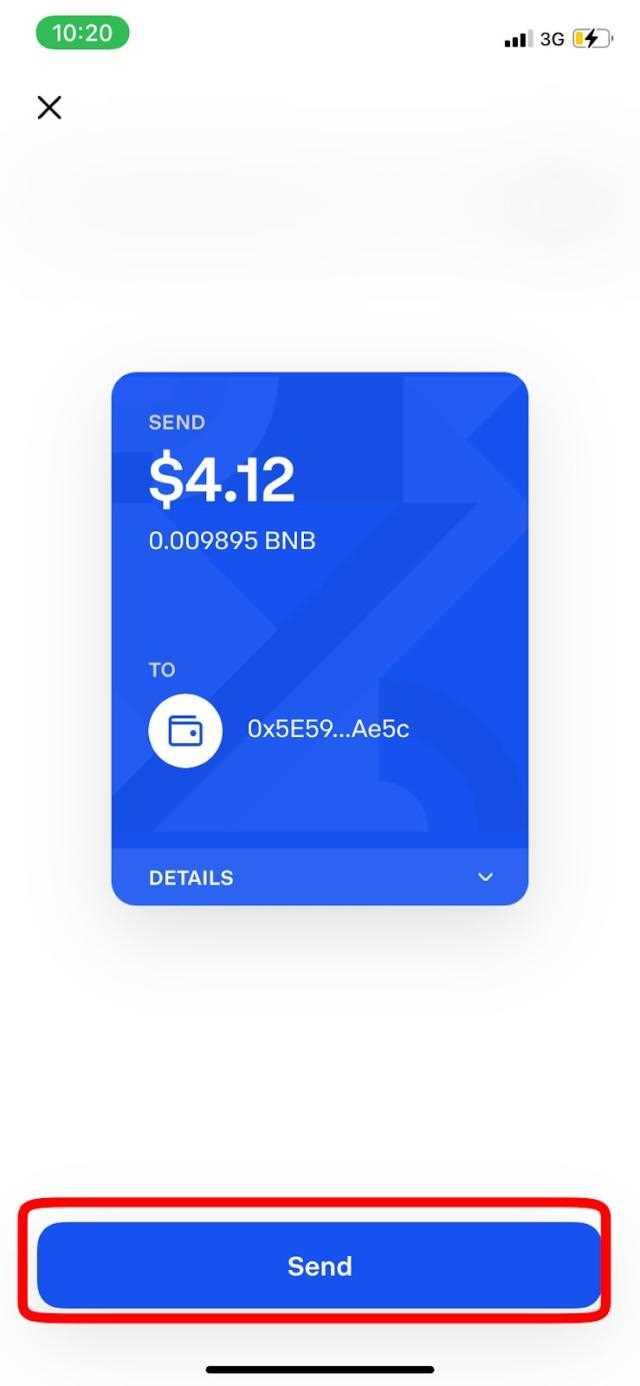
That’s it! You have successfully connected Coinbase to MetaMask. You can now use MetaMask to send and receive Ethereum and interact with decentralized applications (dApps) on the Ethereum blockchain.
Verifying the Connection
After completing the previous steps, it’s important to verify the connection between Coinbase and MetaMask to ensure everything is working properly. Follow these steps to verify the connection:
- Open the MetaMask extension in your browser.
- Click on the menu icon in the top-right corner and select “Connect Hardware Wallet”.
- Choose “Coinbase Wallet” from the list of hardware wallet options.
- Enter your Coinbase email address and password when prompted.
- Approve the connection on your Coinbase Wallet.
Once the connection is successfully verified, you should see your Coinbase Wallet displayed in the MetaMask extension. This means that MetaMask now has access to your Coinbase account and you can proceed with using MetaMask to interact with dApps and decentralized exchanges.
What is Coinbase?
Coinbase is a popular cryptocurrency exchange platform that allows users to buy, sell, and trade various cryptocurrencies.
What is MetaMask?
MetaMask is a cryptocurrency wallet and browser extension that allows users to manage their digital assets, interact with decentralized applications (dApps), and securely store their private keys.
Why would I want to link Coinbase to MetaMask?
Linking Coinbase to MetaMask allows you to easily transfer funds between Coinbase and MetaMask wallets, giving you the convenience of managing your digital assets and interacting with dApps in one place.
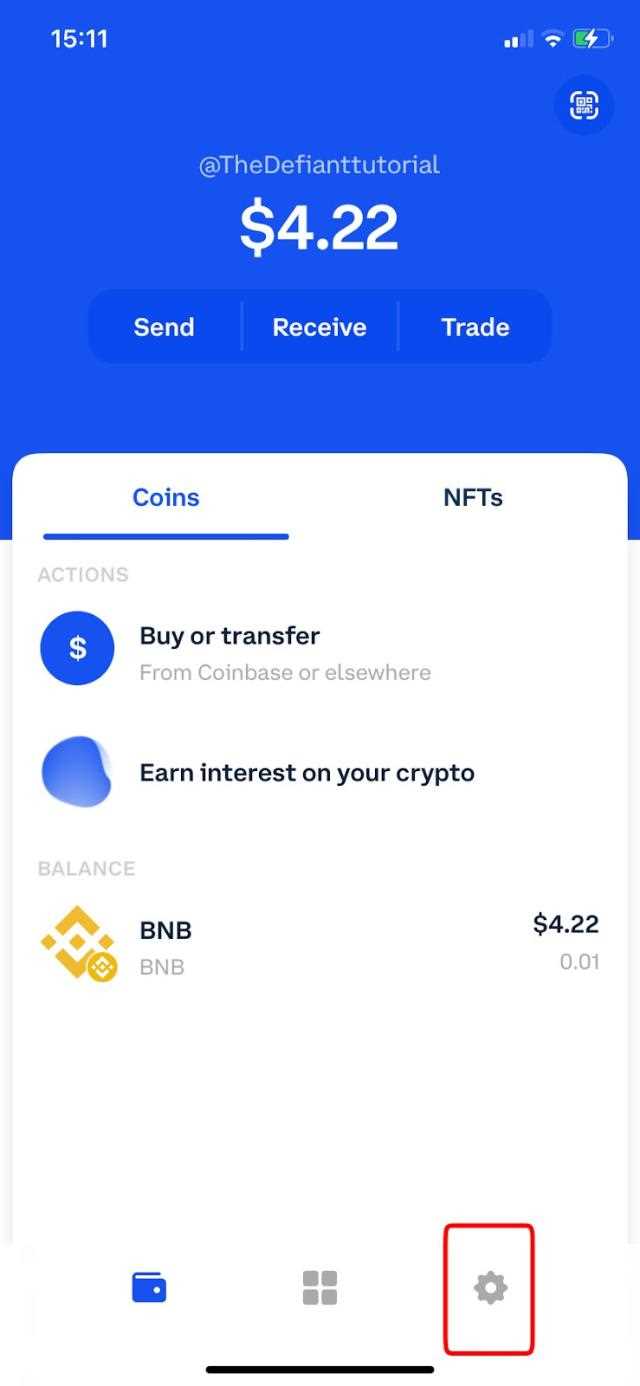
Can I link Coinbase to MetaMask on mobile devices?
Yes, you can link Coinbase to MetaMask on mobile devices. Coinbase and MetaMask both have mobile applications available for iOS and Android users.