
Welcome to our comprehensive guide on how to buy AVAX, the native cryptocurrency of the Avalanche network, using MetaMask. If you’re new to the world of cryptocurrencies or simply looking for a step-by-step tutorial, you’ve come to the right place. In this guide, we will walk you through the process of setting up MetaMask, depositing funds, and buying AVAX. Whether you’re a seasoned investor or a beginner, we’ve got you covered.
MetaMask is a popular web wallet that enables users to securely manage their cryptocurrencies and interact with decentralized applications (dApps). By following the steps outlined in this guide, you’ll be able to use MetaMask to buy AVAX, one of the most promising cryptocurrencies in the market today. But before we dive into the technicalities, let’s take a moment to understand what AVAX is and why it’s worth considering as an investment.
AVAX is the native cryptocurrency of the Avalanche network, a decentralized platform that aims to provide fast, secure, and scalable solutions for decentralized applications. With AVAX, users can participate in the Avalanche network by staking their tokens, voting on governance proposals, and paying for transaction fees. AVAX has gained traction in the cryptocurrency space due to its unique consensus mechanism, high throughput, and low fees.
If you’re ready to get started, let’s dive into the step-by-step instructions on how to buy AVAX using MetaMask. By the end of this guide, you’ll have a clear understanding of the process and be well-equipped to make your first AVAX purchase.
Step 1: Install and Set Up MetaMask Extension
To start buying AVAX using MetaMask, you first need to install and set up the MetaMask extension on your preferred web browser. MetaMask is a popular cryptocurrency wallet and browser extension that allows you to interact with decentralized applications (dApps) on the Ethereum network. Here are the step-by-step instructions to get started:
Installation and Account Creation
1. Open your web browser (Google Chrome, Firefox, or Brave) and go to the MetaMask website.
2. Click on the “Get Chrome Extension” or “Get Firefox Extension” button, depending on your web browser.
3. You will be redirected to the browser’s respective extension store (Chrome Web Store or Firefox Add-ons).
4. Click on the “Add to Chrome” or “Add to Firefox” button to begin the installation process.
5. Once the installation is complete, click on the MetaMask icon that appears on your browser’s toolbar.
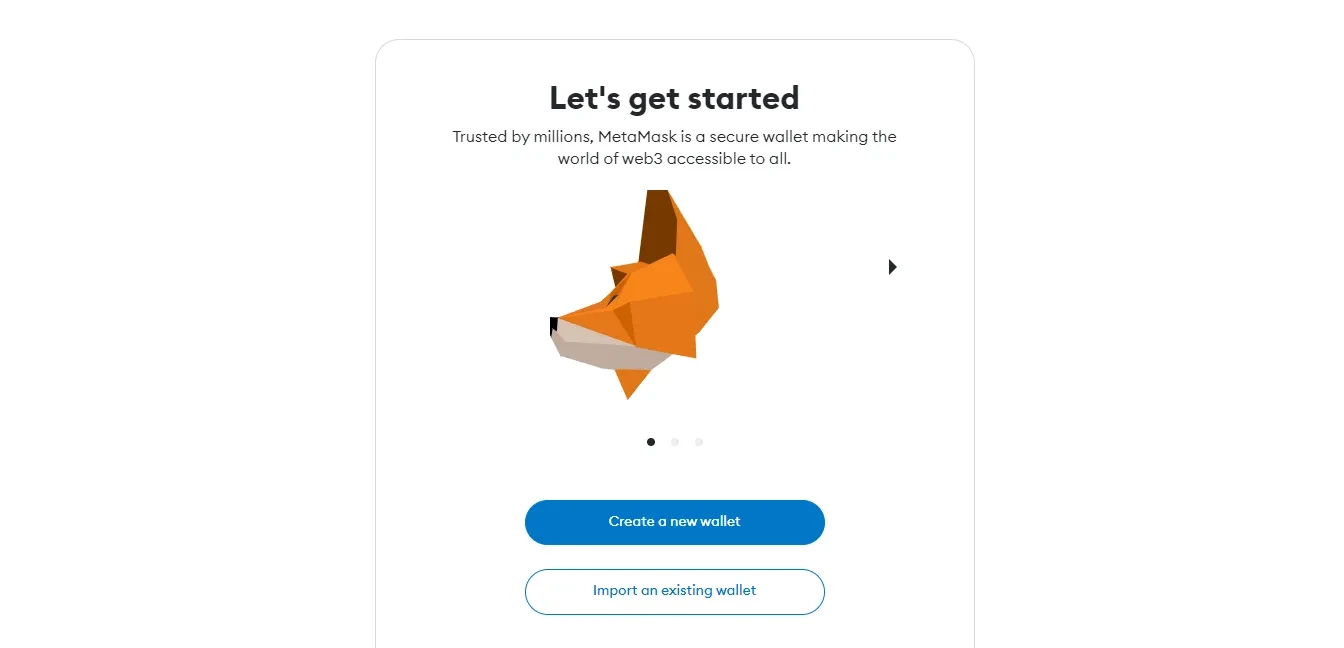
6. Click on the “Get Started” button to create a new MetaMask account.
7. Read through and accept the terms of use and privacy policy.
8. Set up a strong password for your MetaMask account and click on the “Create” button.
9. You will be presented with a secret backup phrase consisting of 12 random words. Write this down and store it in a secure place, as it is crucial for account recovery.
10. Confirm your backup phrase by selecting the words in the correct order.
11. Congratulations! Your MetaMask wallet is now set up, and you can proceed to the next steps to buy AVAX.
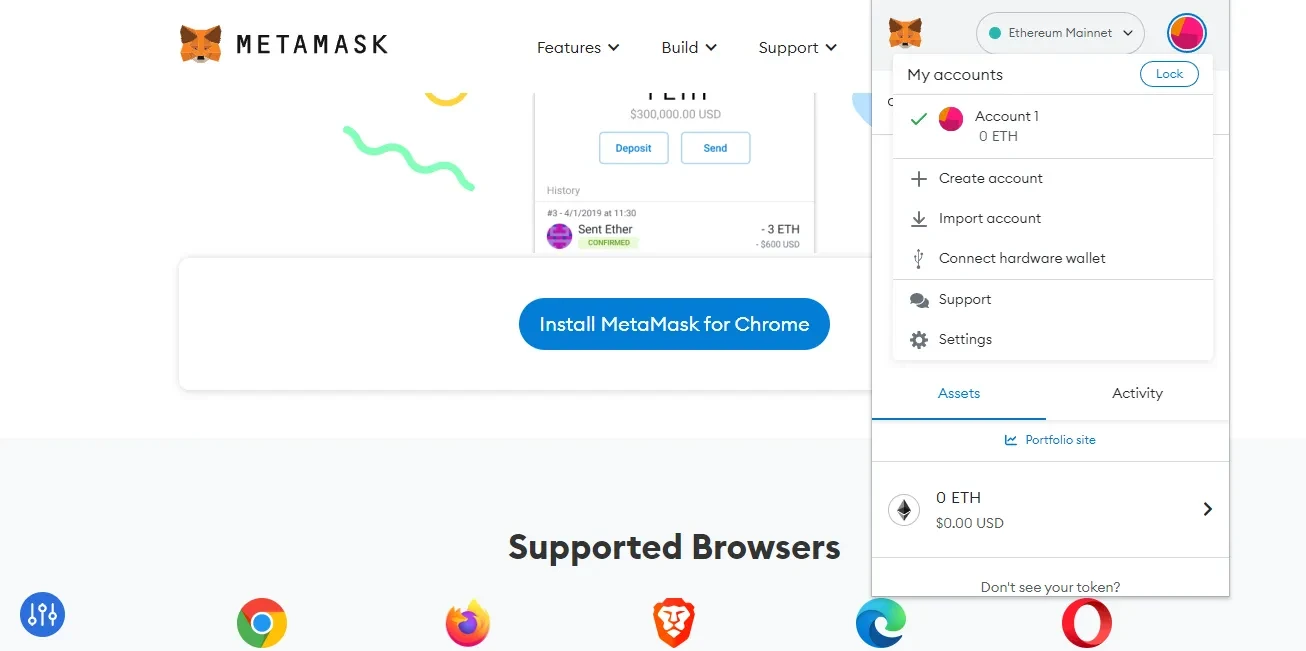
Connecting MetaMask to a Network
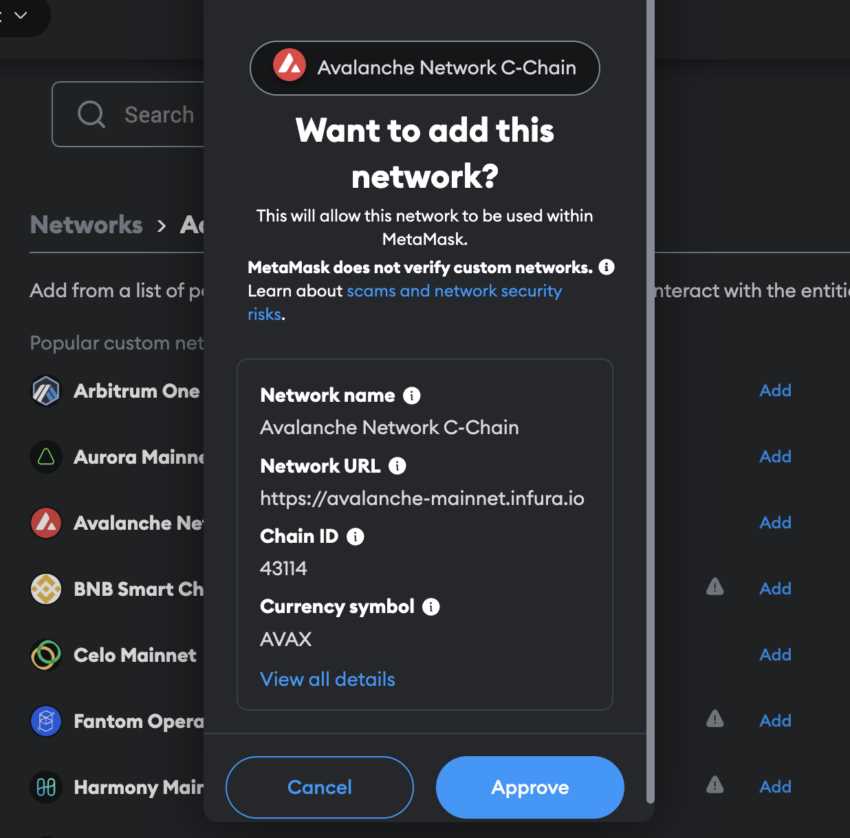
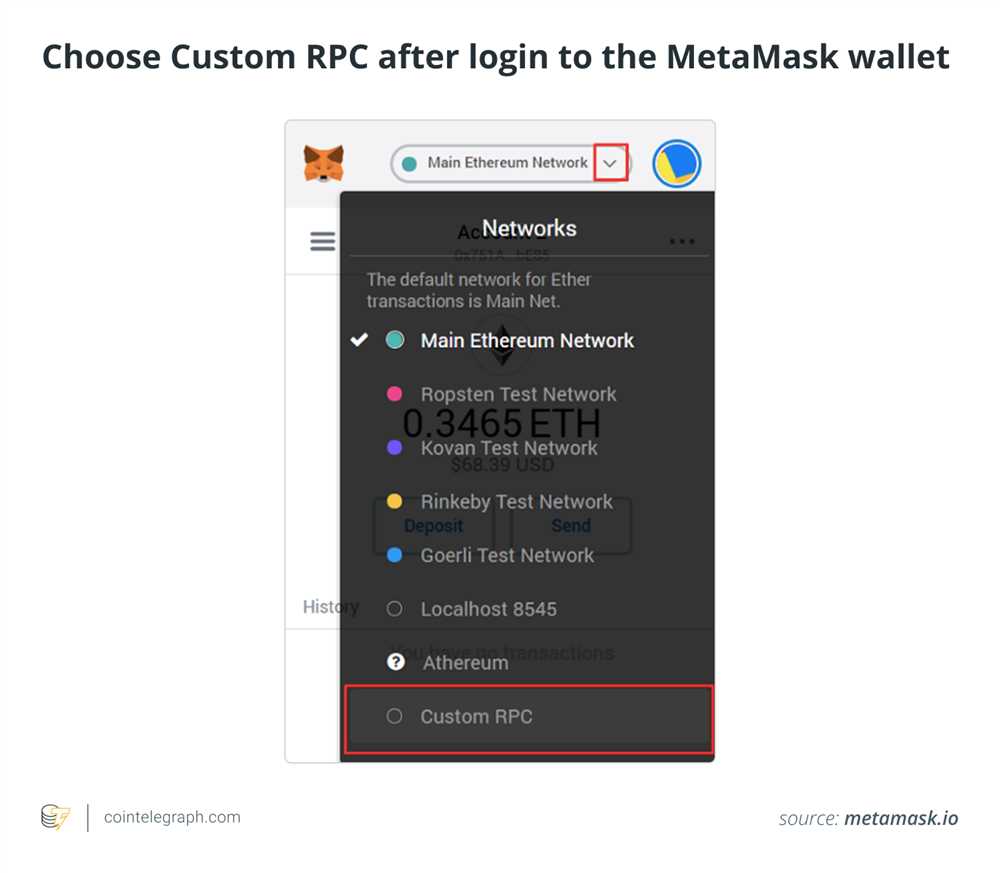
1. When you first open MetaMask, you will see a prompt to connect to a network. Click on the network dropdown button (e.g., “Main Ethereum Network”) and select “Ethereum Mainnet” or “Avalanche Mainnet” depending on the network you want to use.
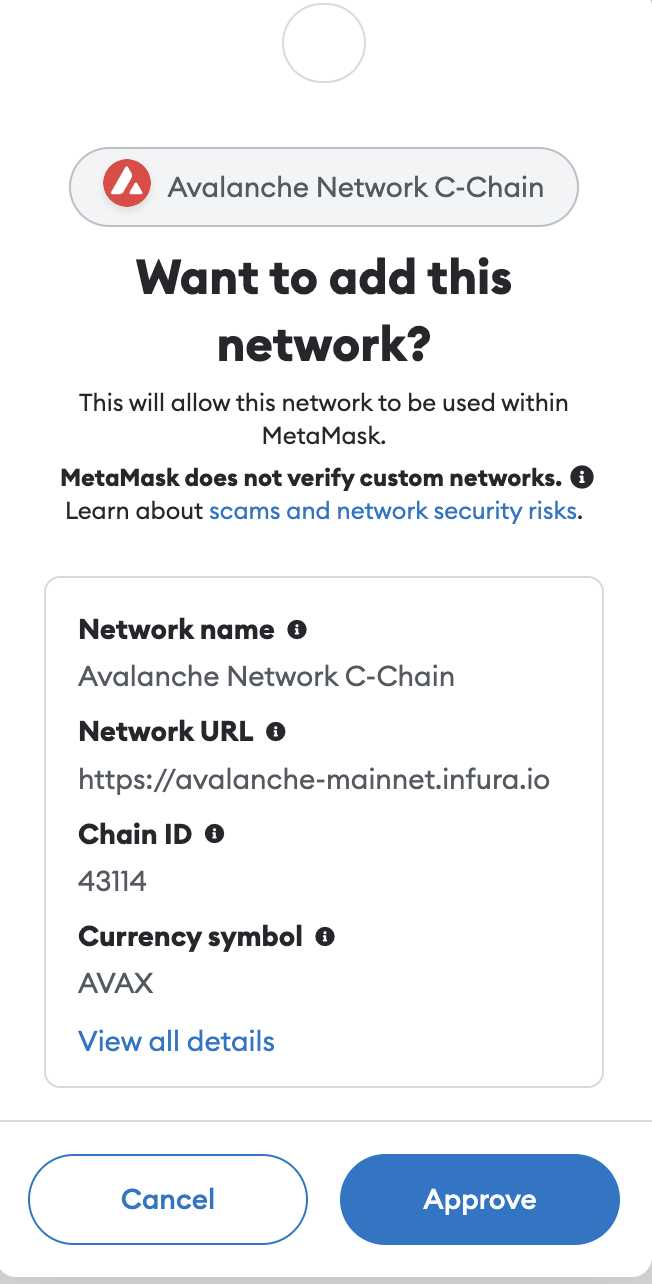
2. If you selected “Avalanche Mainnet,” click on the “Custom RPC” button and enter the following details:
| Network Name | Avalanche Mainnet |
| New RPC URL | https://api.avax.network/ext/bc/C/rpc |
| Chain ID | 43114 |
| Symbol | AVAX |
| Block Explorer URL | https://cchain.explorer.avax.network/ |
3. Click on the “Save” button to save the network settings.
4. MetaMask will now be connected to the chosen network, and you can proceed with buying AVAX.
Congratulations! You have successfully installed and set up the MetaMask extension and connected it to the desired network. In the next steps, we will guide you on how to buy AVAX using MetaMask.
Learn how to install and set up the MetaMask extension
If you want to buy AVAX using MetaMask, the first step is to install and set up the MetaMask extension on your web browser. MetaMask is a popular cryptocurrency wallet and browser extension that allows you to interact with decentralized applications (dApps) on the Ethereum blockchain. Here’s a step-by-step guide on how to install and set up the MetaMask extension:
Step 1: Install MetaMask
To get started, open your web browser and search for “MetaMask” or visit the official MetaMask website. From there, you’ll be redirected to the MetaMask download page. Click on the “Download” button to initiate the installation process.
Step 2: Add MetaMask to your browser
After the download is complete, you’ll need to add the MetaMask extension to your browser. Depending on your browser, you may be prompted to confirm the installation. Follow the on-screen instructions to proceed with the installation.
Step 3: Set up MetaMask

Once the installation is complete, you’ll see the MetaMask icon in your browser’s toolbar. Click on the icon to launch MetaMask, and then click on “Get Started” to begin the setup process.
Follow the prompts and click on “Create a Wallet” to generate a new wallet or “Import Wallet” if you already have a MetaMask wallet. Make sure to securely store your seed phrase in a safe place as it can be used to restore your wallet in case you lose access to it.
Set up a strong password for your MetaMask wallet and read and accept the terms of use. You’ll then have access to your MetaMask wallet, and you can start using it to buy AVAX and interact with other dApps on the Ethereum blockchain.
Now that you have installed and set up the MetaMask extension, you are ready to proceed with buying AVAX using MetaMask. Follow the remaining steps provided in the guide to complete your purchase.
Step 2: Create and Secure Your Wallet
In order to buy AVAX using MetaMask, you need to have a wallet. If you already have one, you can skip this step. If not, follow the instructions below to create and secure your wallet.
1. Install the MetaMask extension on your browser by visiting the MetaMask website and clicking on the “Get Started” button.
2. Once the extension is installed, click on the MetaMask icon in your browser’s toolbar to open the extension.
3. Click on the “Create a Wallet” button on the MetaMask welcome screen.
4. Create a strong password for your wallet. Make sure to include a combination of uppercase and lowercase letters, numbers, and special characters. Remember to write down this password in a secure place.
5. Read and accept the terms of service and privacy policy.
6. On the next screen, you will see a seed phrase consisting of 12 or 24 words. This seed phrase is crucial for recovering your wallet in case you lose access to it. Write down this seed phrase and store it in a safe and secure place. Do not share this seed phrase with anyone!
7. Confirm your seed phrase by selecting the words in the correct order.
8. Congratulations! You have successfully created your MetaMask wallet. You can now use it to buy AVAX and other cryptocurrencies.
Remember to always keep your wallet secure by enabling two-factor authentication (2FA), using a hardware wallet, and regularly updating your browser and wallet software.
Note: It is important to be cautious and mindful of potential phishing attempts. Always double-check that you are on the official MetaMask website and never share your wallet password or seed phrase with anyone.
Discover how to create and secure your MetaMask wallet
MetaMask is a popular wallet for storing and managing cryptocurrency assets. Follow these steps to create and secure your MetaMask wallet:
Create a MetaMask wallet
- Install the MetaMask extension on your browser.
- Click on the MetaMask icon in your browser toolbar to open the extension.
- Click on “Get Started” to create a new wallet.
- Read and accept the MetaMask terms of service.
- Create a strong password for your wallet and click “Create”.
- Copy and securely store your secret backup phrase offline.
- Verify your secret backup phrase by selecting the words in the correct order.
- Your MetaMask wallet is now created and ready to use.
Secure your MetaMask wallet
Once you have created your MetaMask wallet, follow these steps to enhance its security:
| Step | Instructions |
|---|---|
| 1 | Enable the password protection feature to prevent unauthorized access to your wallet. |
| 2 | Enable two-factor authentication (2FA) for an extra layer of security. You can link your wallet to a 2FA app like Google Authenticator. |
| 3 | Avoid sharing your secret backup phrase with anyone. Keep it offline and in a safe place. |
| 4 | Be cautious of phishing attacks. Always double-check the URL and ensure you are on the official MetaMask website before entering your wallet details. |
| 5 | Regularly update your MetaMask extension to benefit from the latest security features and bug fixes. |
By following these steps, you can create and secure your MetaMask wallet, providing a safe and convenient way to manage your AVAX and other cryptocurrencies.
Step 3: Connect MetaMask to a Decentralized Exchange
Once you have set up and funded your MetaMask wallet, you are now ready to connect it to a decentralized exchange (DEX) to buy AVAX. A DEX allows you to trade cryptocurrencies directly from your wallet without the need for a centralized intermediary.
Follow the steps below to connect MetaMask to a DEX:
1. Choose a DEX
There are several popular DEXs available, such as Uniswap, SushiSwap, and PancakeSwap. Research and choose a DEX that supports AVAX and is trustworthy. Visit the DEX’s official website.
2. Visit the DEX’s Website
Open your web browser and visit the official website of the DEX you selected. Make sure you are on the correct website to avoid phishing attacks.
3. Connect MetaMask
On the DEX’s website, look for a “Connect Wallet” or similar button. Click on it and select MetaMask from the list of available wallets. A pop-up window will appear.
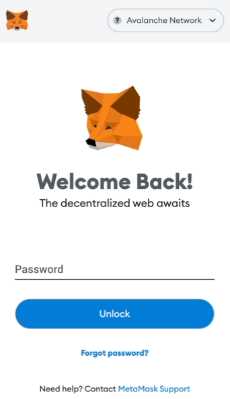
Ensure that the MetaMask extension is open and unlocked. If it’s not, click on the MetaMask icon in your browser’s toolbar and enter your password to unlock it.
Click on the “Connect” button in the MetaMask pop-up window. This will establish a secure connection between MetaMask and the DEX.
4. Allow Access
After connecting MetaMask to the DEX, you may see a pop-up requesting permission to access your account details. Review the permissions and click on the “Allow” or “Confirm” button to proceed.
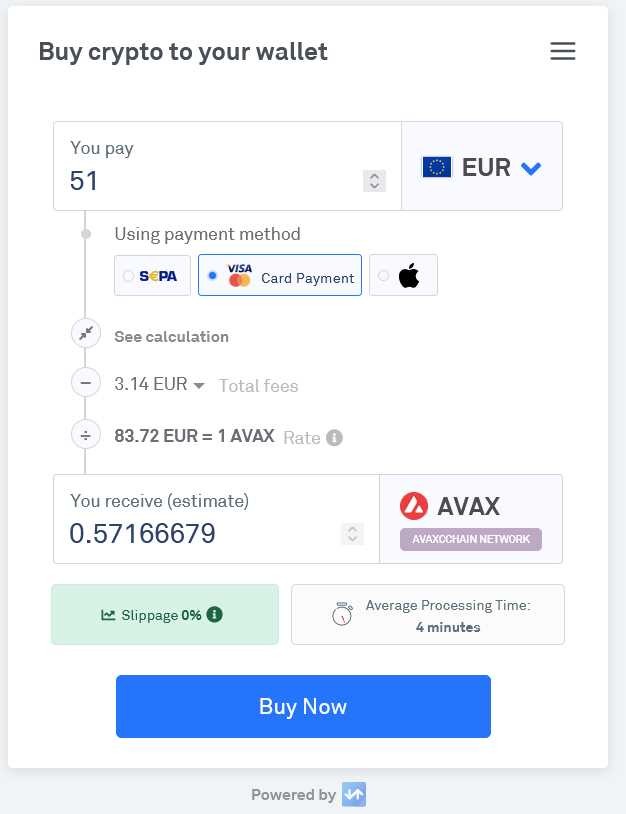
5. Set Slippage and Confirm Transaction
Depending on the DEX, you may need to set the slippage tolerance. This helps protect you from price fluctuations during the transaction. Follow the DEX’s instructions to set the slippage.
Once the slippage is set, you can proceed with your AVAX purchase. Enter the desired amount of AVAX you want to buy and review the transaction details, including gas fees.
Click on the “Confirm” or “Buy” button to initiate the transaction. MetaMask will display a confirmation pop-up. Review the transaction details once again, including the gas fees, and click on the “Confirm” or “Approve” button.
Wait for the transaction to be processed on the blockchain. You can monitor its progress using the transaction hash provided by MetaMask or the DEX.
Once the transaction is confirmed, you will receive the AVAX tokens in your MetaMask wallet.
| Important Note |
|---|
| Always double-check the URL of the DEX’s website before connecting your wallet to avoid phishing attacks. Use official sources to find the correct URL, such as the DEX’s official Twitter account or their project’s official website. |
By following these steps, you can easily connect MetaMask to a decentralized exchange and buy AVAX directly from your wallet. Enjoy your AVAX tokens and remember to secure your wallet by enabling two-factor authentication and keeping your wallet’s backup phrase safe.
Find out how to connect your MetaMask wallet to a decentralized exchange
In order to buy AVAX using MetaMask, you will need to connect your MetaMask wallet to a decentralized exchange. This will allow you to trade your Ethereum or other ERC-20 tokens for AVAX directly from your wallet.
To connect your MetaMask wallet to a decentralized exchange, follow these steps:
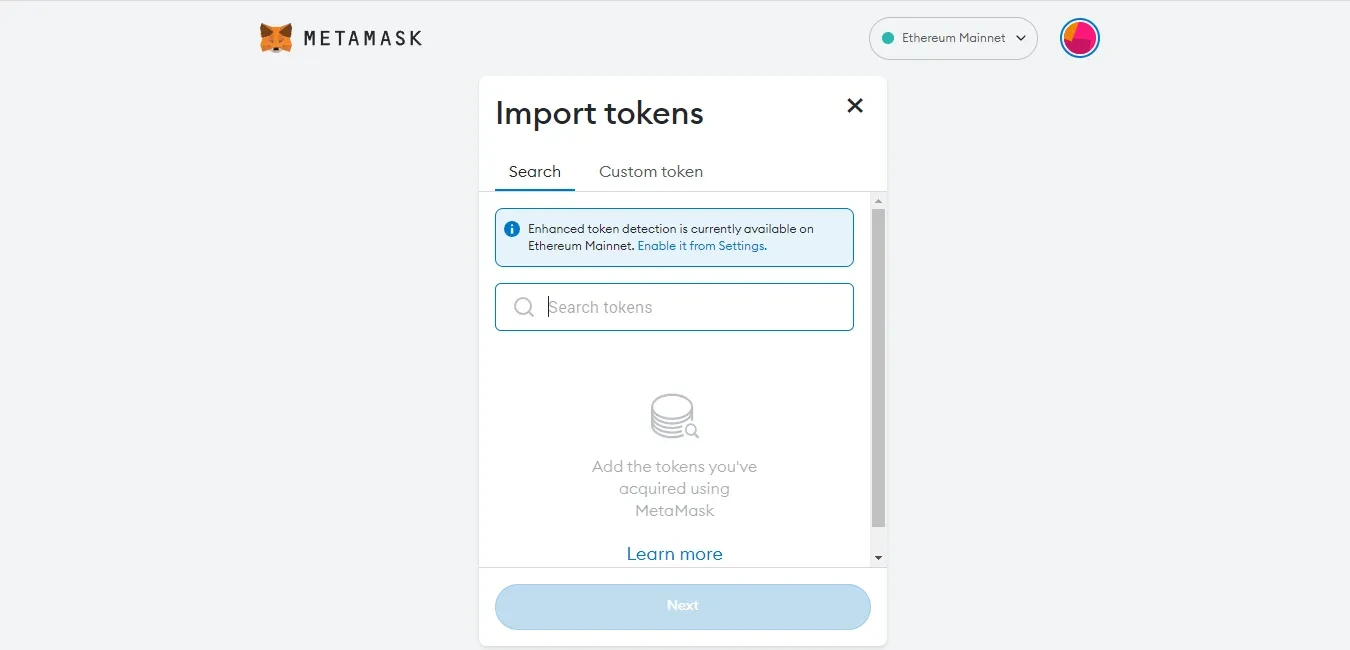
- Open your MetaMask wallet by clicking on the extension icon in your browser.
- Click on the menu button in the top right corner of the MetaMask pop-up.
- Select “Connect to a New Application” from the drop-down menu.
- A new window will open showing a list of supported applications.
- Choose a decentralized exchange from the list, such as Uniswap or SushiSwap.
- Click on the “Connect” button next to the name of the decentralized exchange.
- A confirmation message will appear asking for your permission to connect MetaMask to the exchange. Click “Connect” to confirm.
Once you have connected your MetaMask wallet to a decentralized exchange, you will be able to trade your Ethereum or ERC-20 tokens for AVAX. Simply follow the instructions provided by the exchange to complete your transaction.
Please note that when using a decentralized exchange, you are responsible for the security of your funds. Make sure to double-check the address you are sending your tokens to and be cautious of potential scams.
By connecting your MetaMask wallet to a decentralized exchange, you can easily buy AVAX and participate in the growing Avalanche ecosystem.
What is AVAX?
AVAX is the native cryptocurrency of the Avalanche network, which is a decentralized platform for launching and trading assets and applications.
How can I buy AVAX using MetaMask?
To buy AVAX using MetaMask, you need to first download and set up the MetaMask wallet extension on your browser. Then, you’ll need to transfer funds to your MetaMask wallet, connect to an exchange that supports AVAX, and follow the trading process to purchase AVAX tokens.